Spotter app
See demo or read blog tutorial for more information on the Spotter app.
To begin using Steampunk Spotter, visit the registration page, create an account, and verify your email.
Incorporate it into your workflow using the steampunk-spotter CLI or integrate it with GitLab, GitHub Actions, Azure DevOps or VS Code.
Requirements
- Steampunk Spotter app user account
- steampunk-spotter CLI
Profile settings
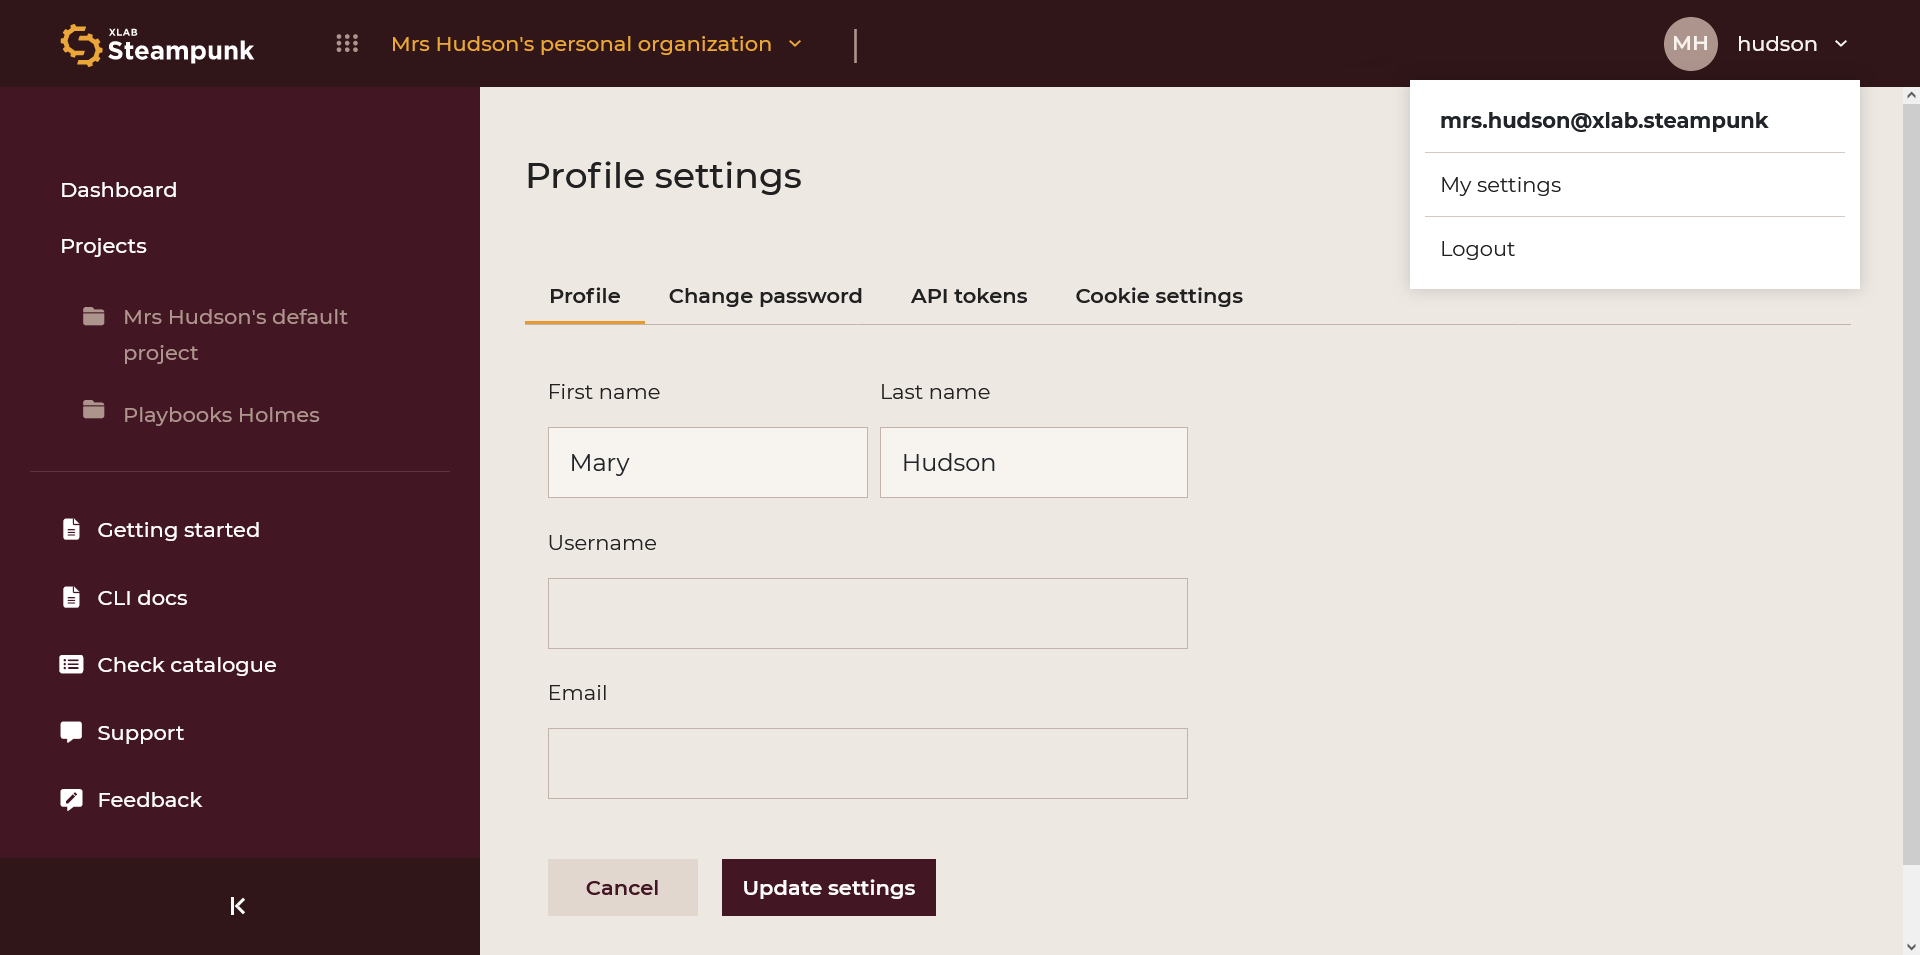
By clicking your username in the upper right corner, you can choose My Settings; it will take you to your Profile settings. You can edit the fields and update them.
Profile
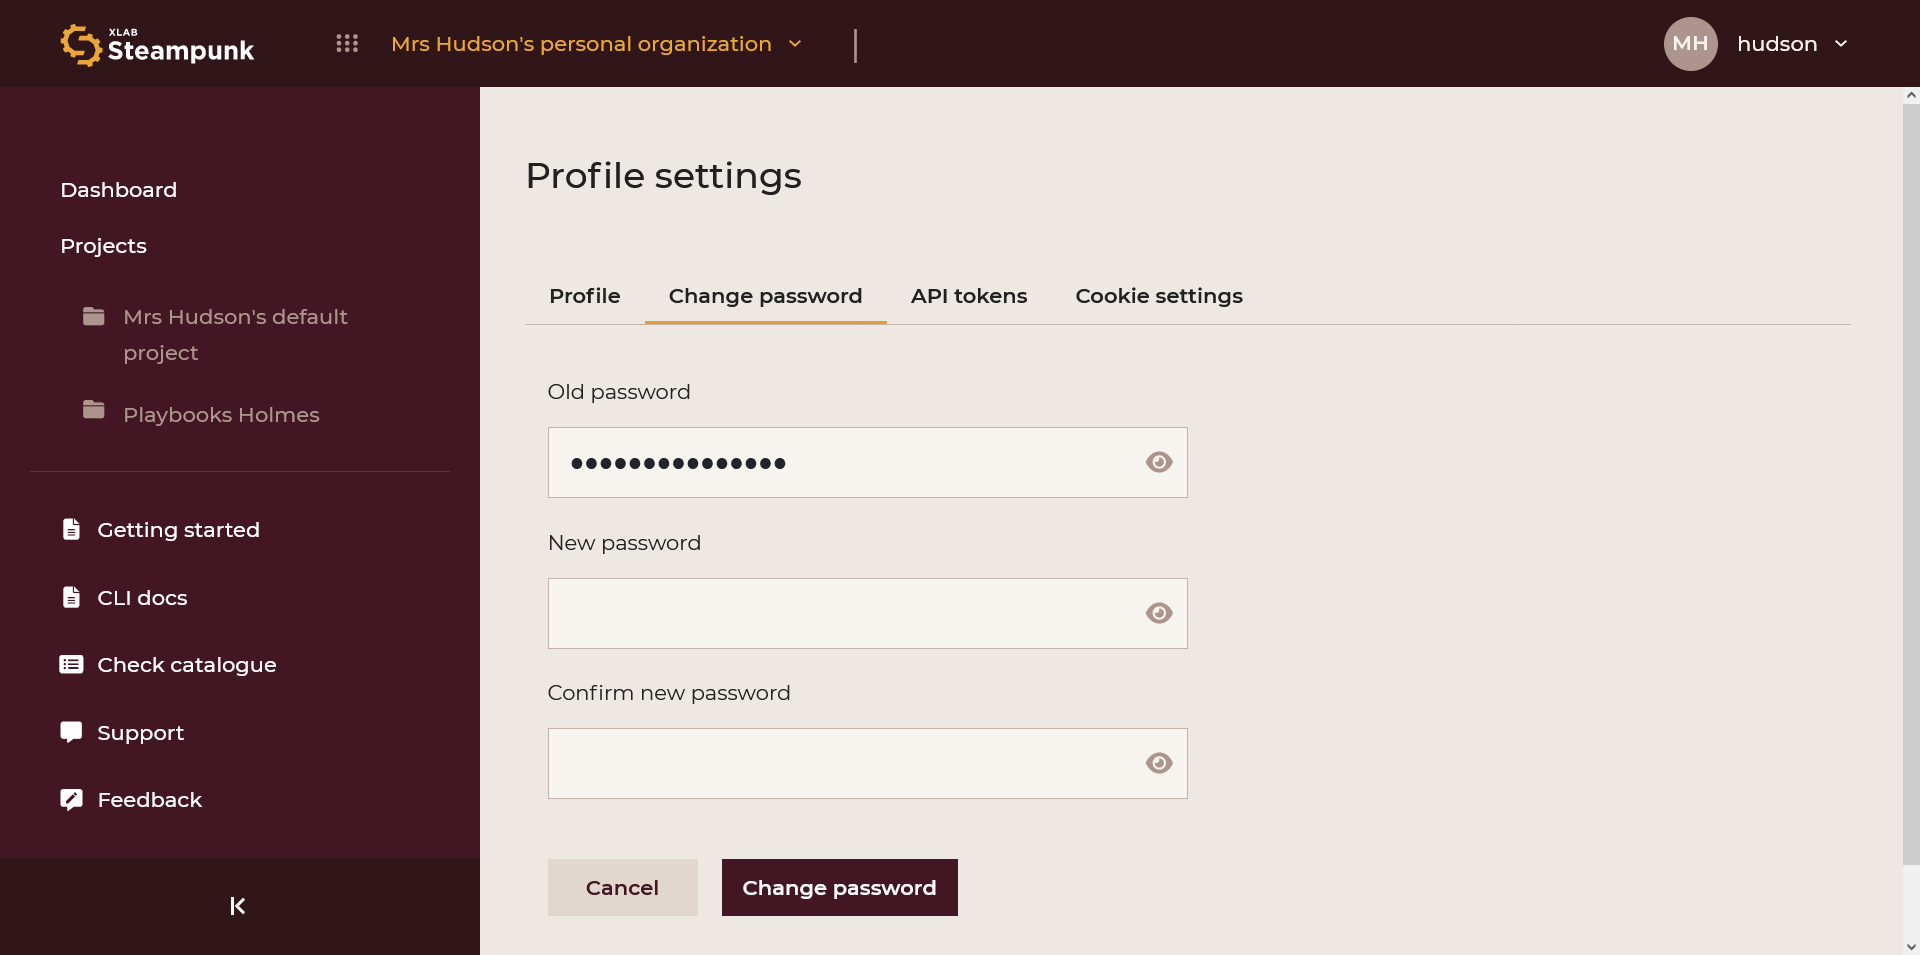
Change password
API tokens
Generate your API token by inputting your token name, and selecting your token expiration date. See demo.
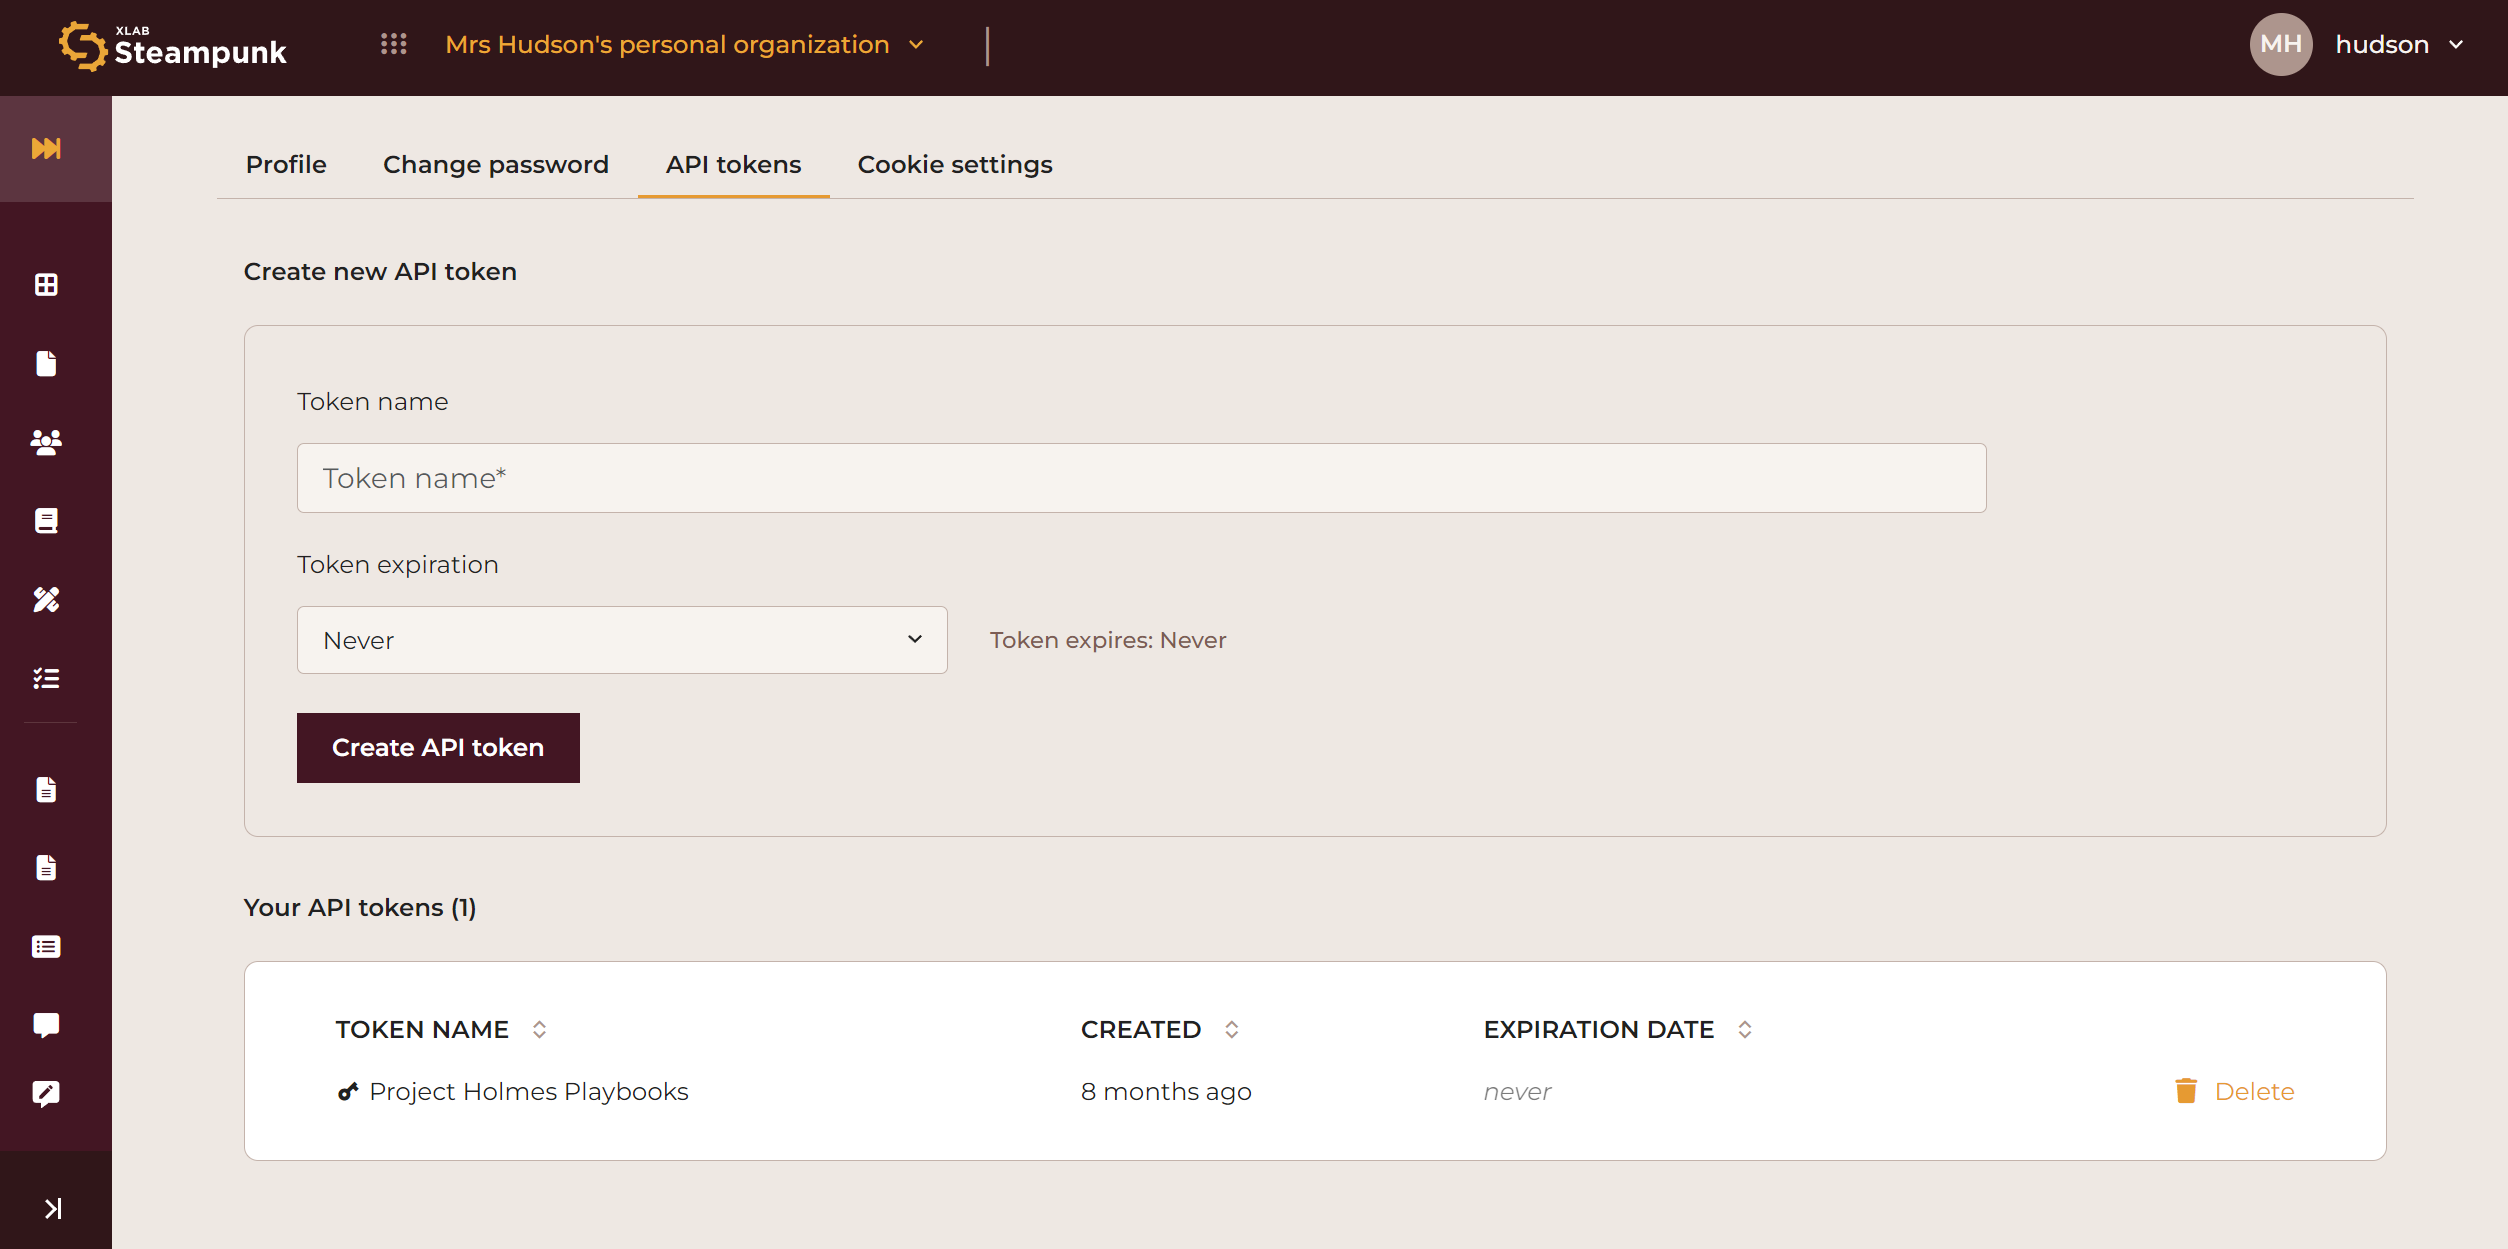
Create the API token by clicking Create API token. Make sure to copy the API token immediately; it is not possible to access it later.
Quickstart
The Quickstart guide is designed to get you quickly familiarized with the main features of the Steampunk Spotter App, and to help you start scanning as quickly as possible. Start by clicking the Quickstart button in your sidebar:

- Create a new project and run your first scan by clicking Run scan.
- After a few seconds, a pop-up appears highlighting an important visual component. To proceed to the next step, click the element being pointed to as instructed in the pop-up.
-
Follow the steps presented on your screen. If you interrupt the quickstart guide, you can always start it from the beginning by clicking Quickstart again.
-
Install Spotter CLI and scan your Ansible content.
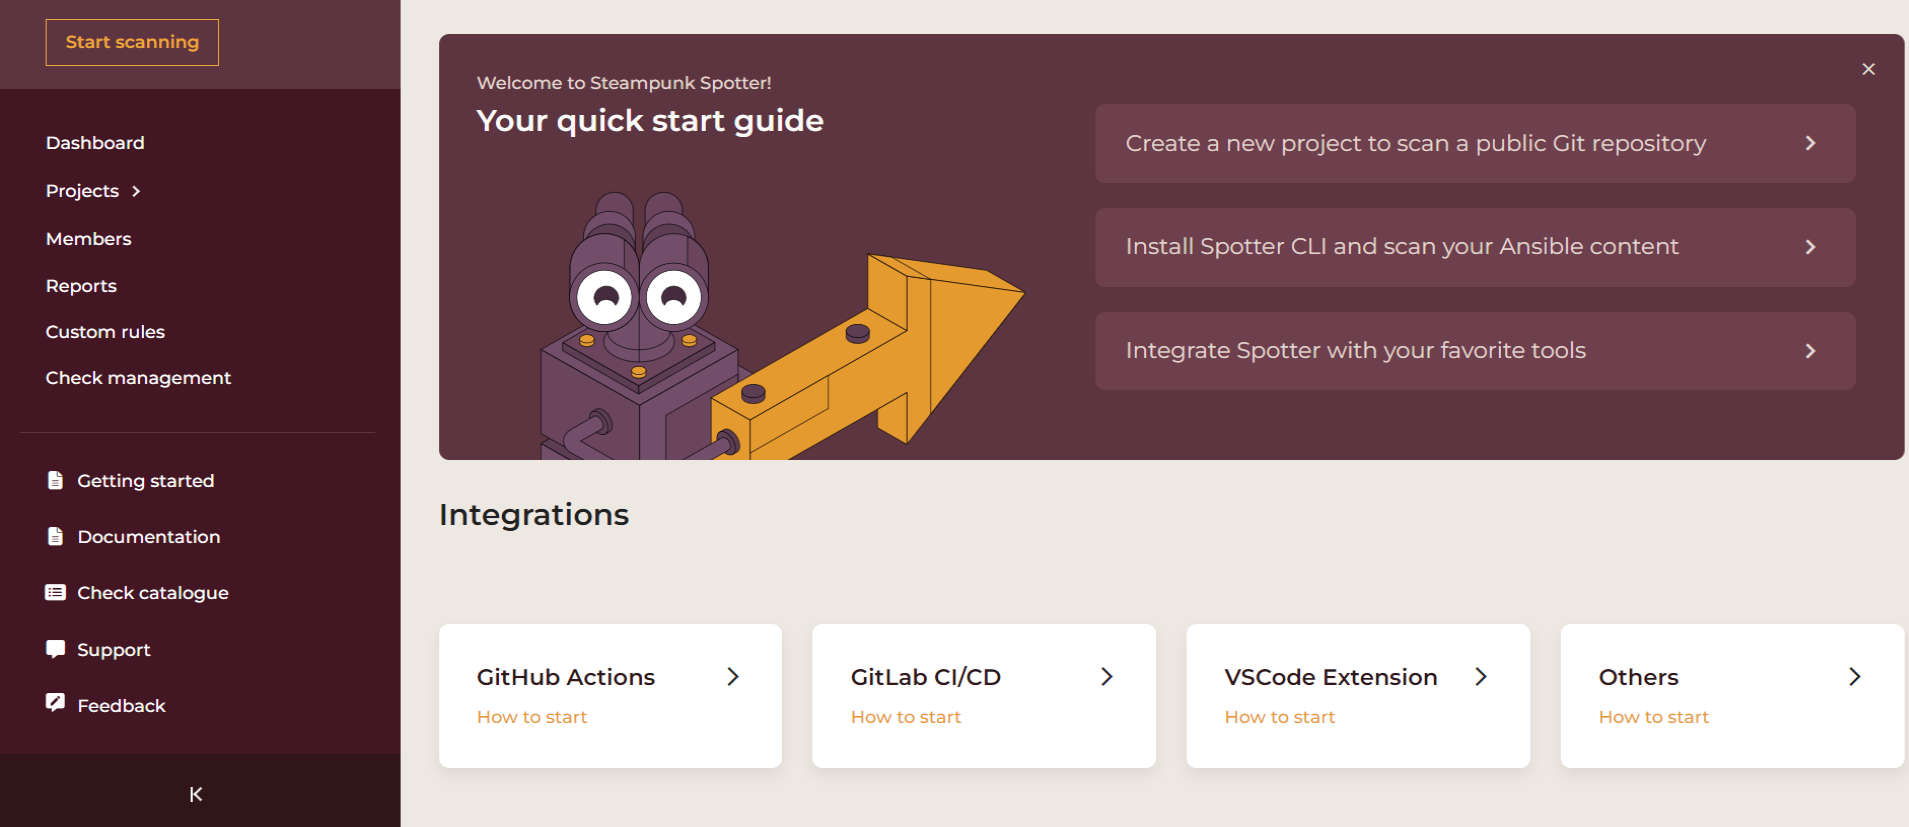
- Click Integrations to see how to integrate Spotter with your favorite tools.

Organizations
An organization is created when you sign up.
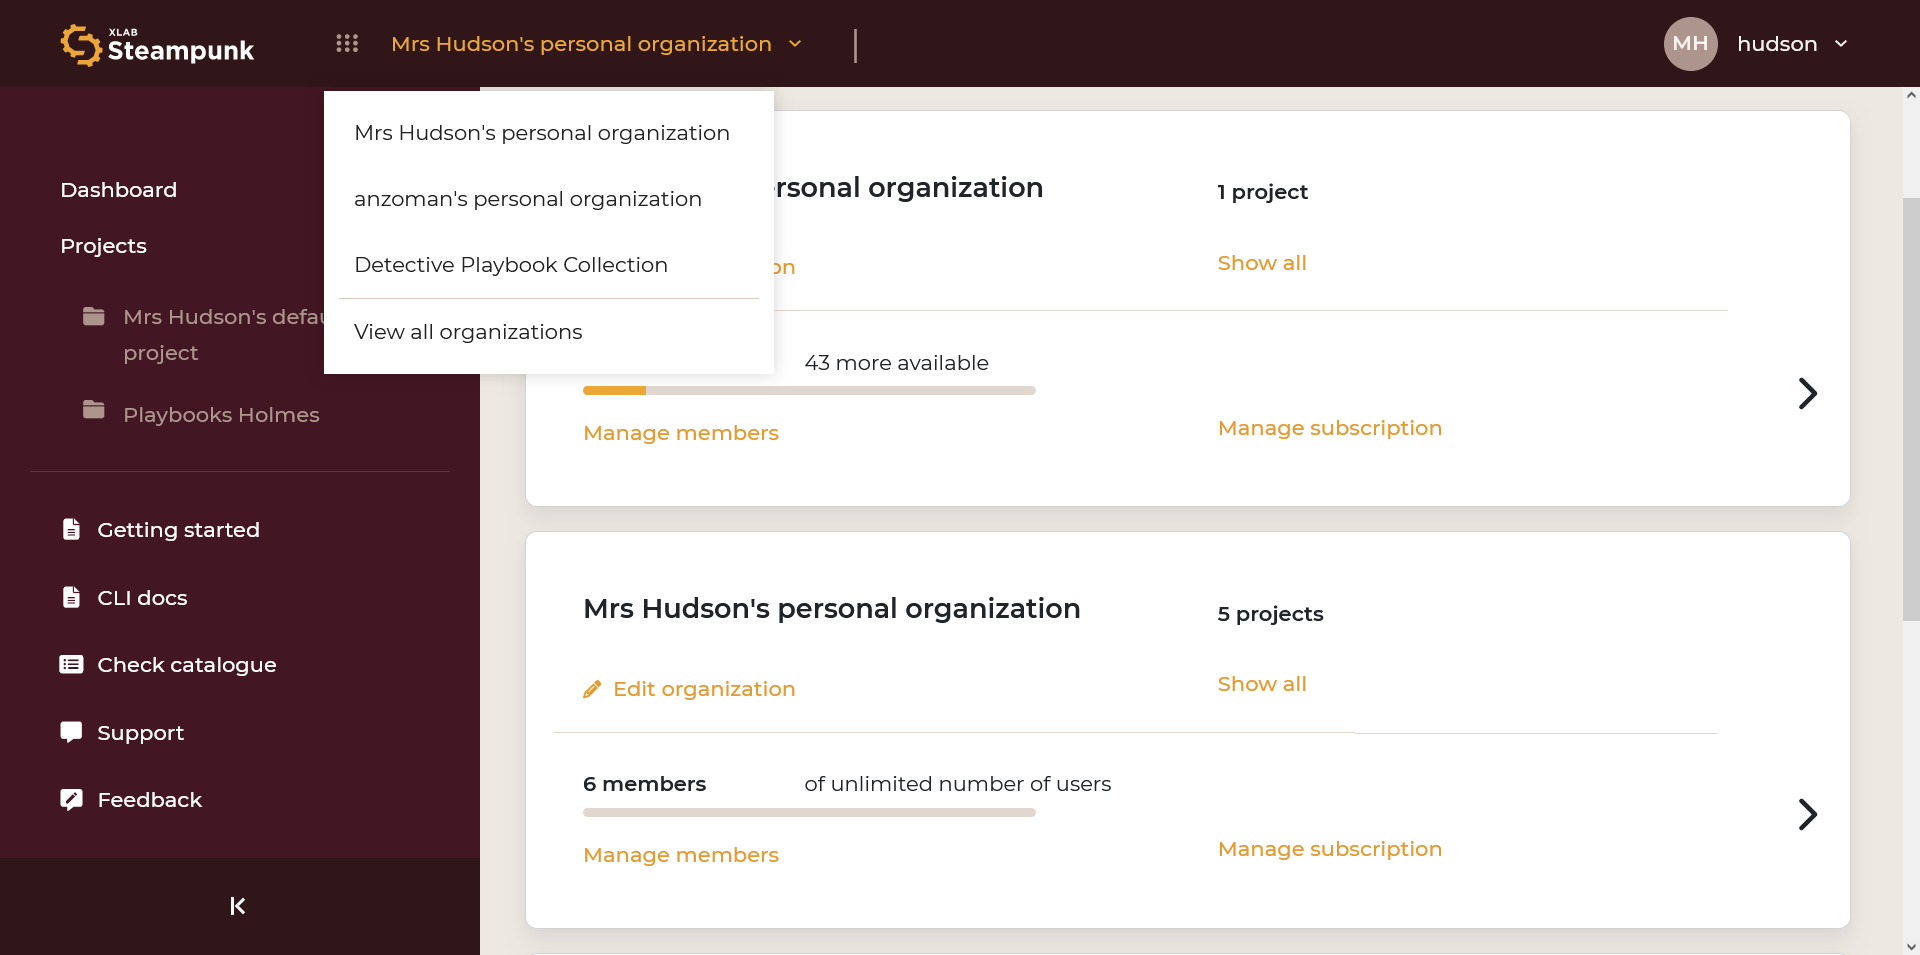
A drop-down menu under your personal organization lets you choose an organization or view all organizations:
In the Organization view, you can see pending organization invitations and active organization memberships.
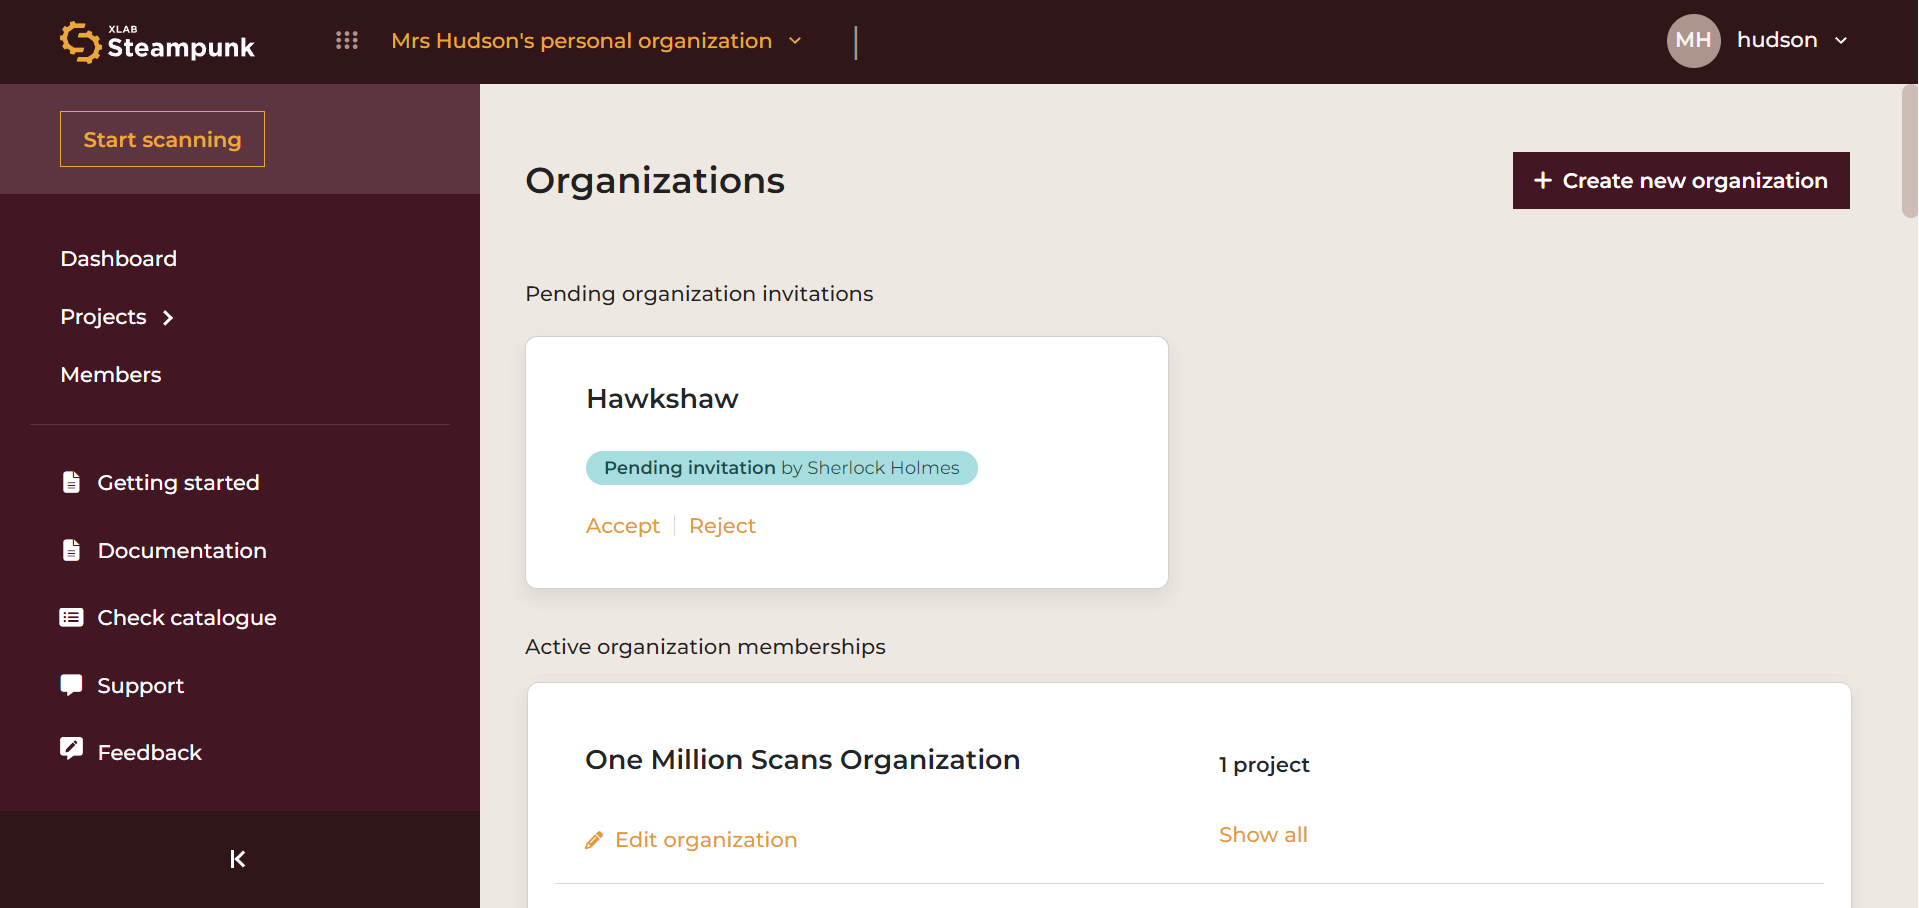
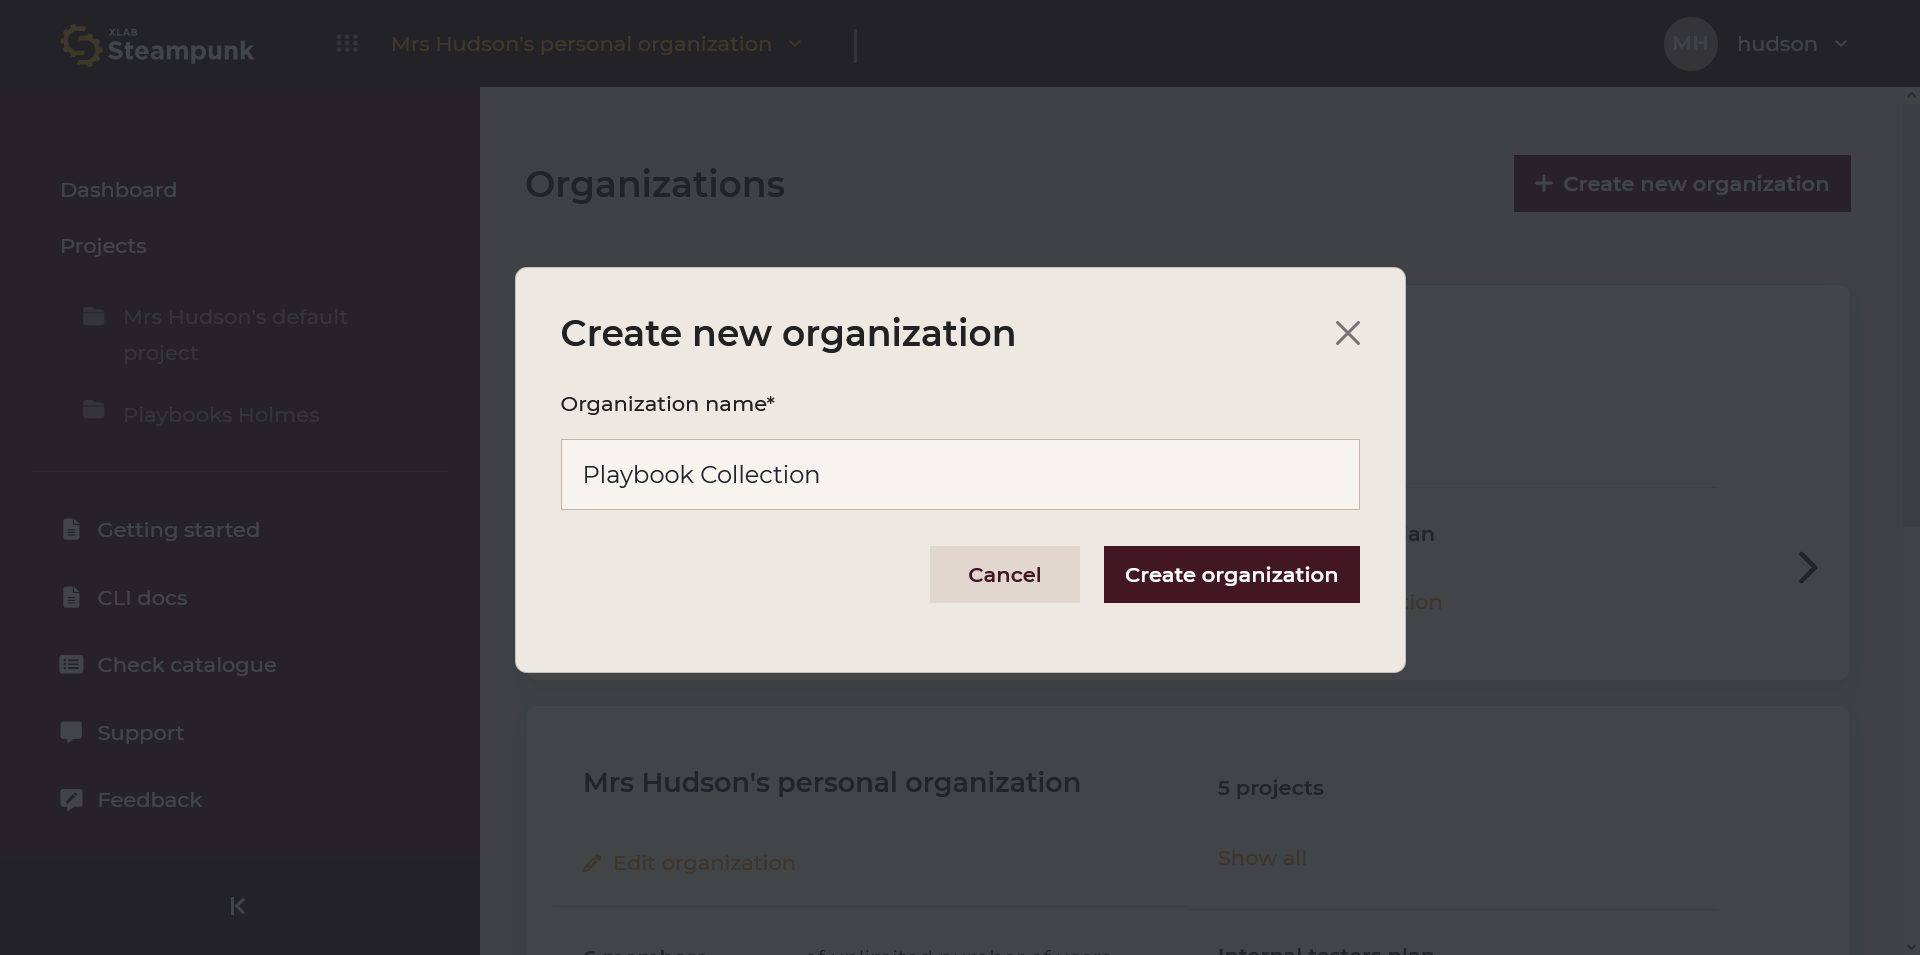
New organizations can be created by clicking Create new organization:
To set an organization to be your default organization, click the star to the right of the organization's name.
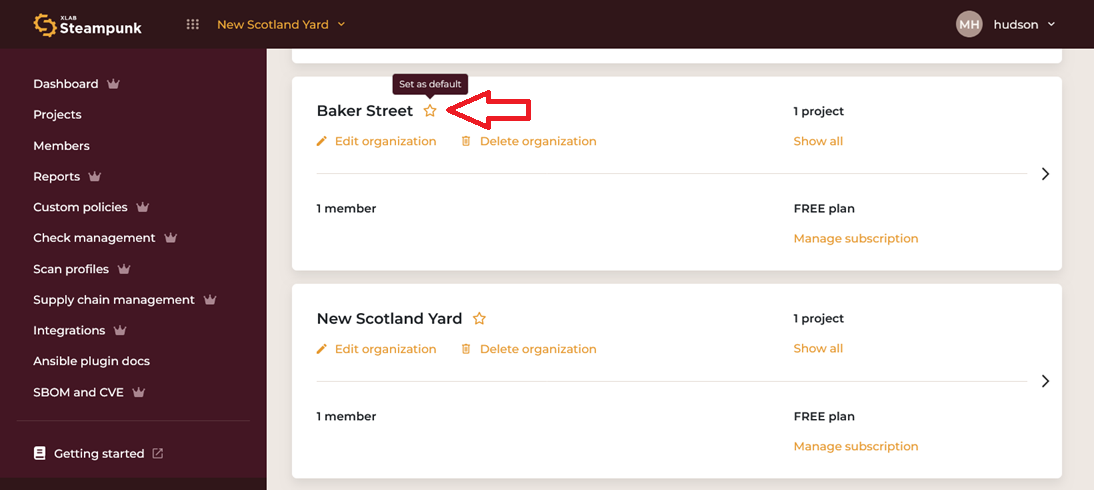
Confirm the change by clicking Switch default organization.
Your current default organization shows a Default badge to the right of its name:

Note
Default organization receives all CLI scans that don't have any target project selected.
To delete an organization, click Delete organization.
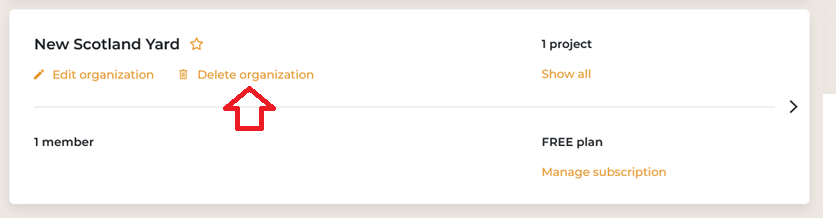
A confirmation dialog appears with any additional information on the organization deletion. Click Delete to confirm the action or Cancel to discard.
Note
Proceeding with deletion of an organization that was one or more users' default organization results in those users not having any default organization. The affected users may continue using Steampunk Spotter by always selecting target project for scans. They may also select another organization to be their default organization.
Dashboard

The Dashboard offers a quick snapshot of the following:
- Critical data
- Prevalent challenges
- Real-time performance tracking and success rate
It helps you stay informed about:
- Executed scans
- Error counts
- Common error patterns
Choose a period:
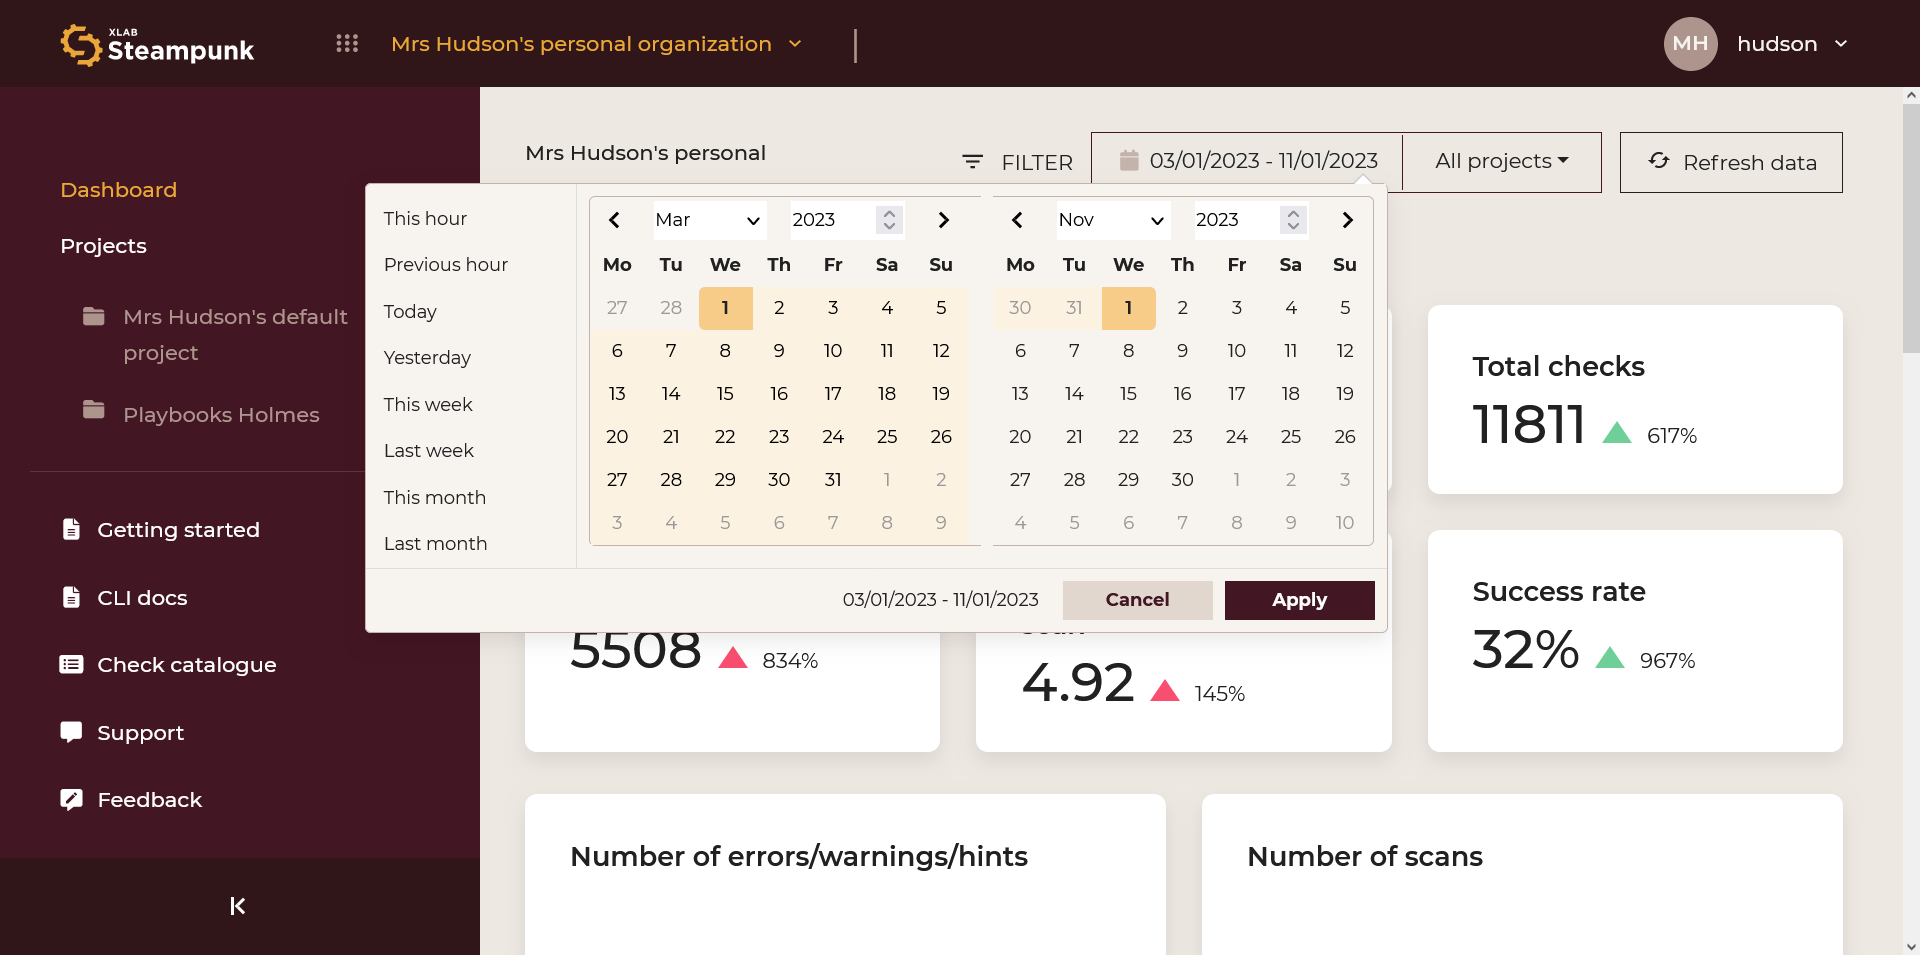
Choose a project:
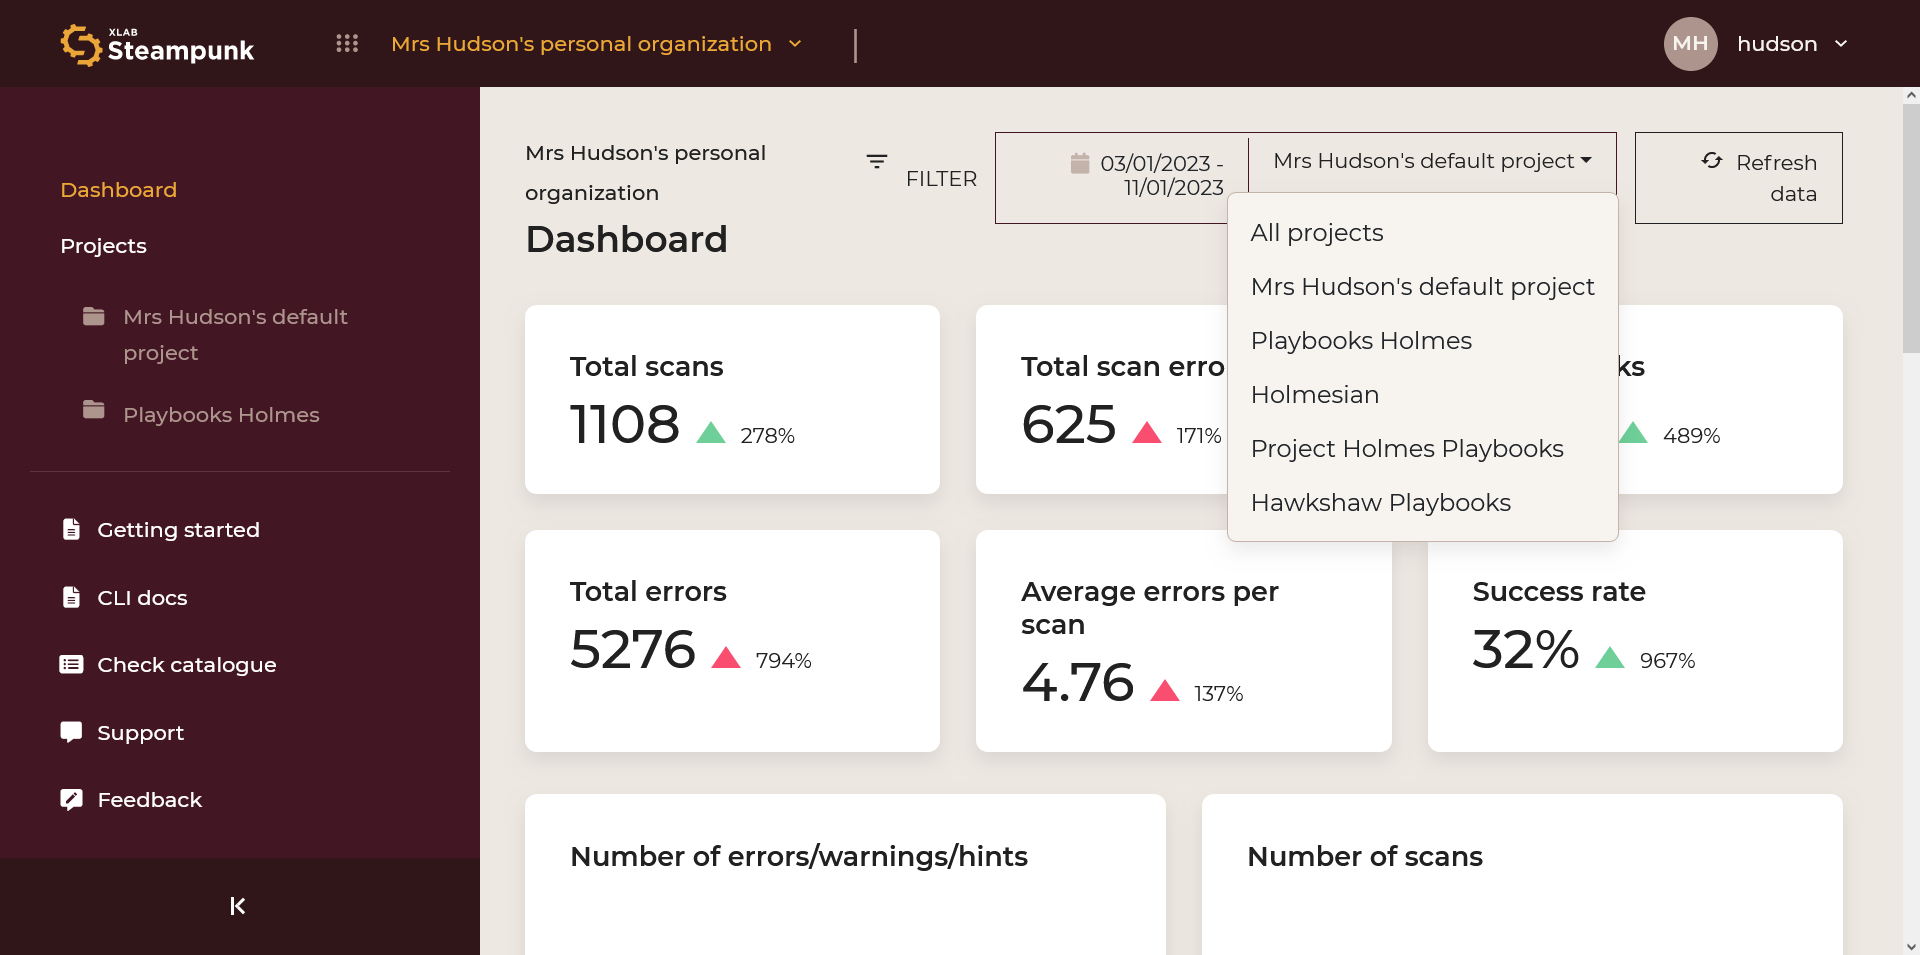
By clicking the numeric code you can access the check in the Check catalogue.
Projects
See demo on how to work with Projects.
Projects let you organize Ansible content scans. A default project is assigned to you upon sign-up; this is where your data is sent by default, no matter where you scan your Ansible content.
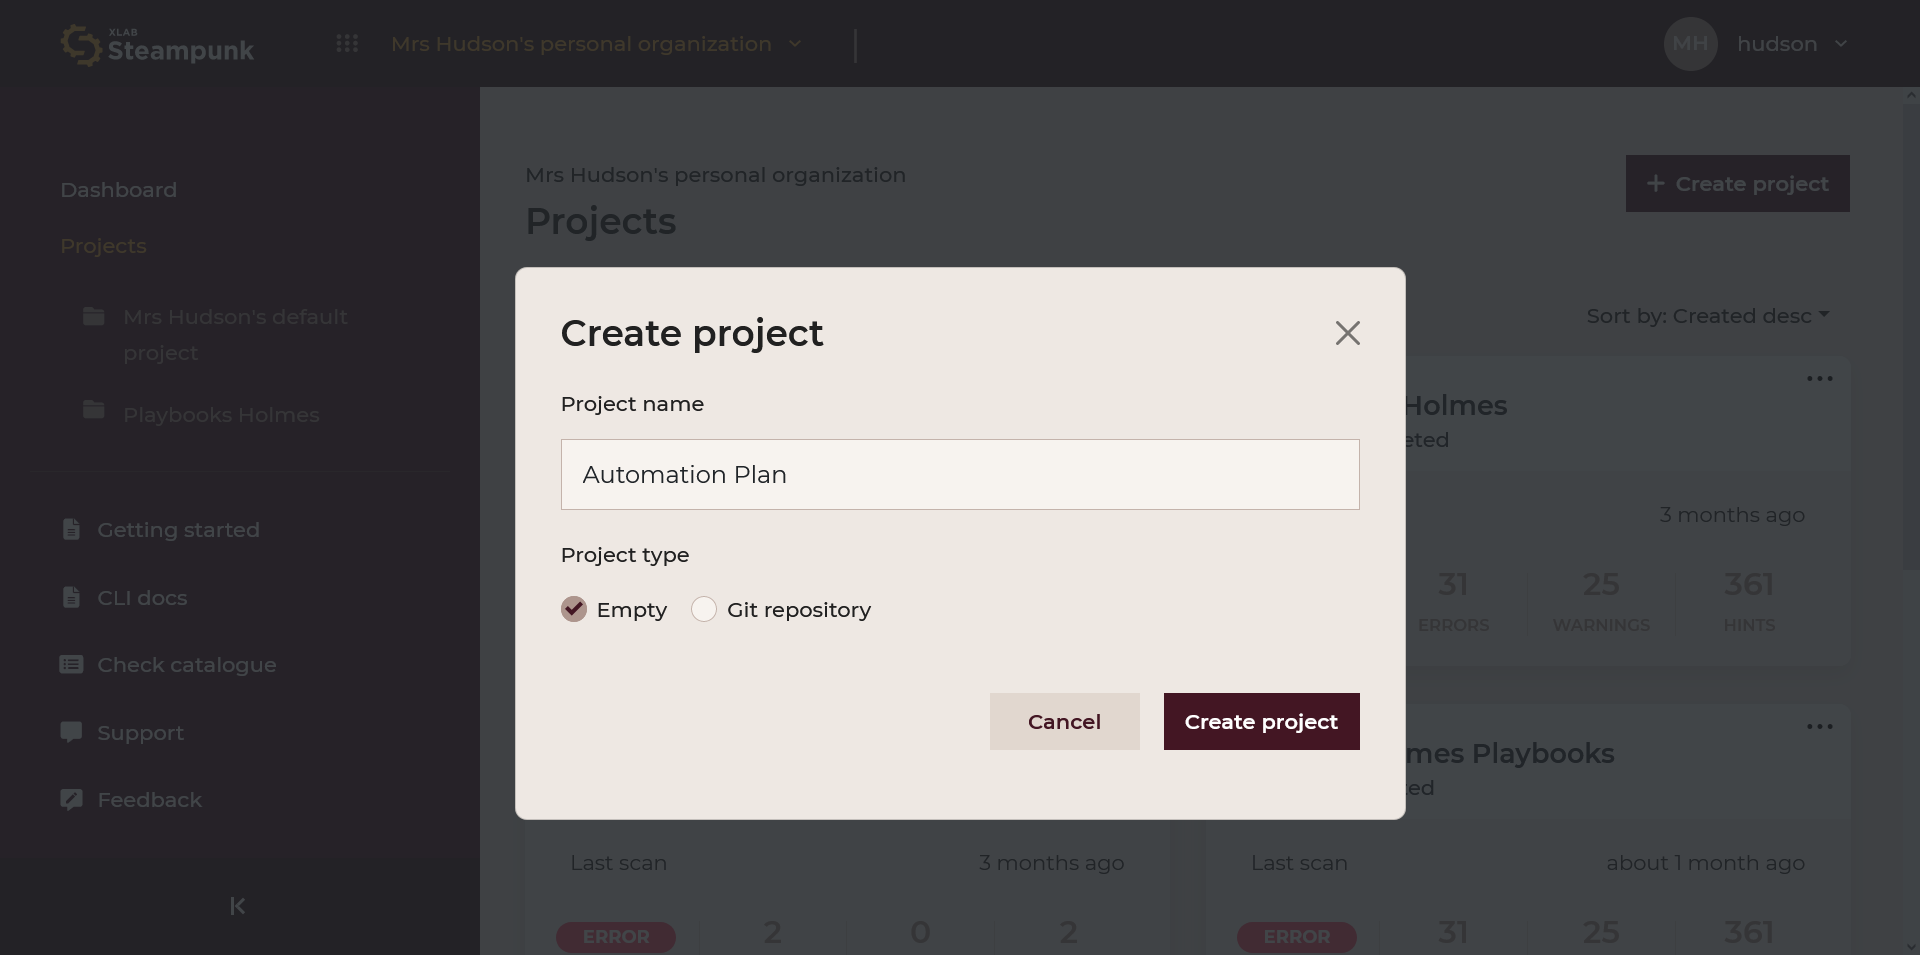
Create new projects
New projects can be created by clicking Create project.
A new empty project comes with a project ID you can use to scan; Spotter sends
data to the chosen project. Copy the scan command or use the --project-id <your ID>
in the CLI. Projects can also be edited and deleted.
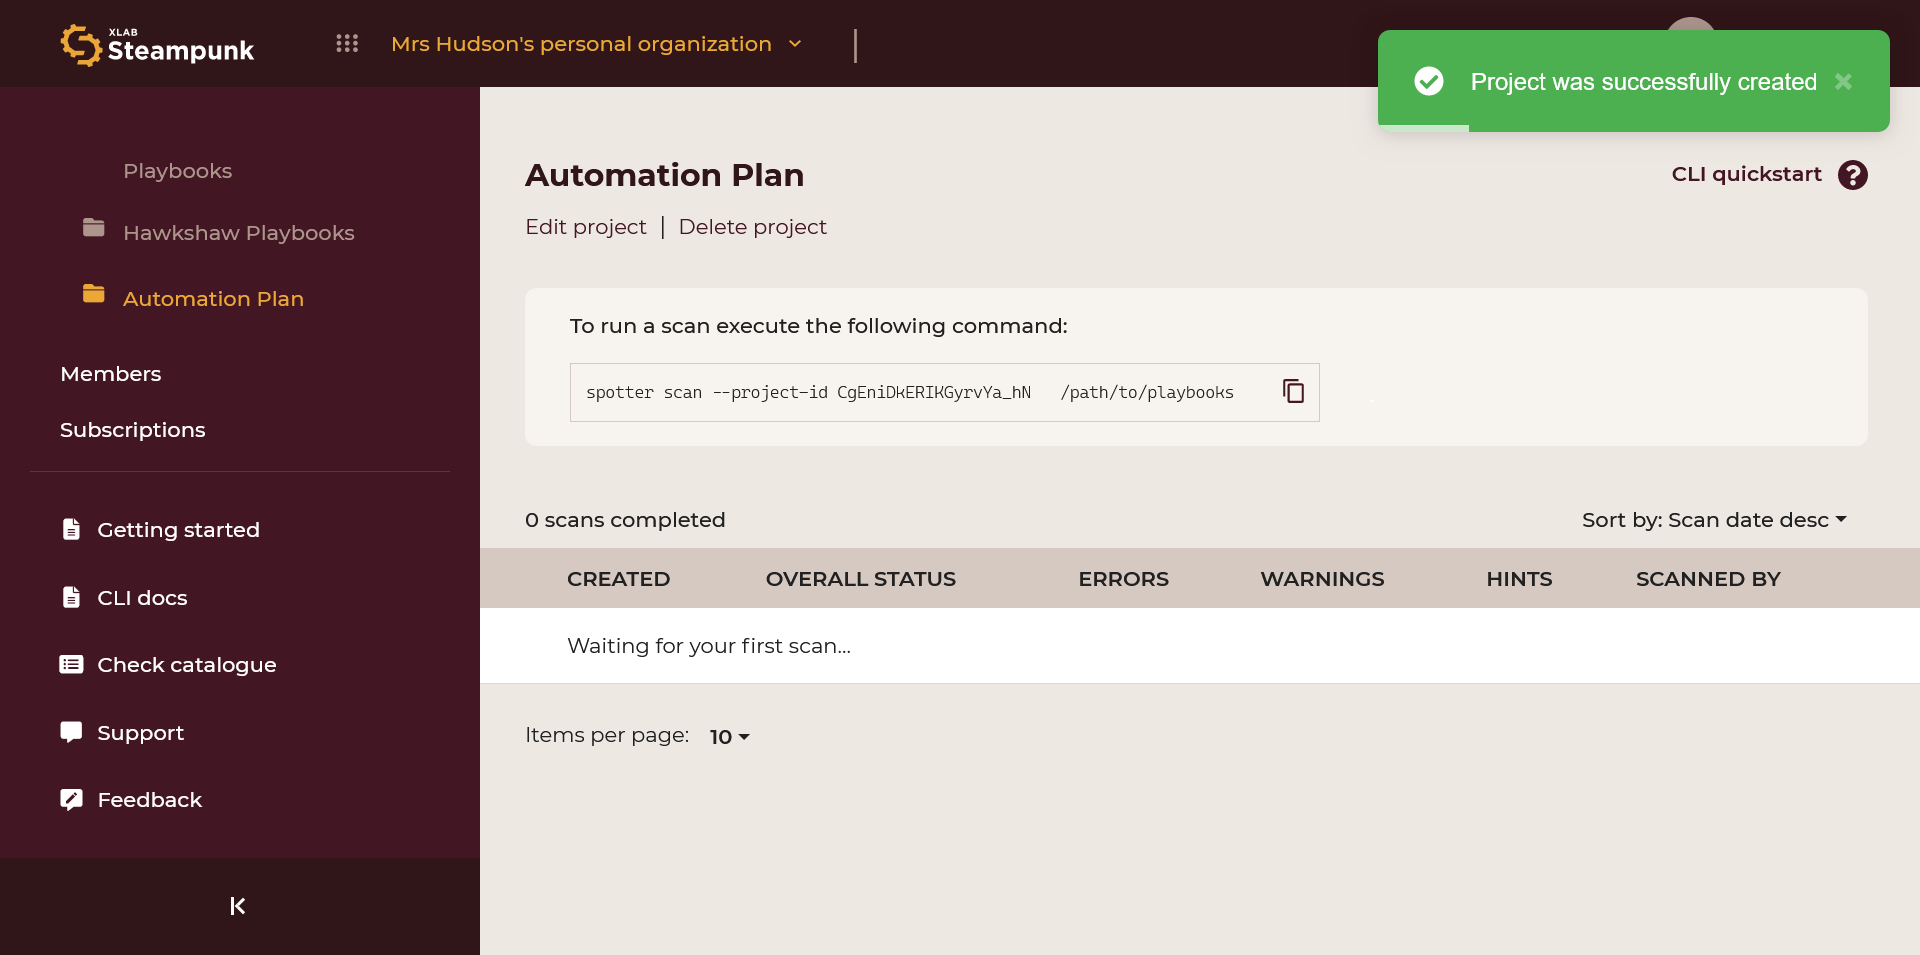
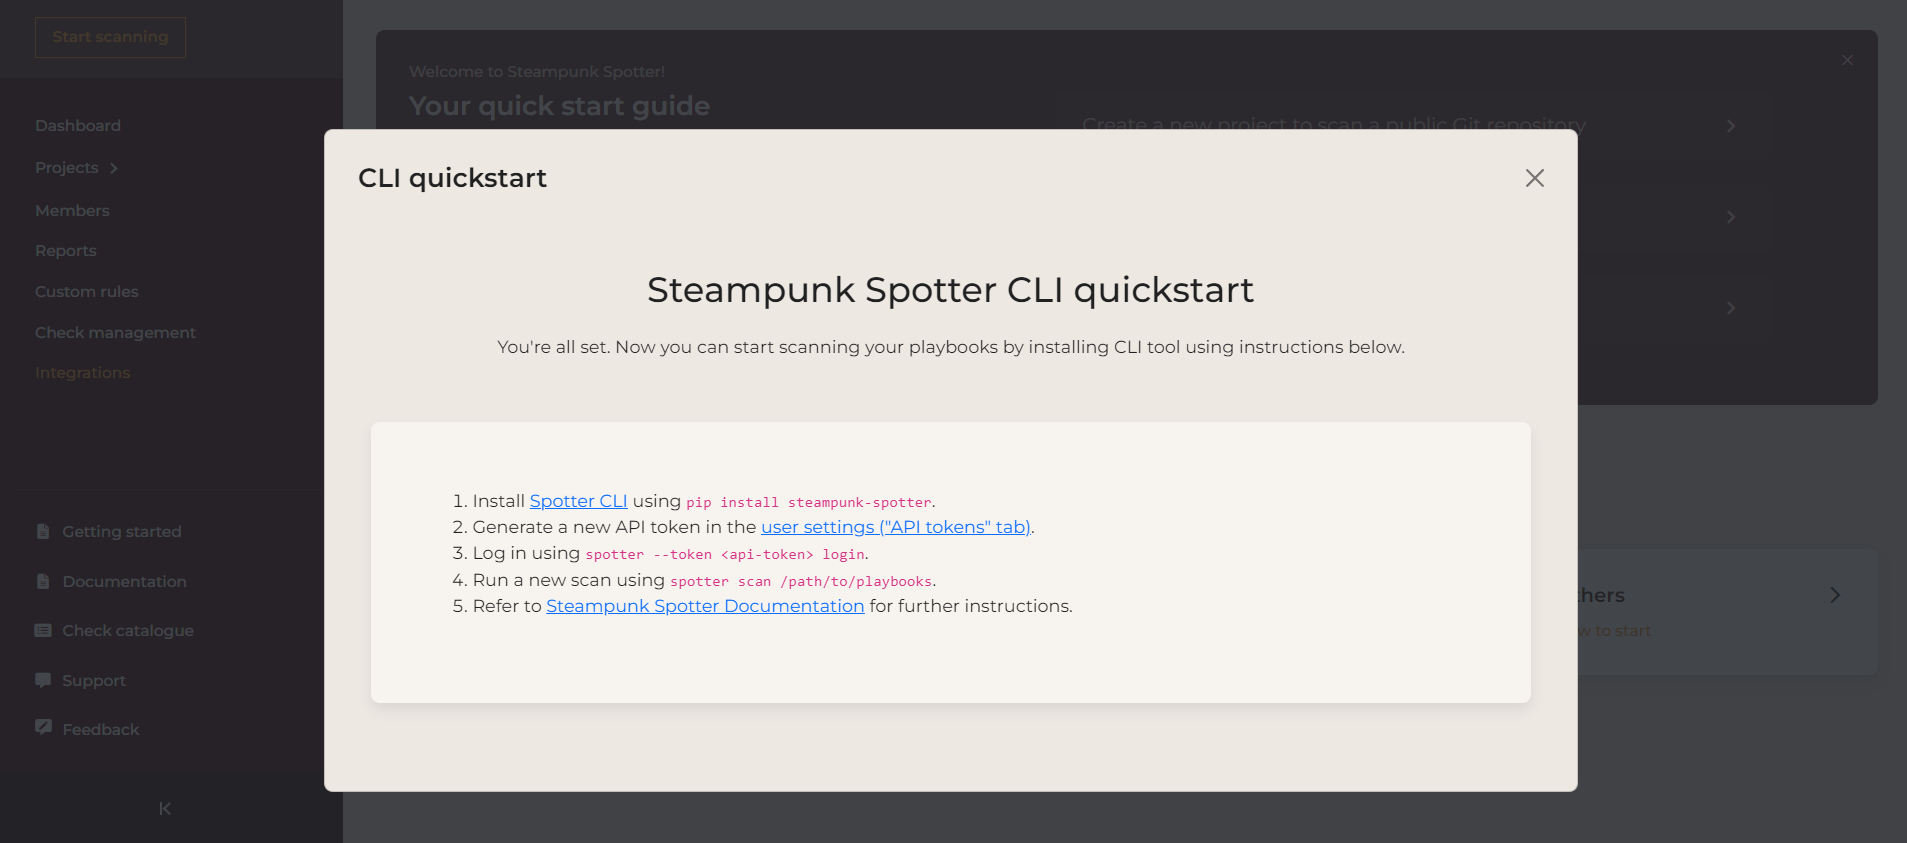
Obtain additional instructions by clicking the CLI quickstart button.

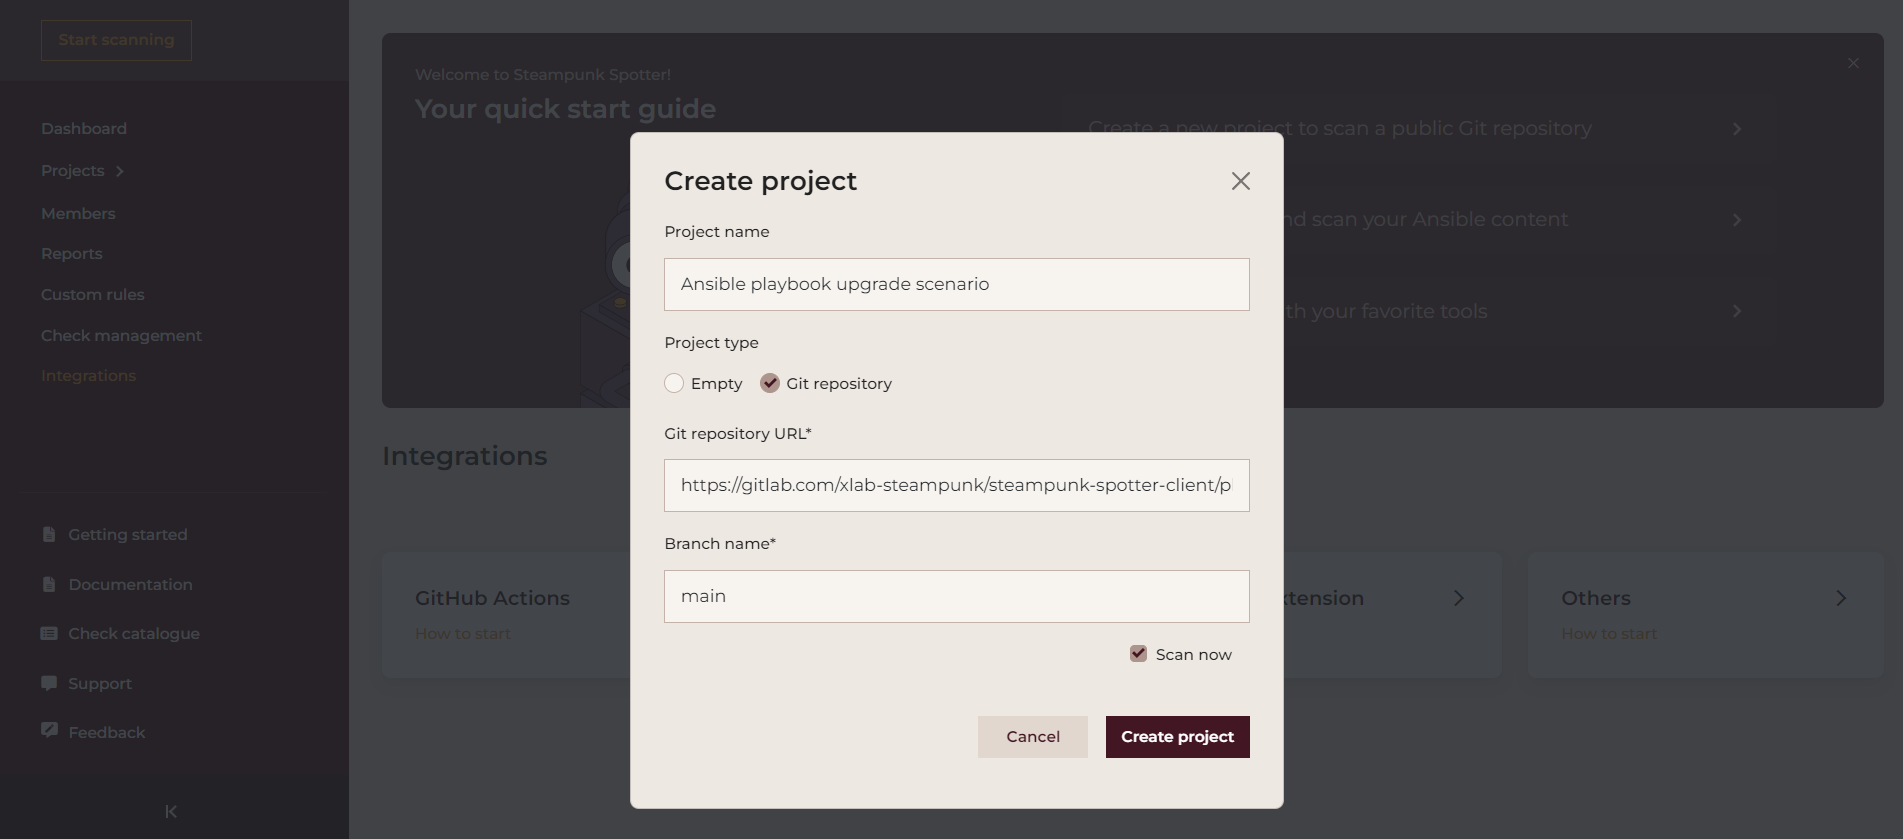
Git projects
Enable scanning a Git repository by choosing Git repository when creating a new project.
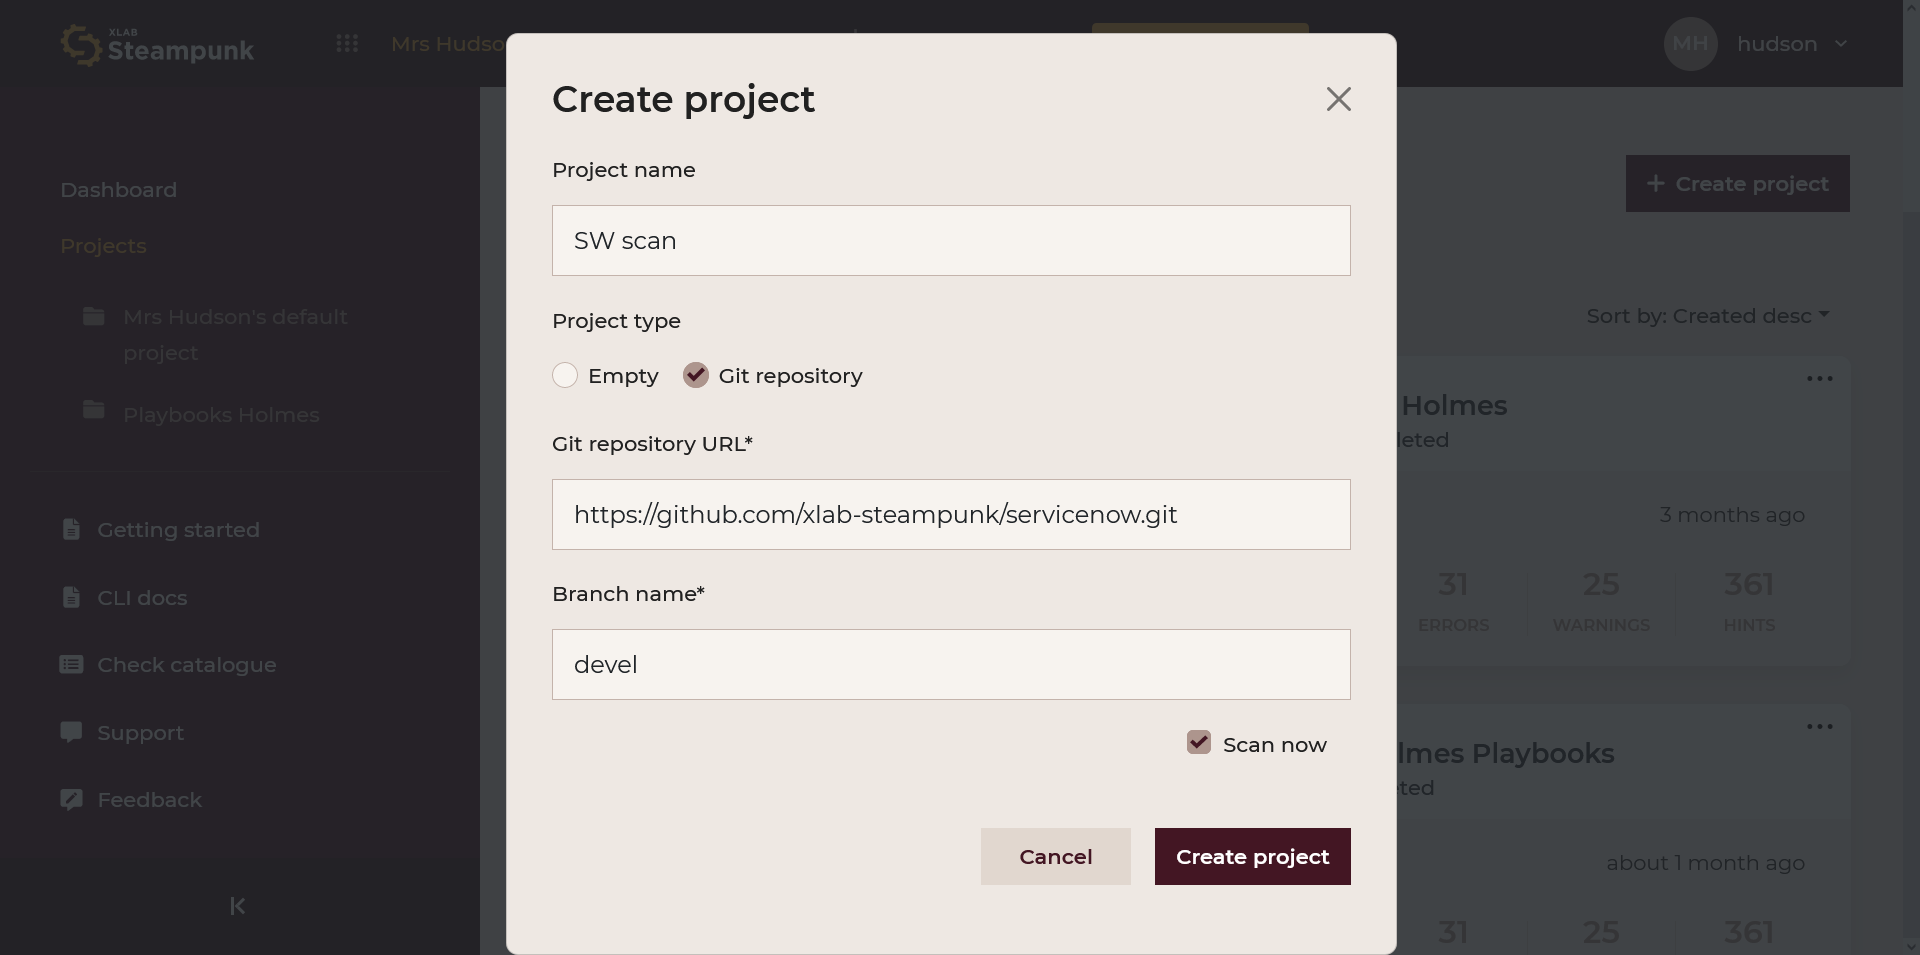
With Repository visibility level select if your Git repository is public or private. For private repositories, enter Username and Password.
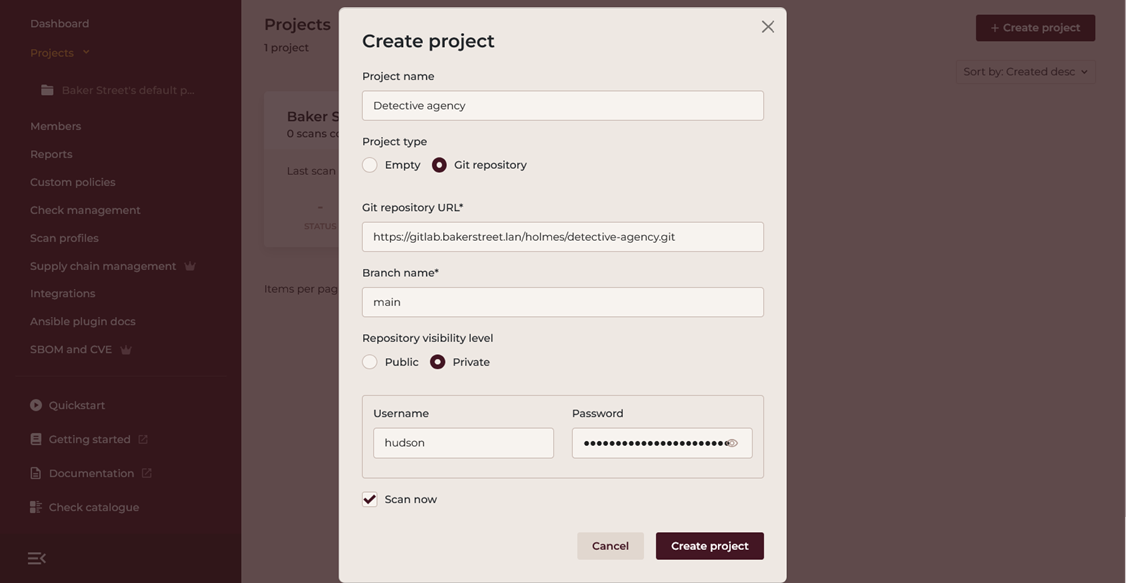
Tip
Use the http:// or https:// address in Git repository URL for private projects.
For Password, use a narrow-scoped and short-lived personal access token instead of your actual account password..
Untick the Scan now option if you do not want the scan to start right away. The action of scanning git repository can only be applied within the Spotter app.
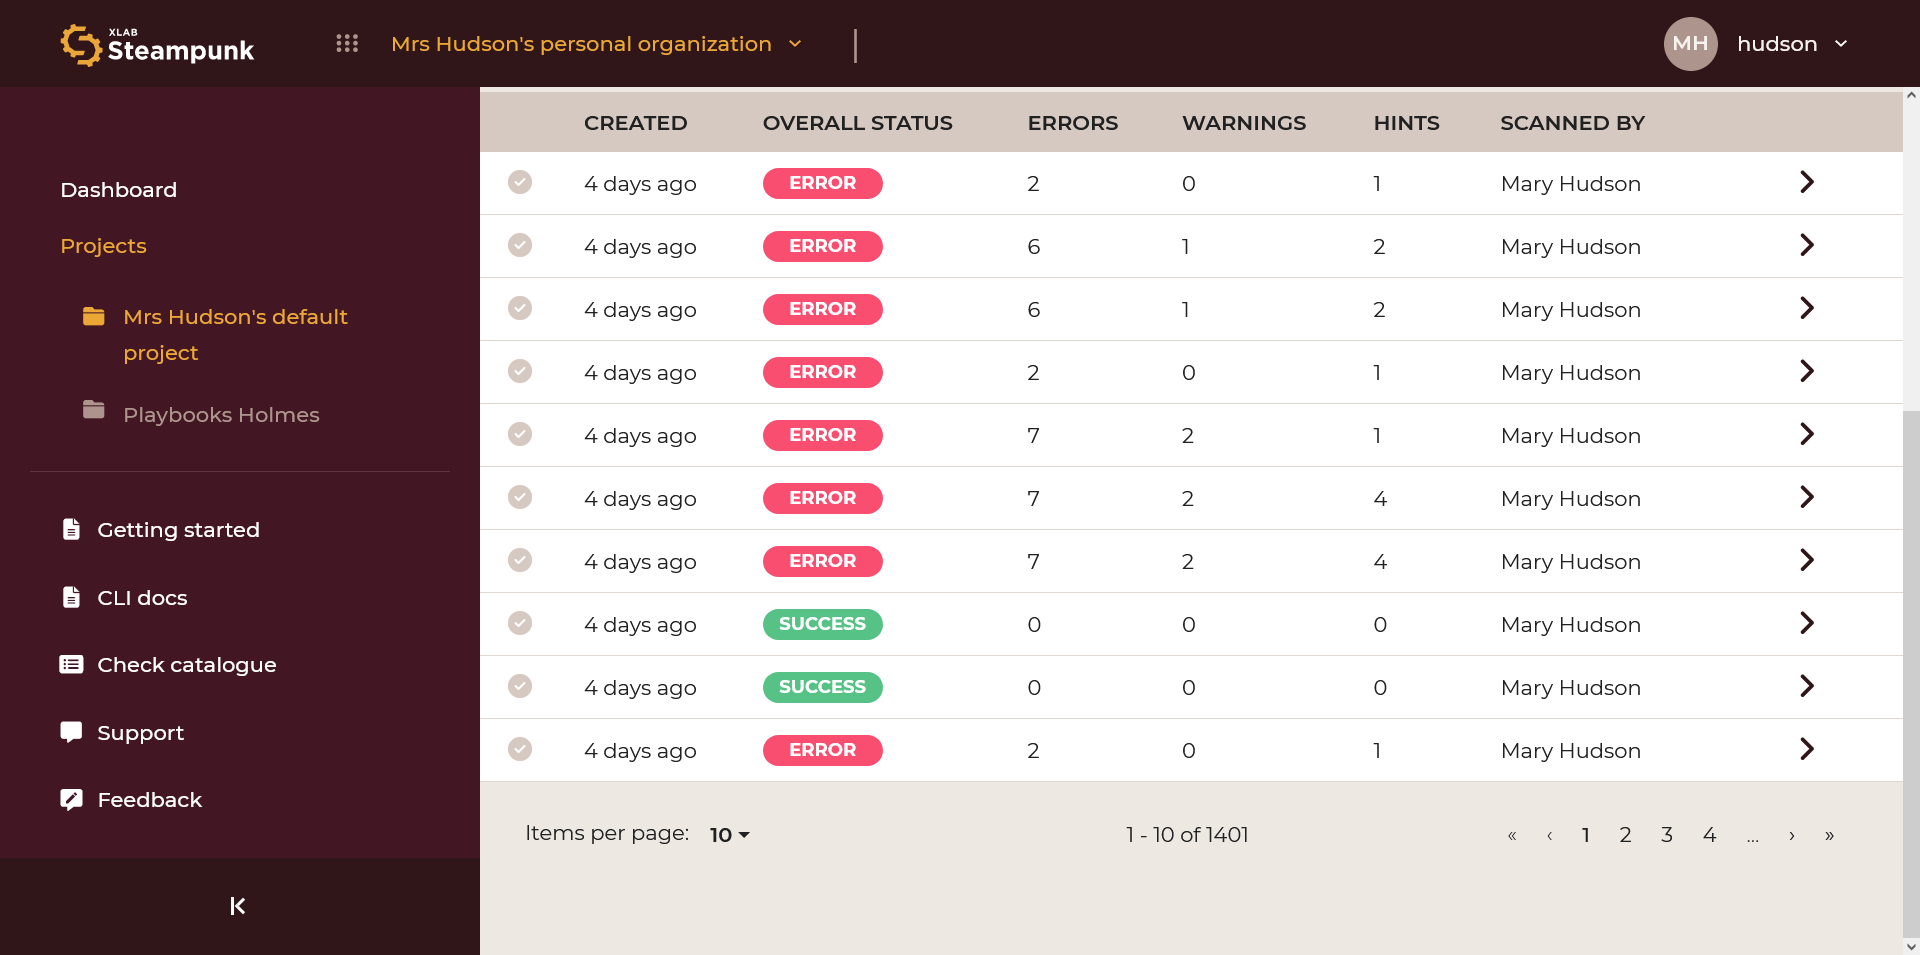
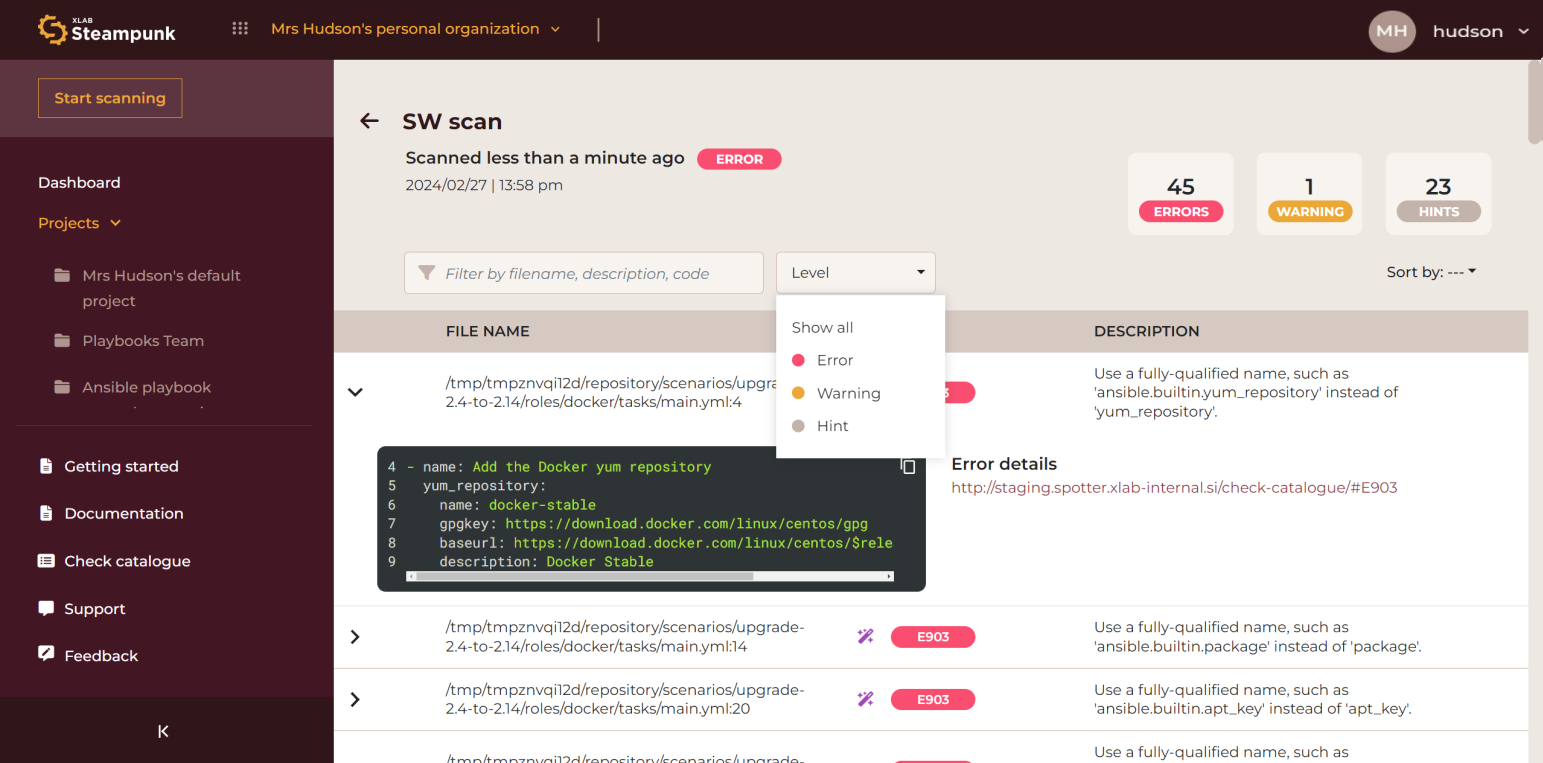
After the scan is complete, you can assess the quality of the content. You can filter by
filename, description, and code, choose the items per page shown, and choose the level of
warnings to display: errors, warnings, or hints. The information icon takes you to the
module documentation. Tapping the arrow symbol › on the left side of each line unfolds
a view of the specific section where Spotter found the highlighted issue mentioned in that
line.
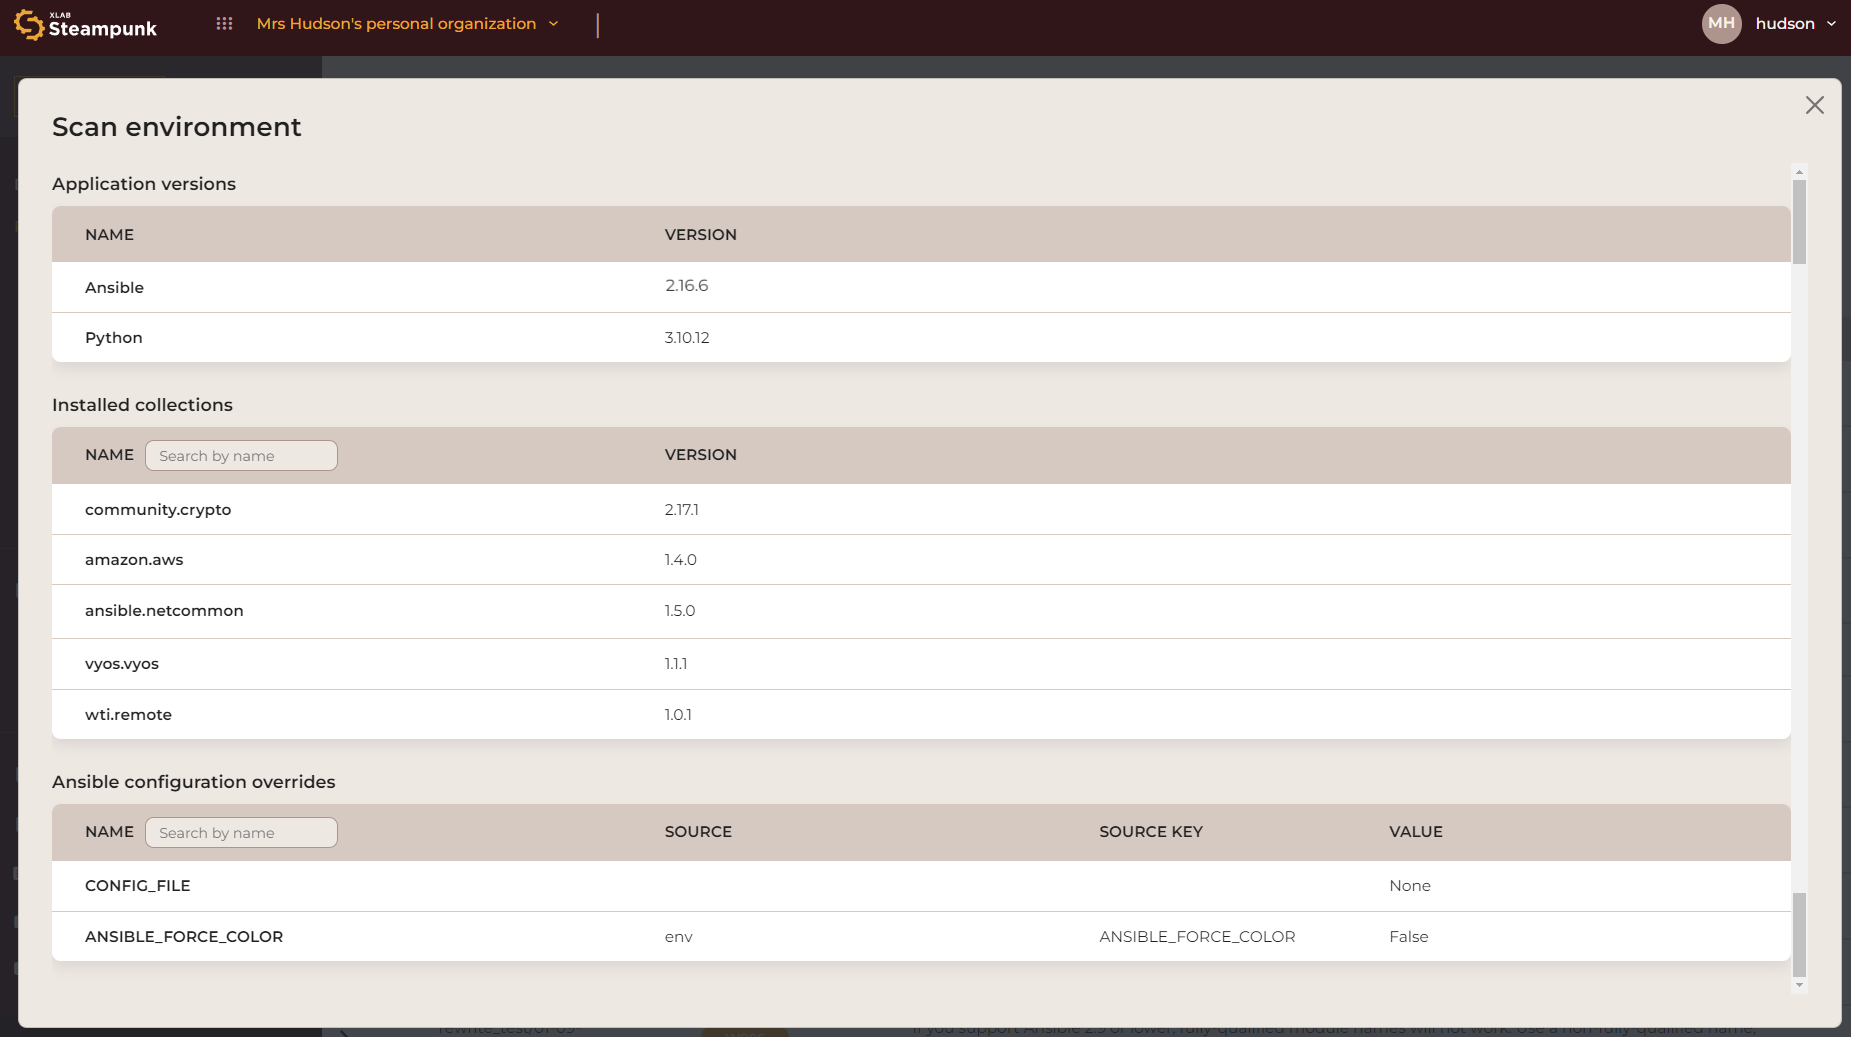
Scan environment
Steampunk Spotter captures a set of information that is relevant to each scan as it takes place. This scan environment includes Ansible and Python versions, installed collections, and Ansible configuration overrides. Tracking environments across scans enhances oversight and fortifies infrastructure management.
The scan environment is accessible within every given project by clicking the Scan environment button in the upper left corner:
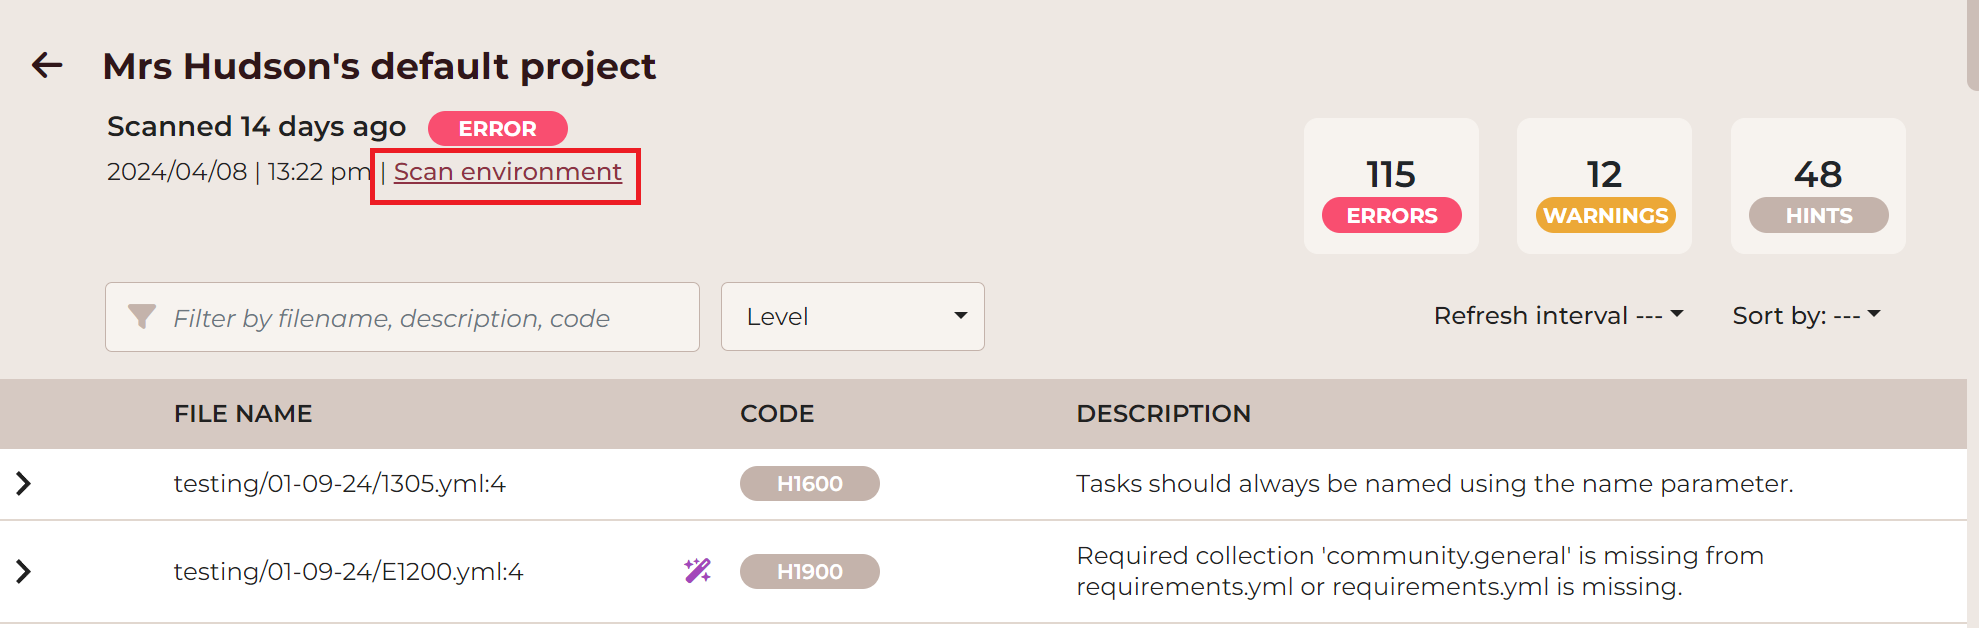
This opens a pop-up window that displays the details of your scan environment:
Members
In the Members section, you can see all the members of your organization; You can change organization roles by clicking on the Member role drop-down menu.
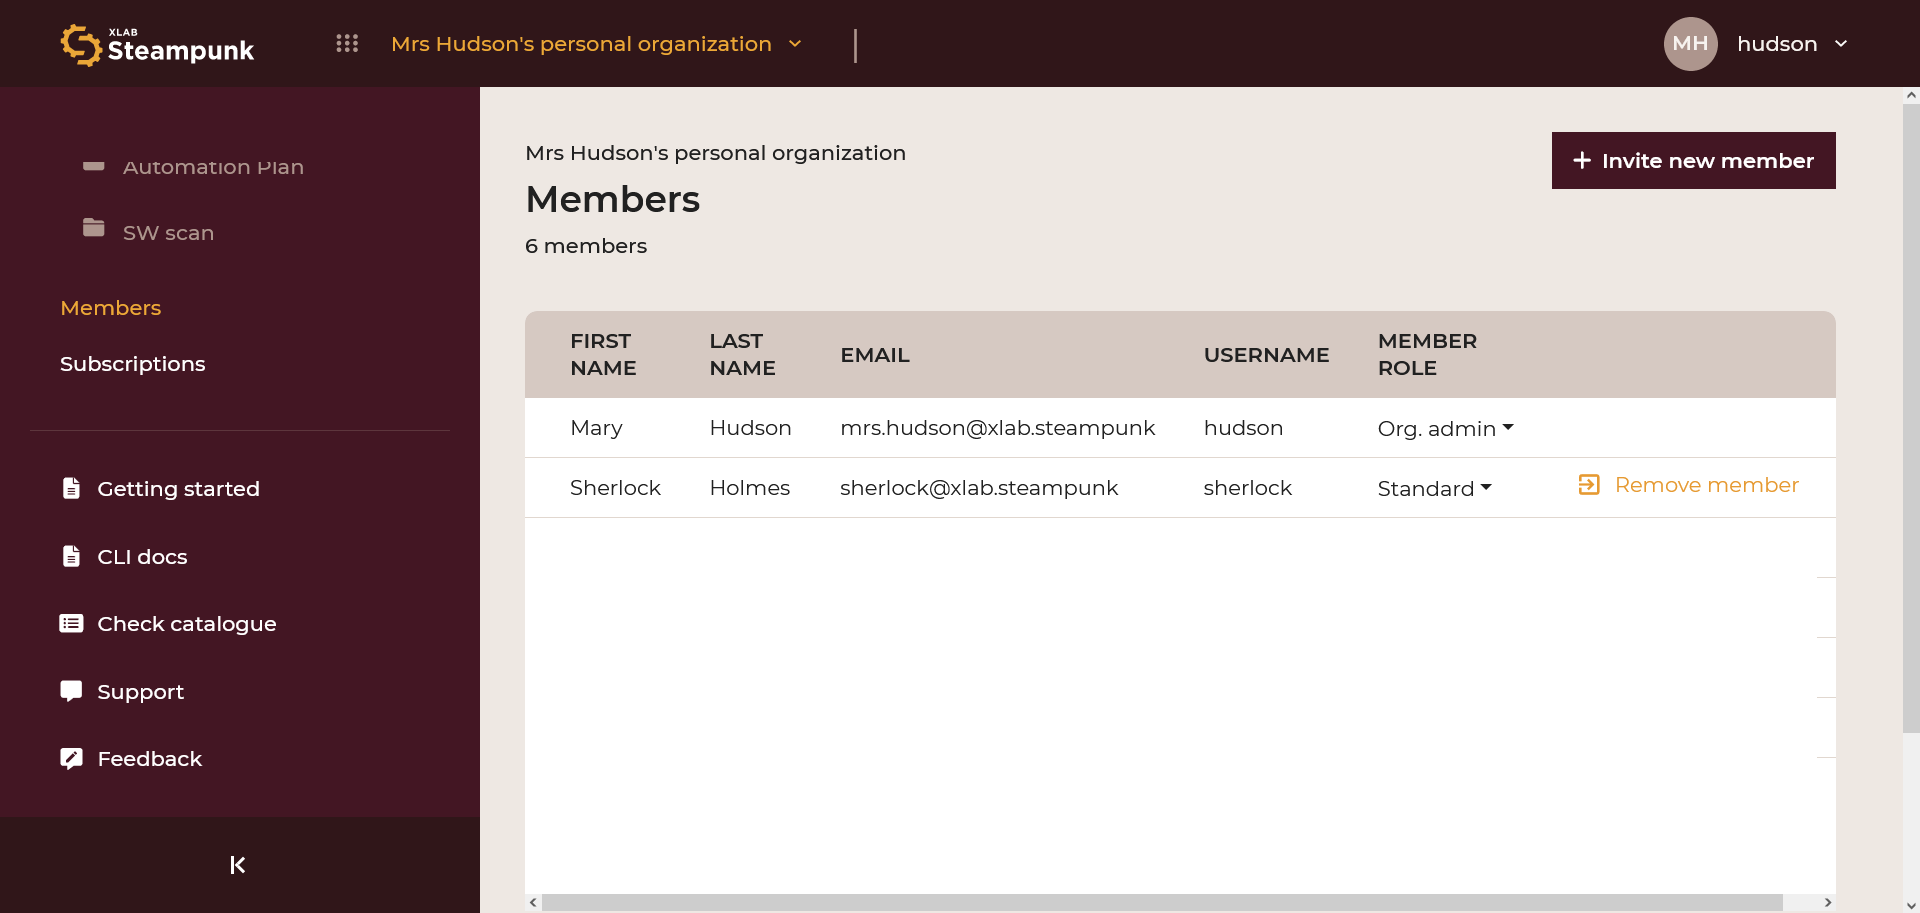
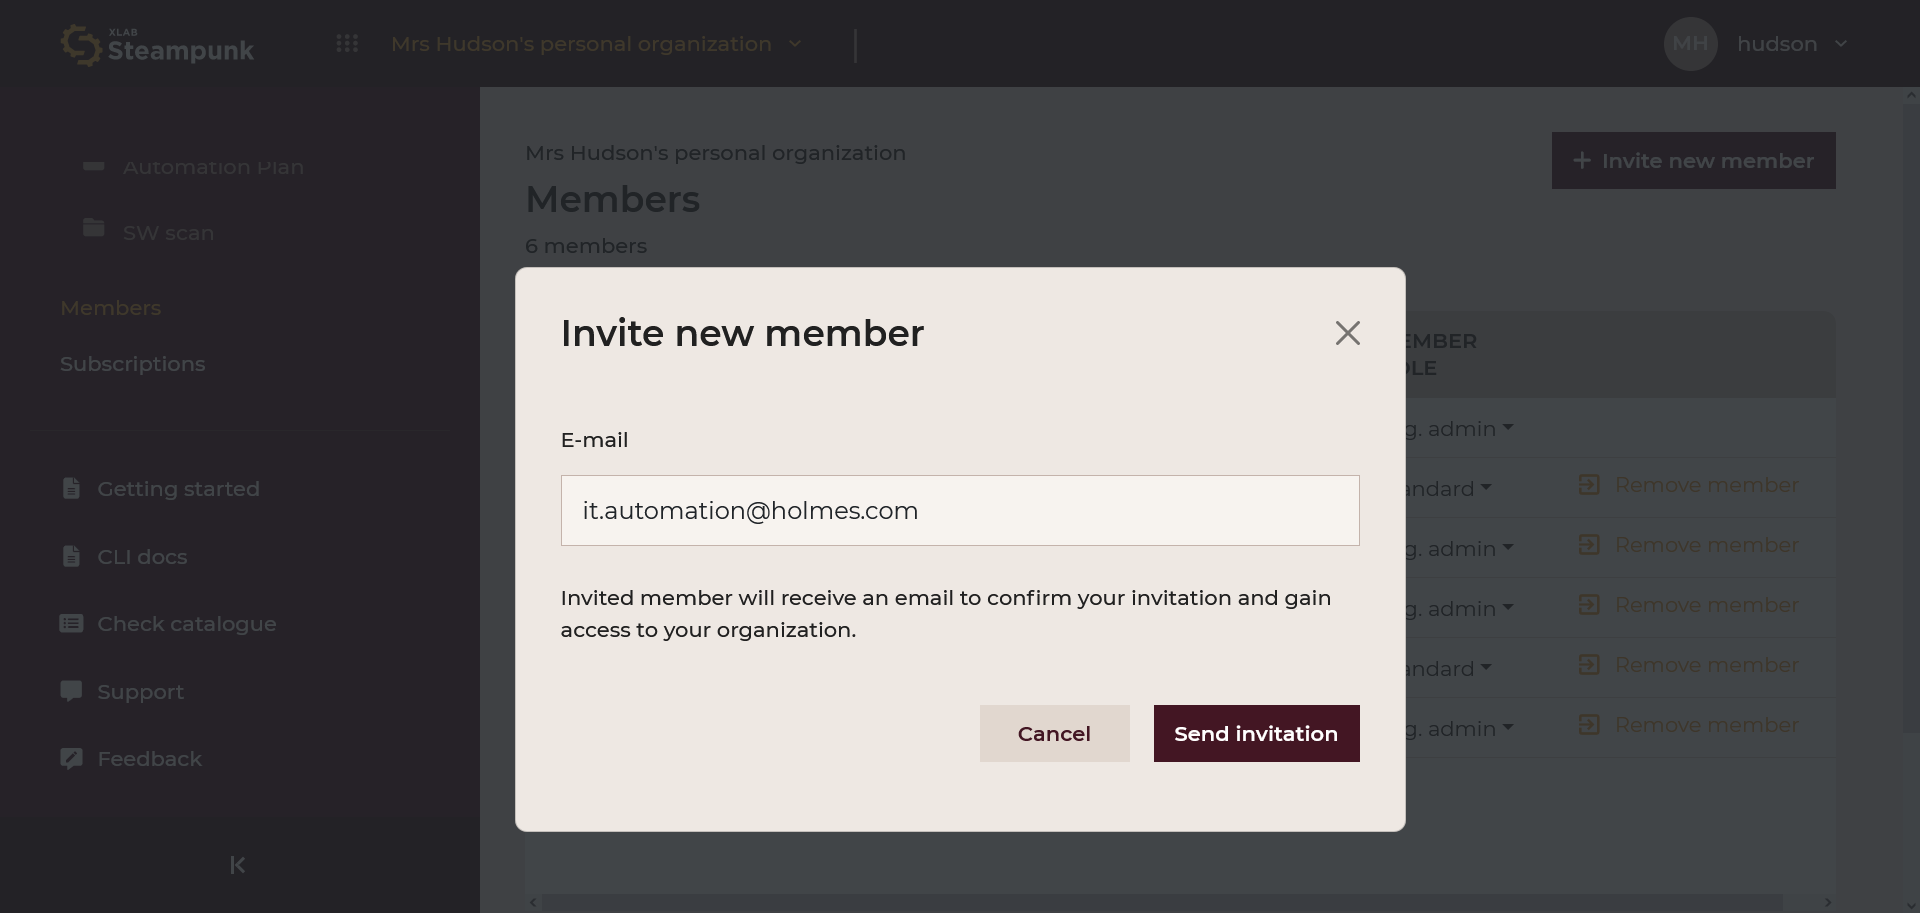
Add new members by clicking Invite new member:
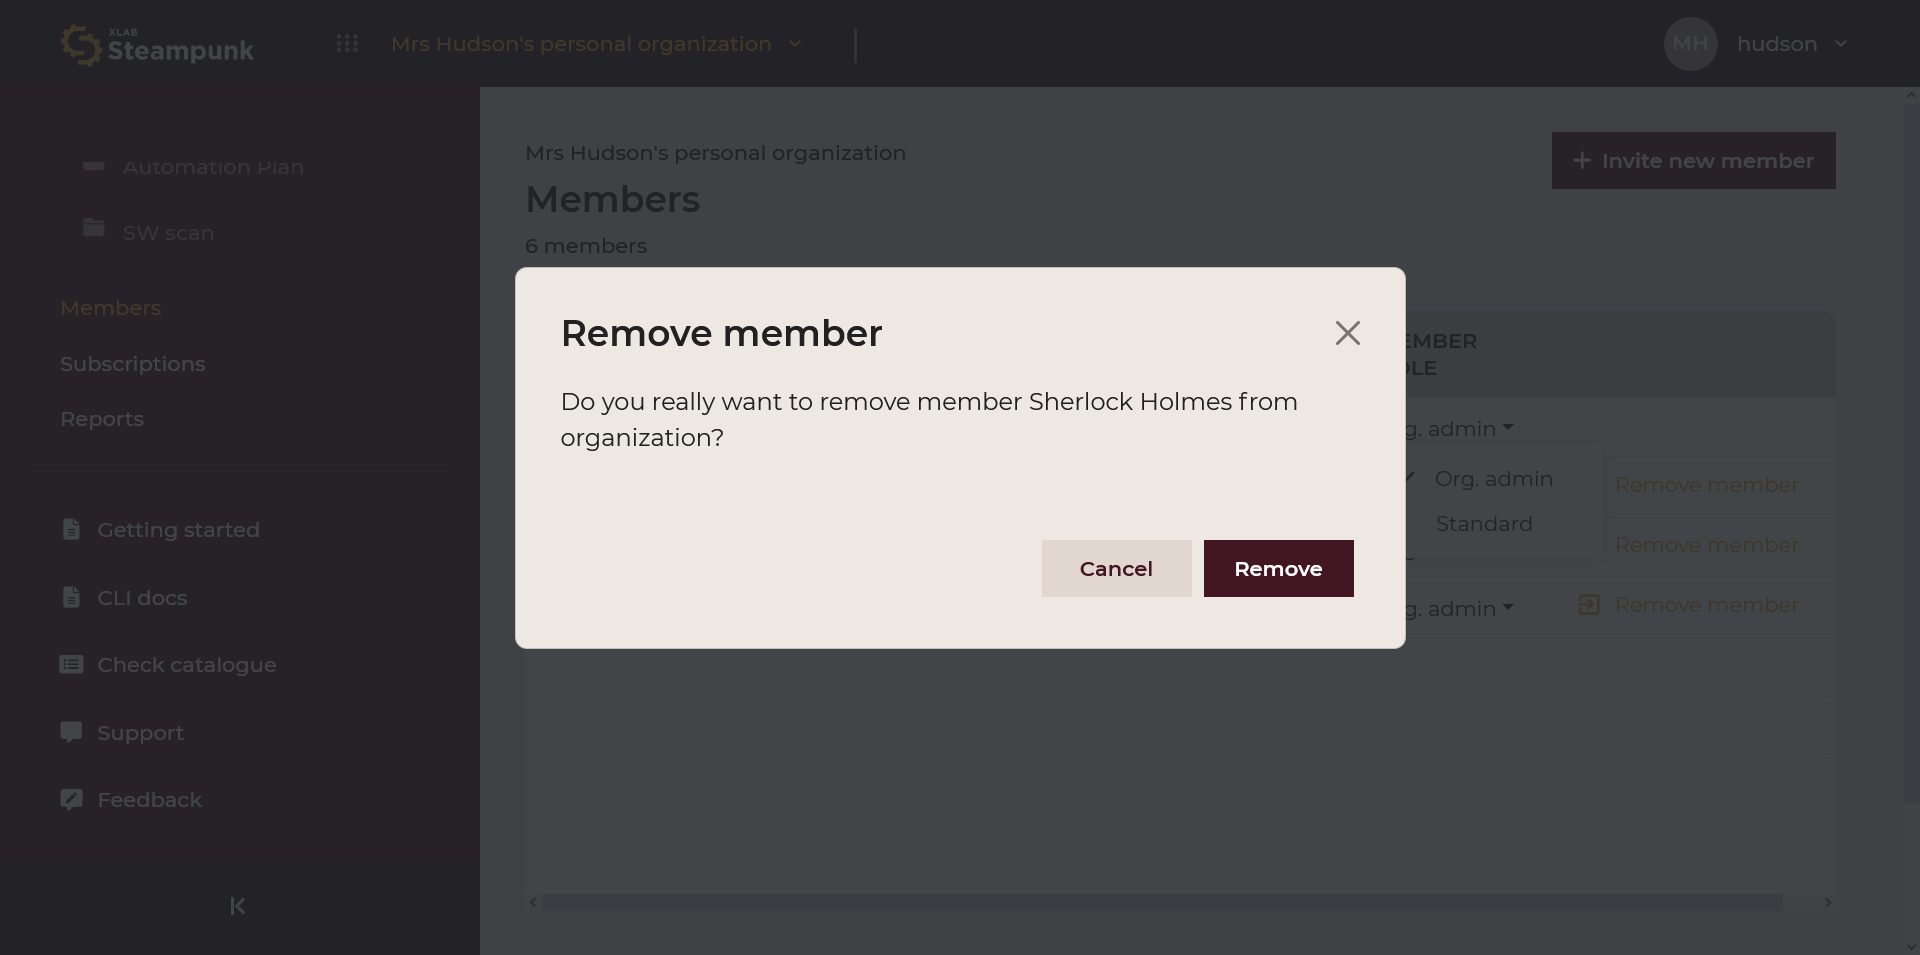
Remove members by clicking Remove member:
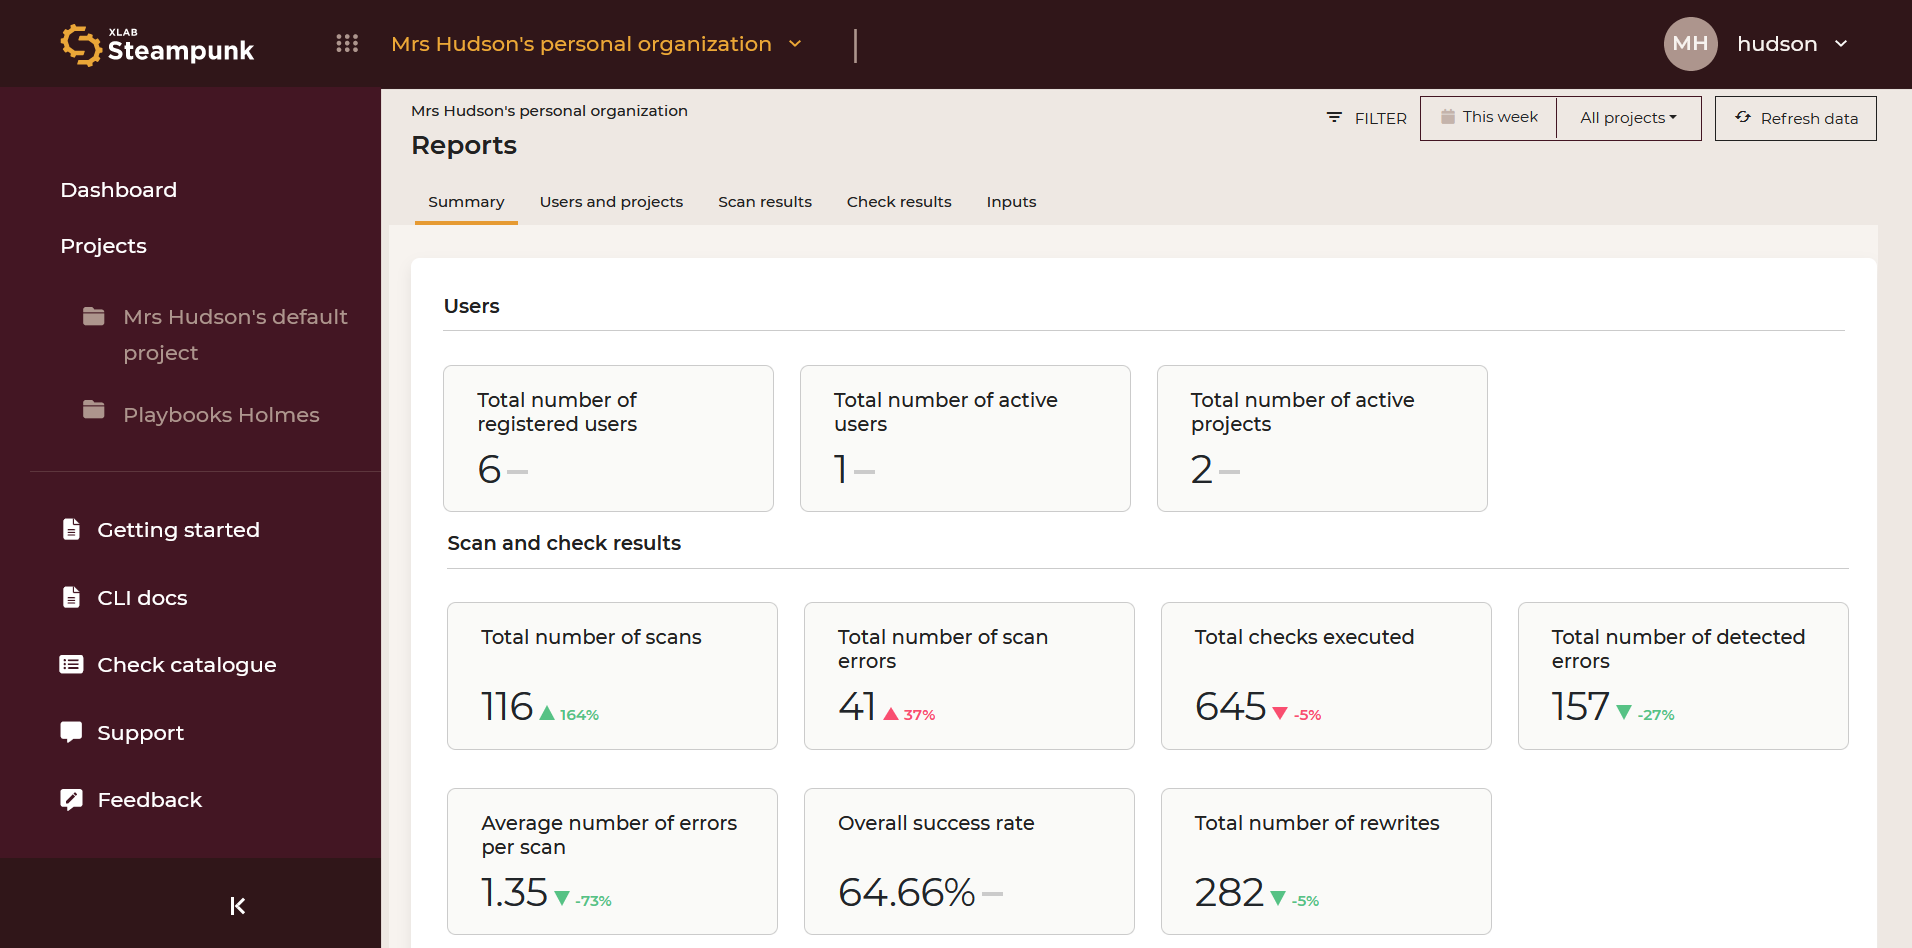
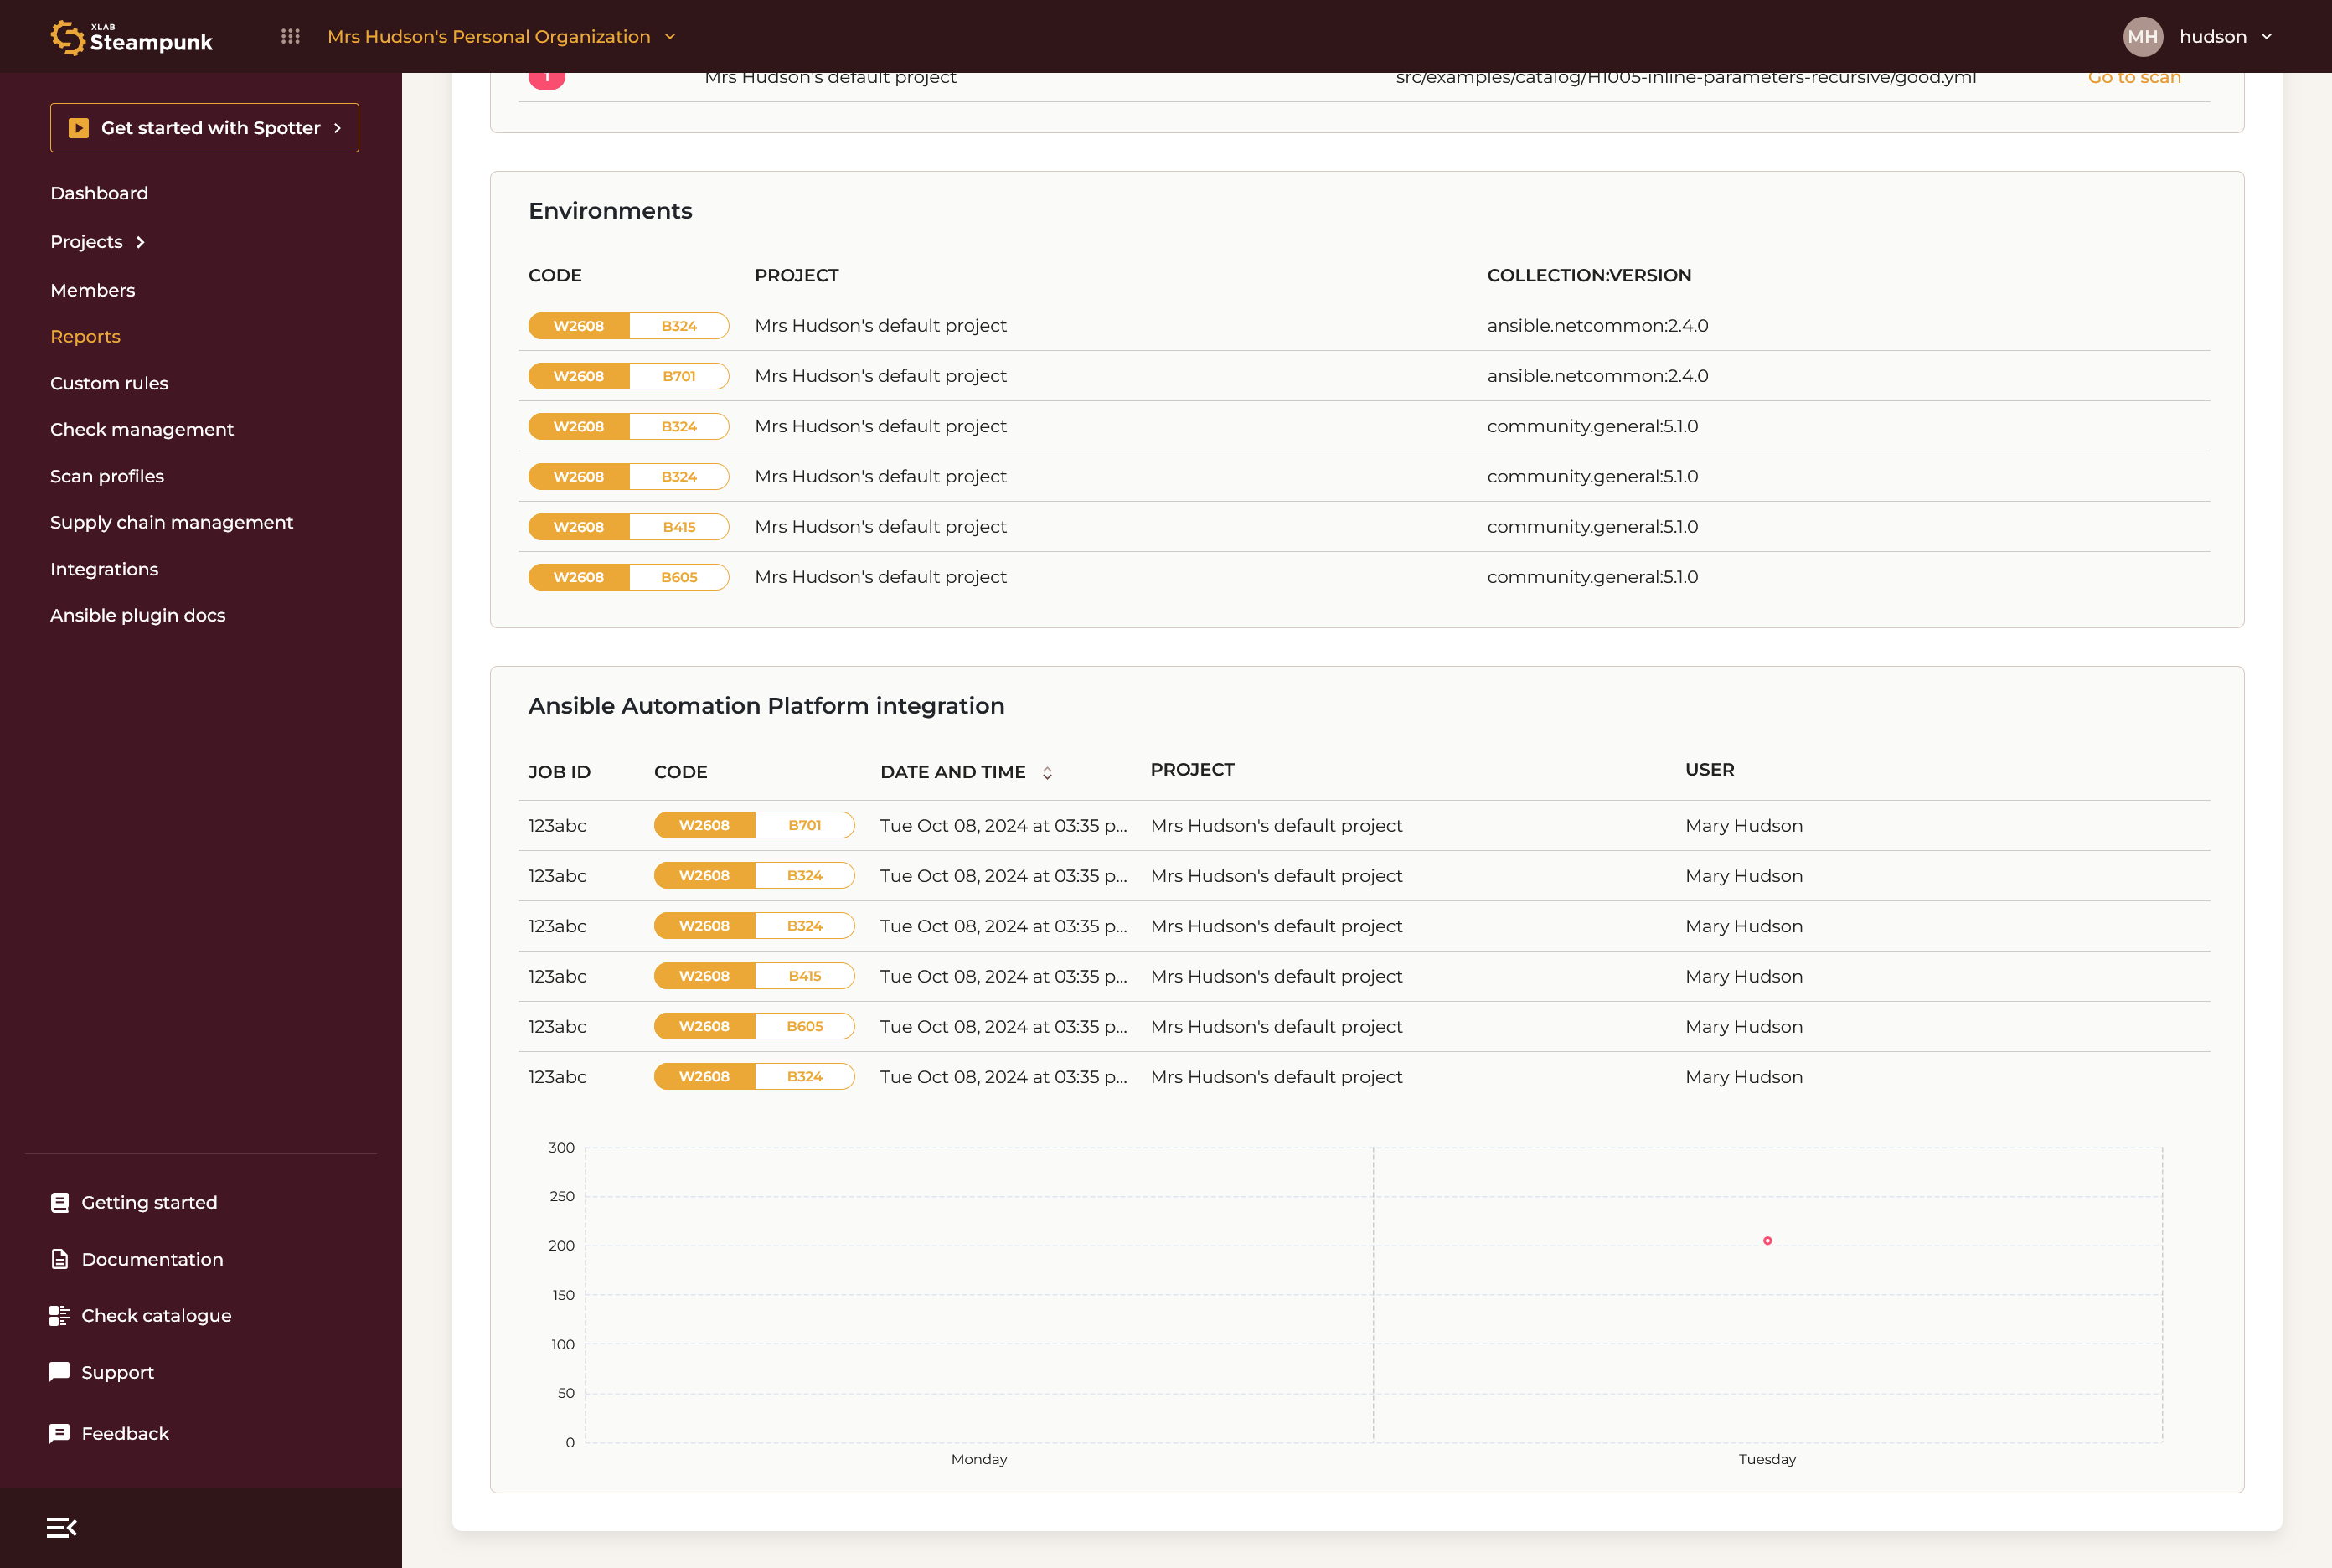
Reports
The Reports tab shows detailed analytics of users and their scan activity.
Overview
An overview of active users and projects, and scan and check results; these can also be downloaded by clicking on the button (right side) Download PDF.

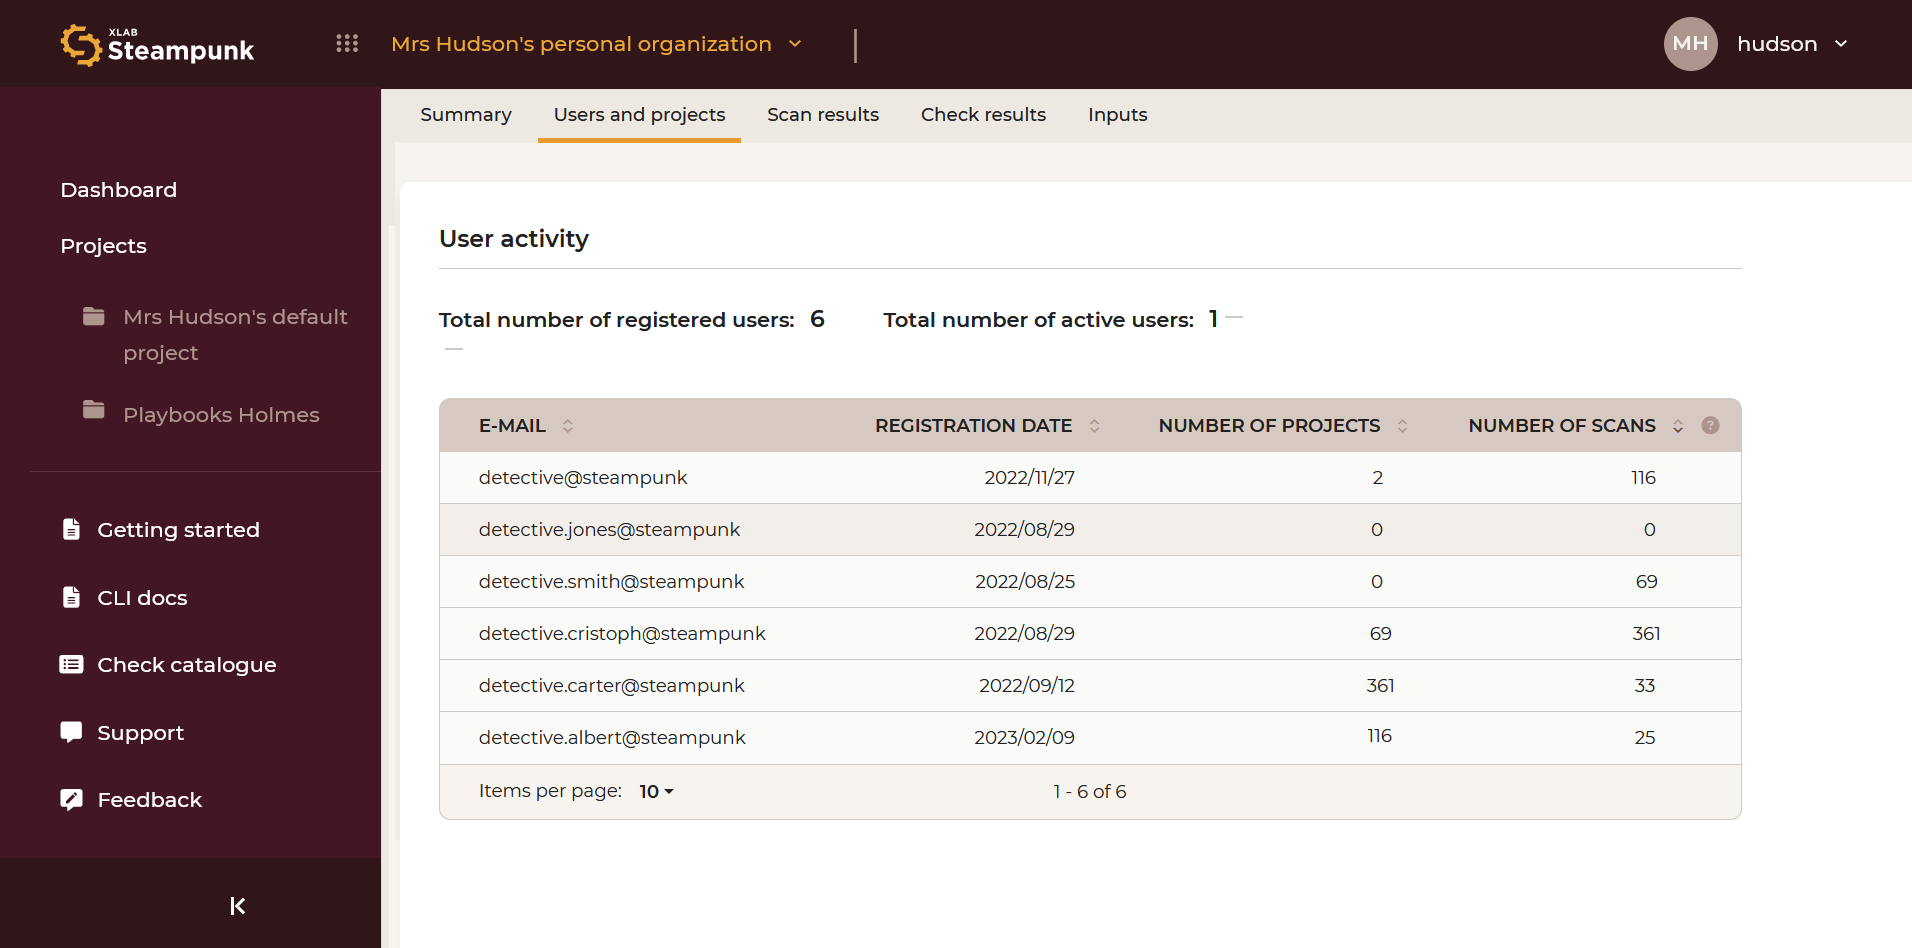
Users and projects
A detailed view of users and projects.
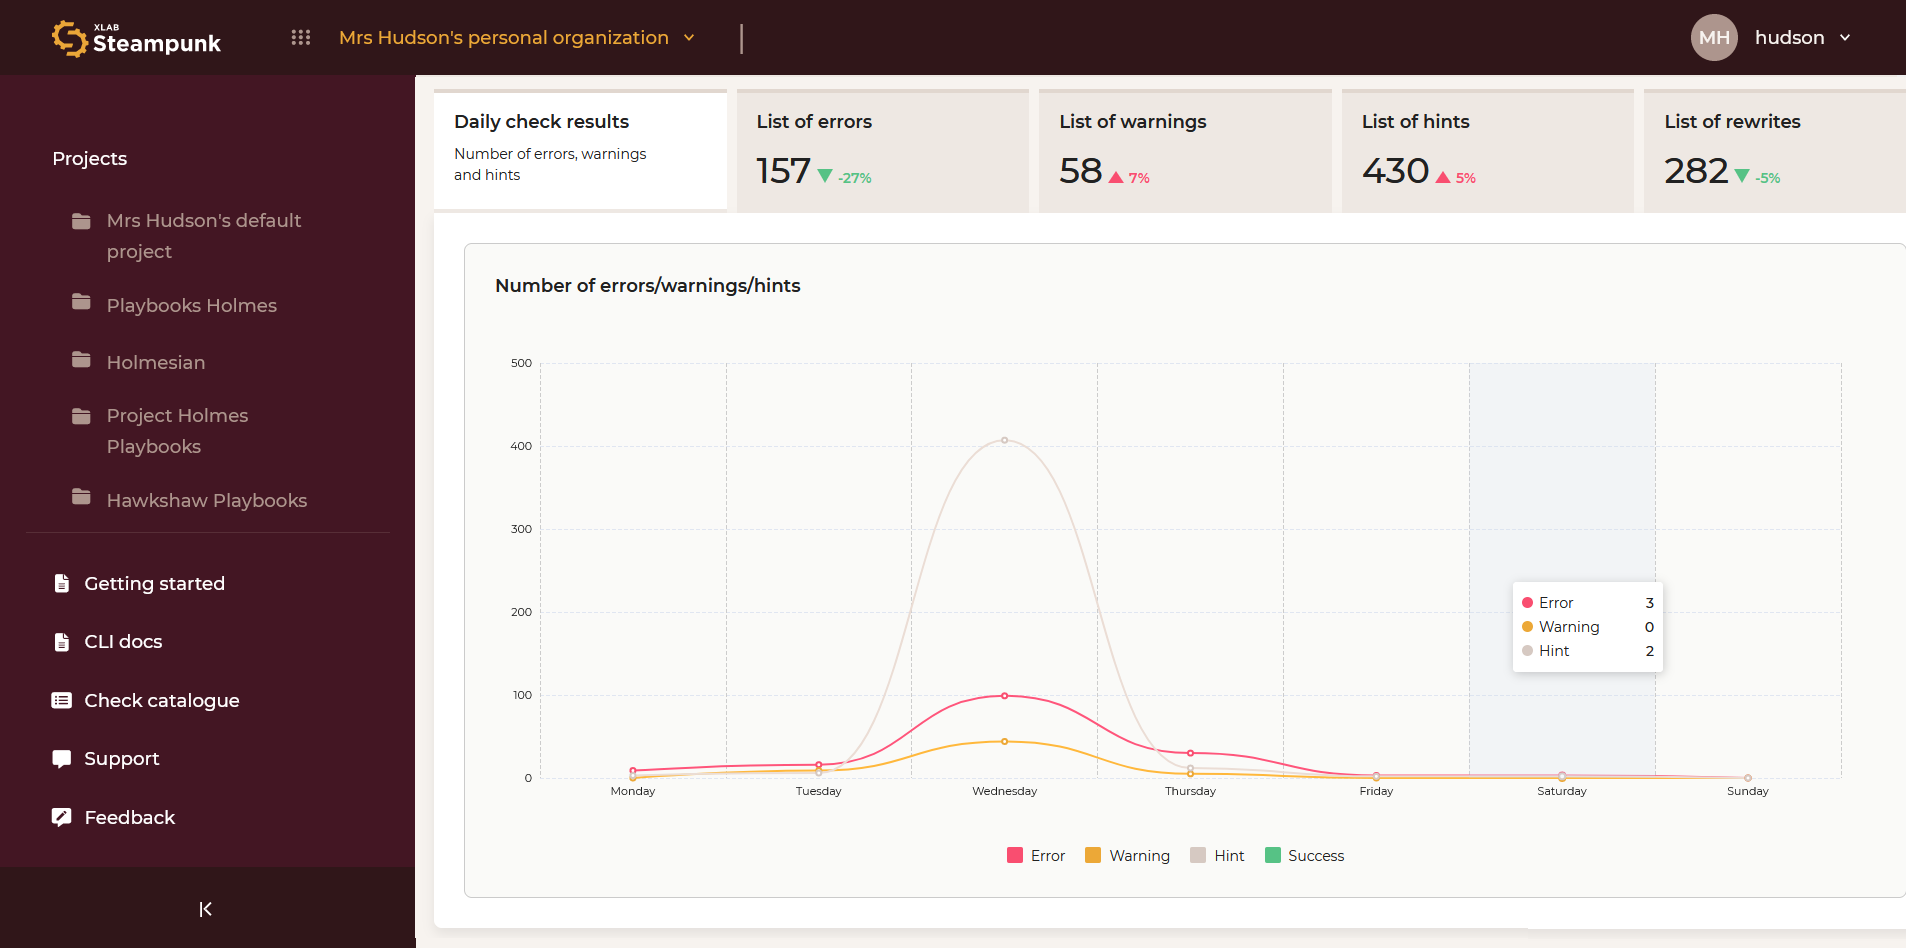
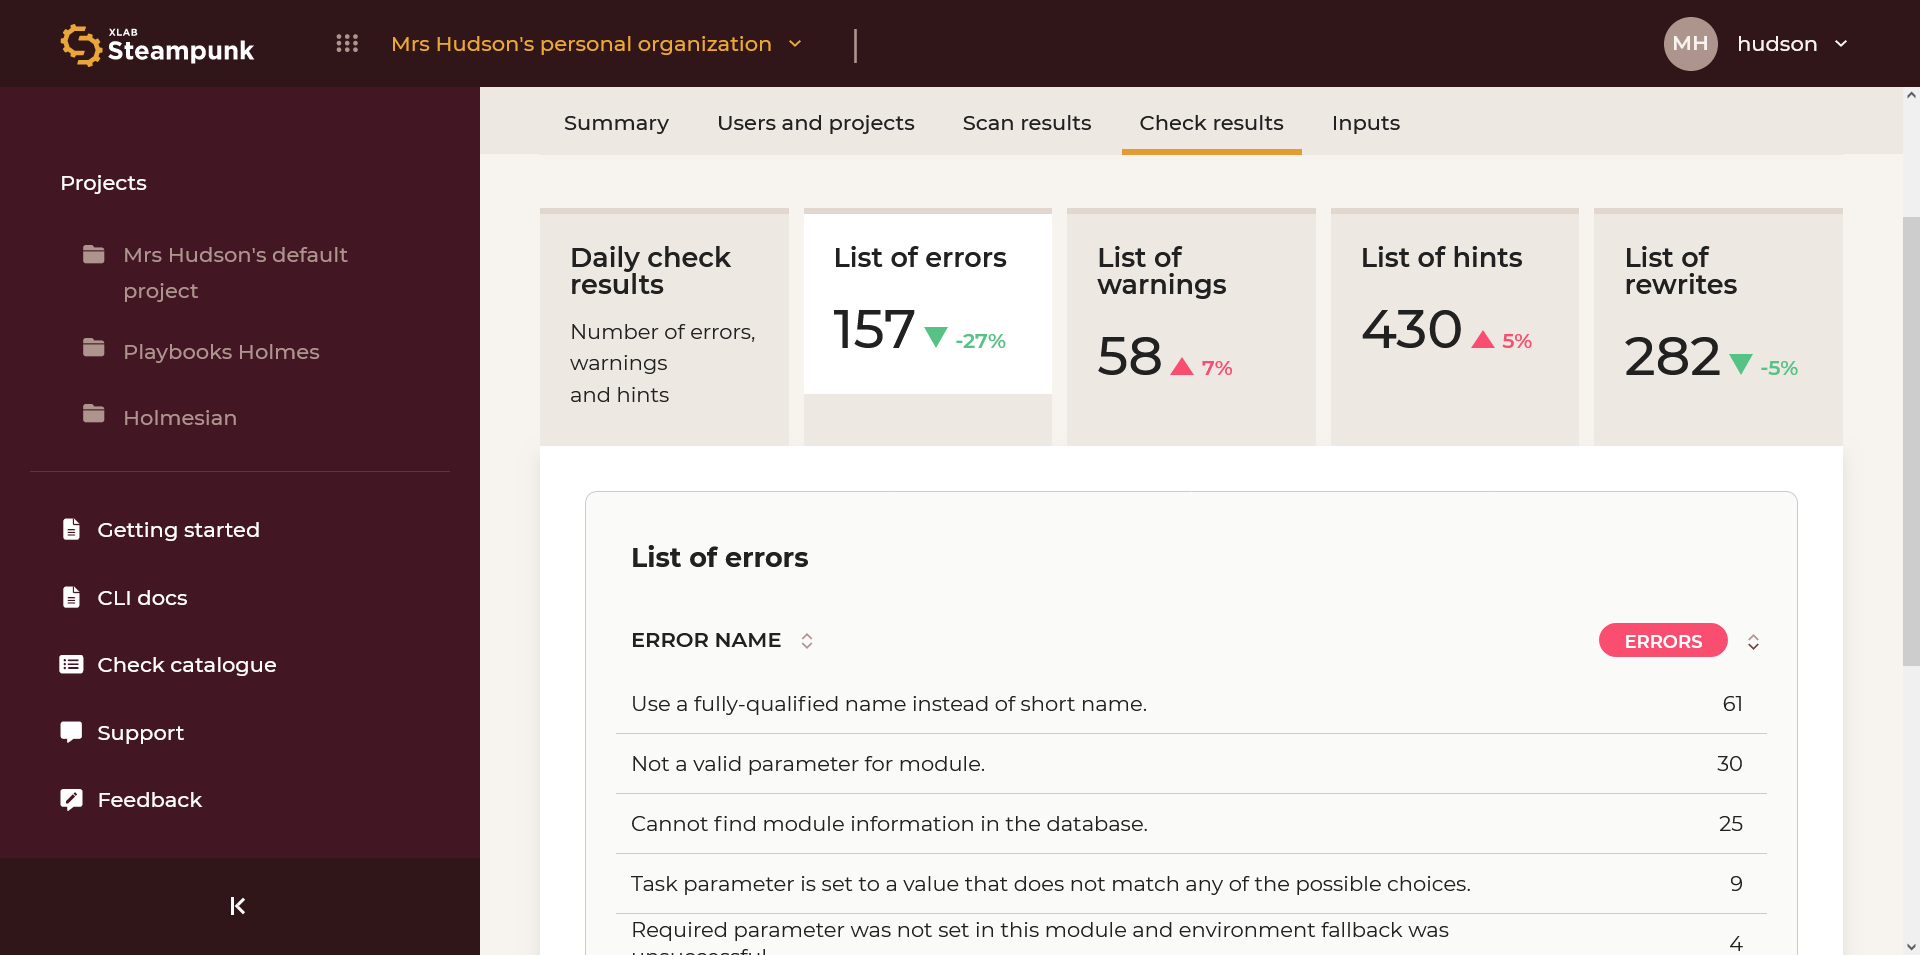
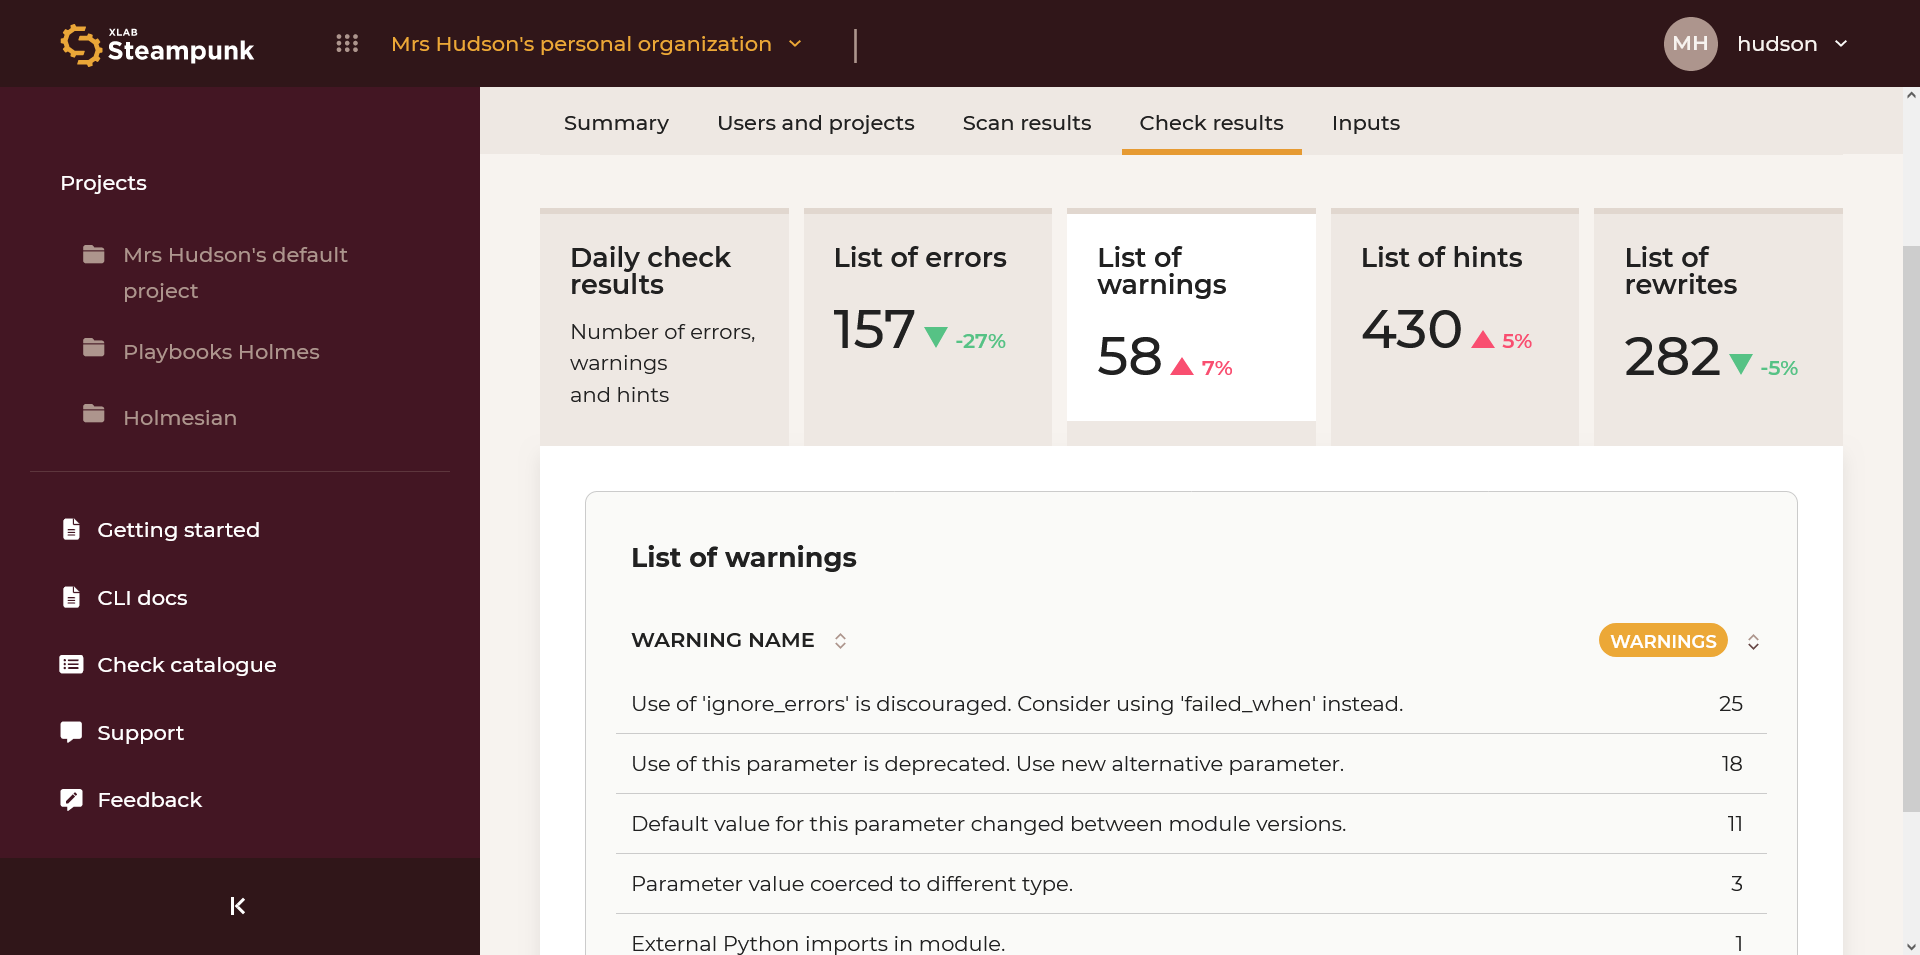
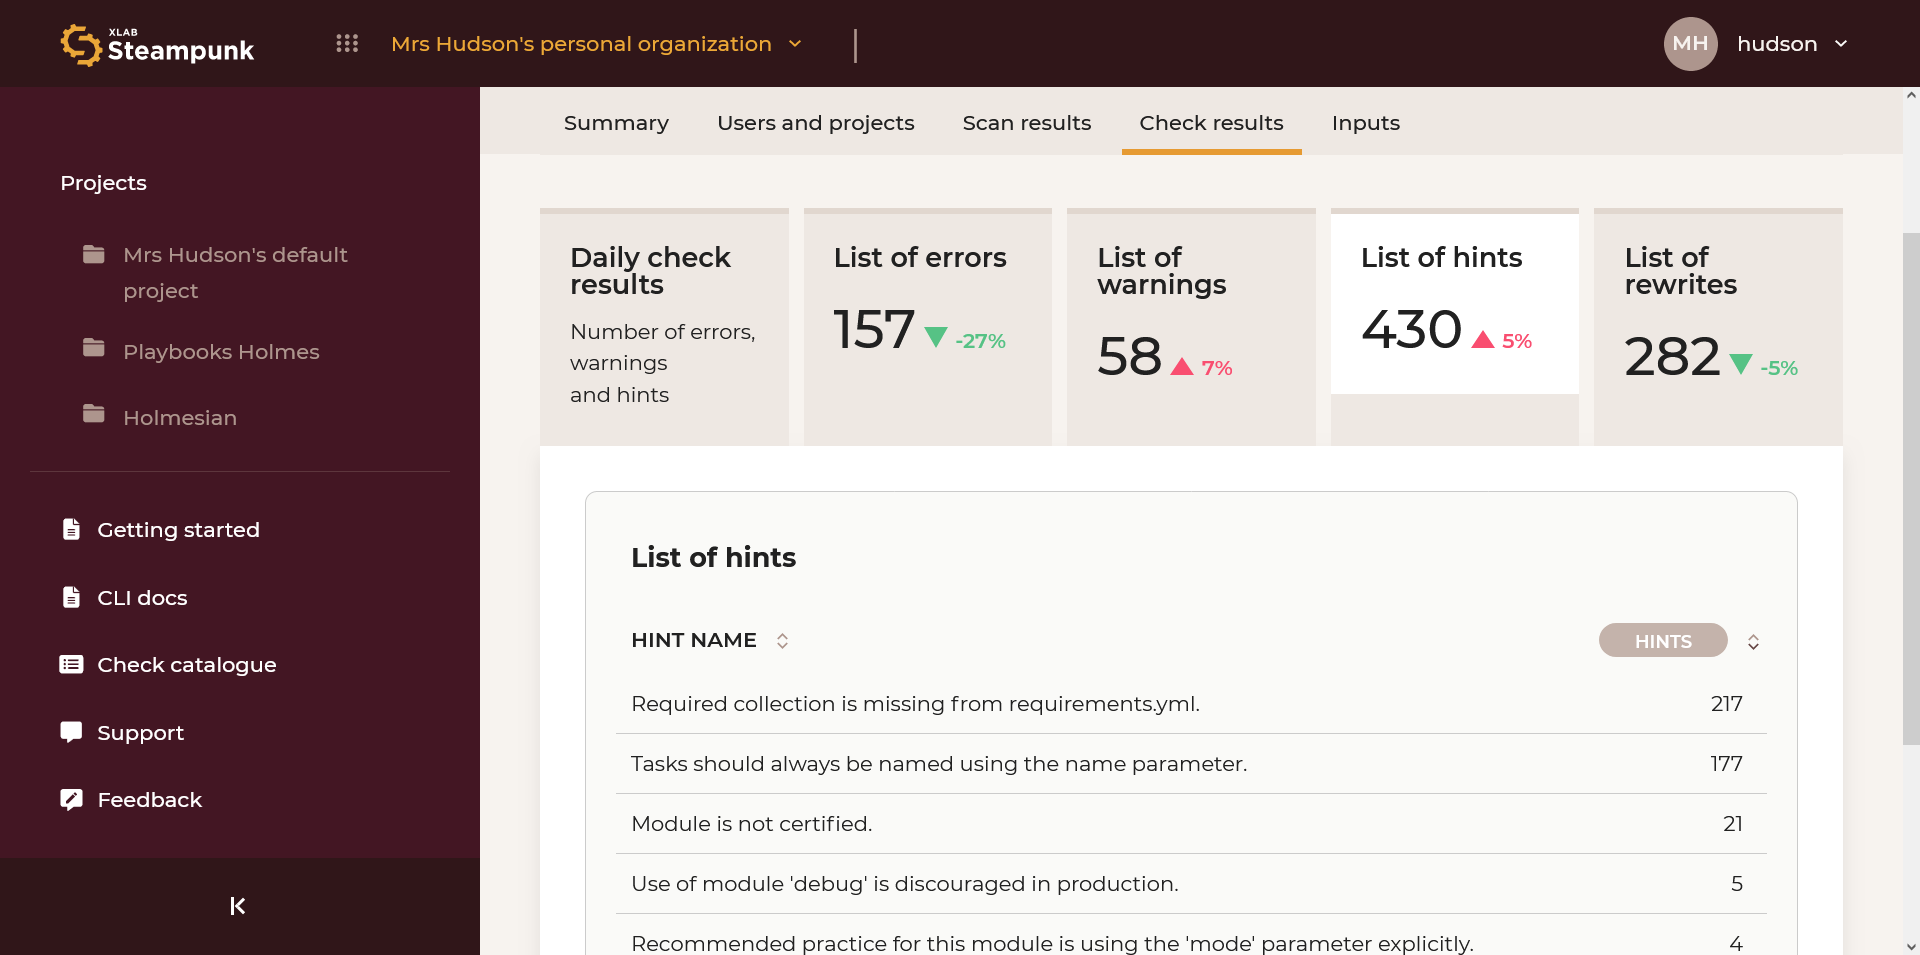
Check results
An overview of all check results: daily check results and lists of errors, warnings, and hints.
Daily check results
Number of errors, warnings, and hints.
List of errors
List of most common errors. By clicking the numeric code you can access the check in the Check catalogue.
List of warnings
List of most common warnings. By clicking the numeric code you can access the check in the Check catalogue.
List of hints
List of most common hints. By clicking the numeric code you can access the check in the Check catalogue.
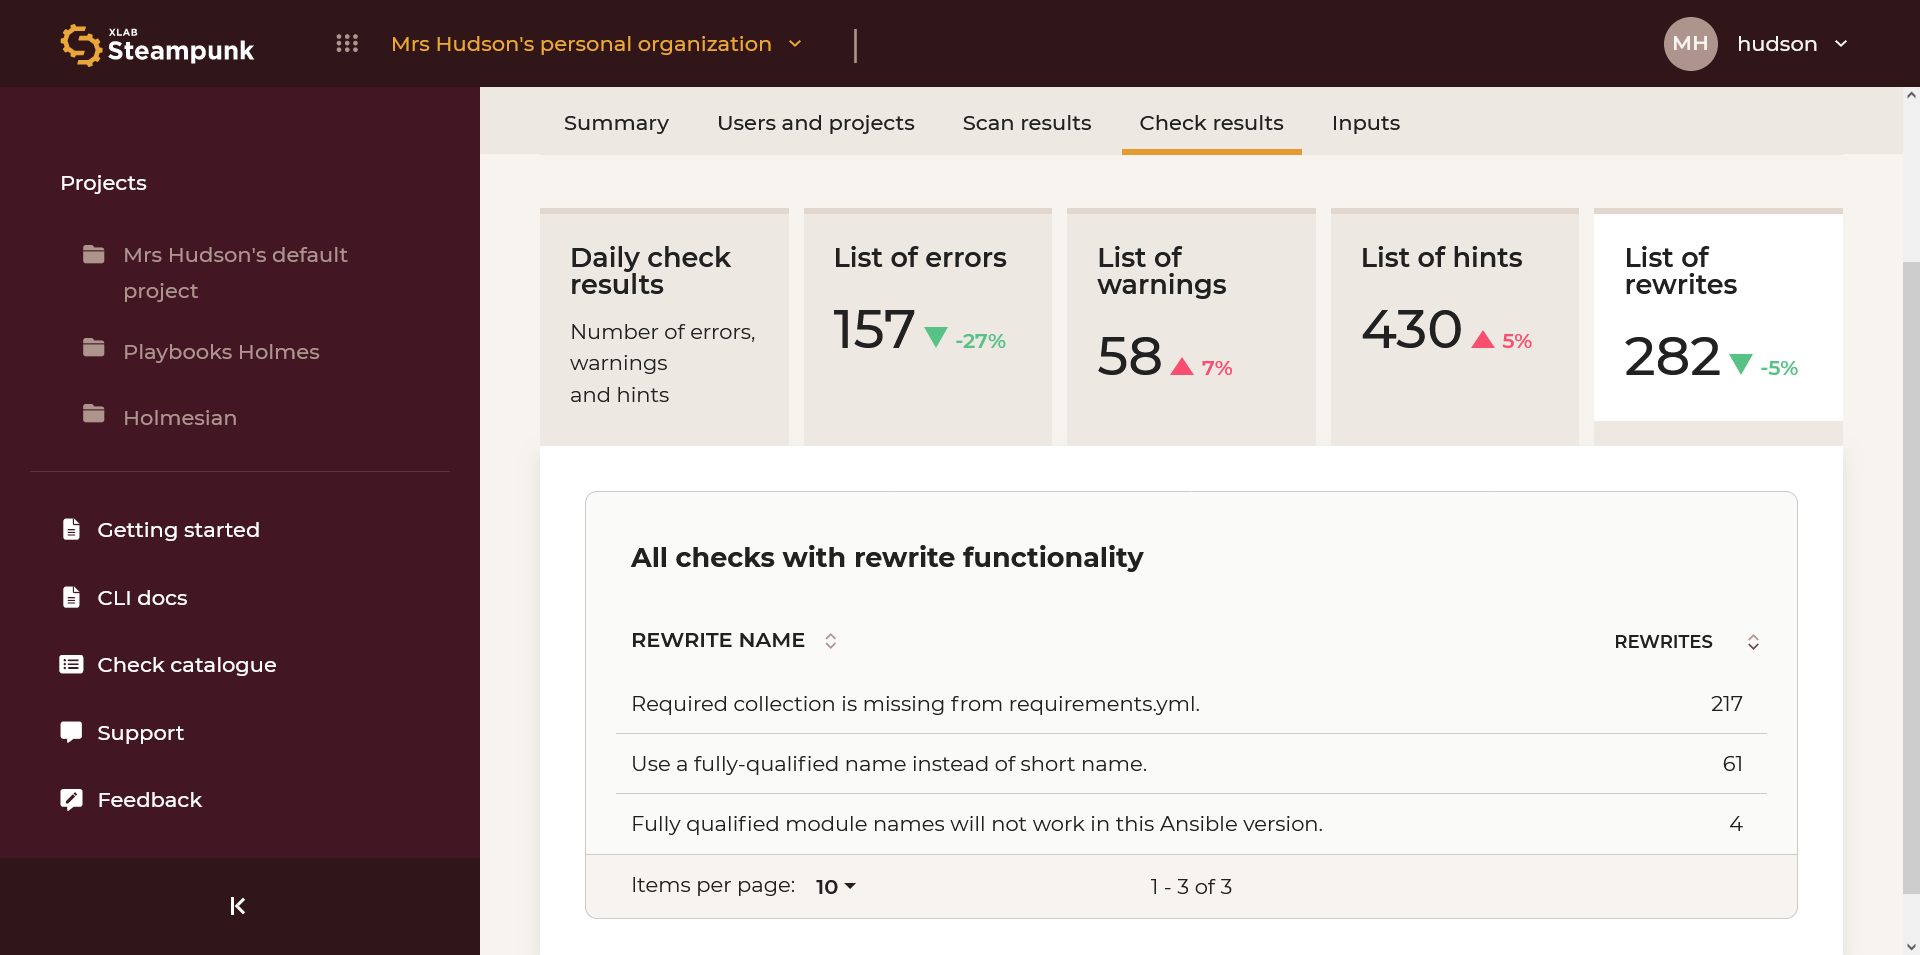
List of rewrites
List of most common rewrites (automatically fixed errors). By clicking the numeric code you can access the check in the Check catalogue.
Security
To monitor the security aspects of your Ansible automation projects, integrate Steampunk Spotter into your CI/CD pipeline. This setup ensures automatic scans that are performed at a regular schedule and triggered by any project changes.
The Security tab in the Reports view provides detailed metrics on risk levels and compliance status, offering better insights into the quality of your projects.
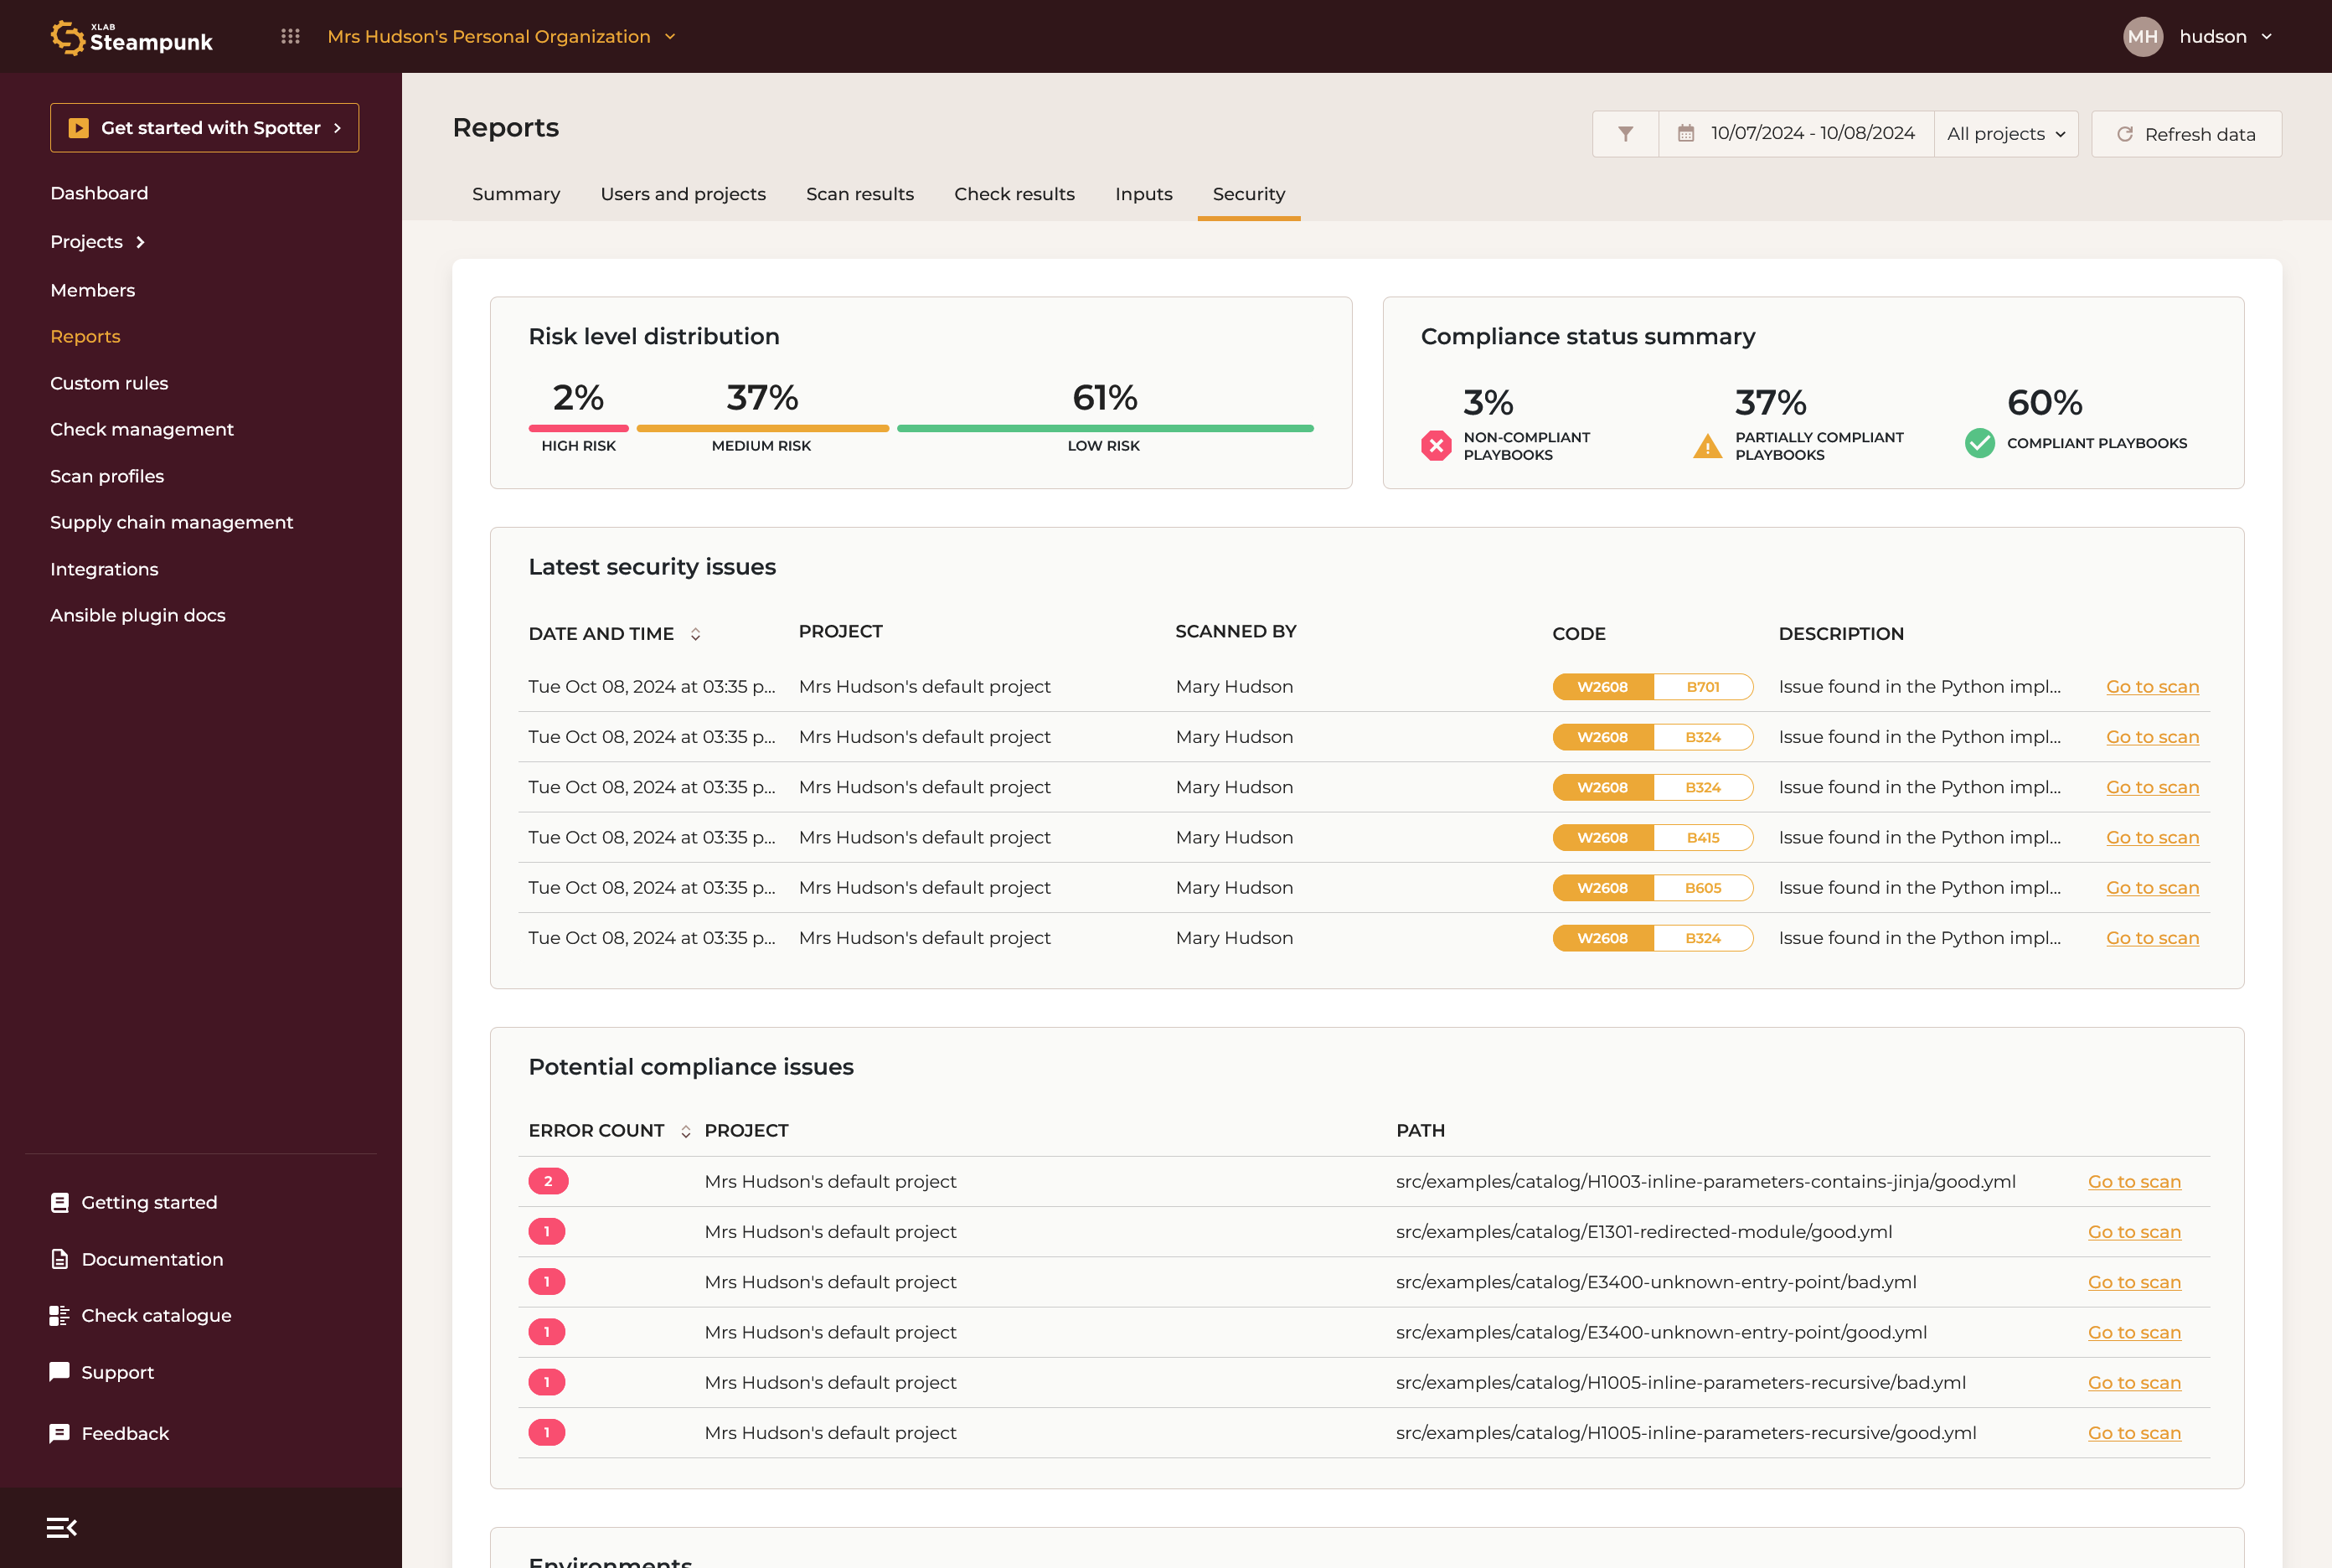
The report displays the status of the most recent scan completed before the selected time range's end.
Results in the security report are based on several factors, including:
- The scan profile used for scans. Use the
--profile securityor--profile fullswitch when running scans. - Project and organization-level supply chain management settings.
- Run-time scans executed from AAP.
Note
Regular scans initiated from the CLI or Visual Studio Code's Steampunk Spotter extension do not affect the security report status. Only scans performed through CI/CD pipelines and AAP contribute to the report.
Upgrade
Assess the progress of your efforts to update your automation projects to the target version of the Ansible platform, along with the latest versions of collections and modules. Monitor any outstanding issues that need to be resolved and check which ones you have recently fixed.
Navigate to Reports, then click the Upgrade tab.


To see the impact of your scans in the upgrade report view, make sure your scans include information on the target Ansible version:
Environment
Track Ansible and Python versions, Ansible Collections, and execution environment templates to ensure consistent setups across projects. The report reflects the most recent scans per project in the selected interval.


This report tracks only those check result issues that use the Supply Chain Management and Python checks.
Custom policies
Easily create and manage custom policies, written in Rego, a universal human-readable language to simplify policy management across your cloud-native stack. To learn more about custom policies with OPA in Steampunk Spotter, see this document.
You can view and navigate applied custom policies at an organization or a project level by clicking the drop-down menu. This enables you to review and edit the logic and details of each custom policy directly in the app.

To upload a file or a folder containing policies, click the Upload and set new policies button. This action replaces all the previously applied policies of the organization or the project.

To remove all existing policies from the currently selected organization or project, click the Remove all policies button.
Click the name of a Rego file to view its contents. To delete the selected policy, click Delete policy. To open the the policy for editing in the Steampunk Spotter Web App, click Edit policy.

In the policy editing mode, you can make changes to the text representing the policy. Click Save to save and immediately apply any changes to the policy. To discard any changes, click Cancel or navigate away from the currently edited policy.

To initiate a new empty policy, click Add new policy. The App will prompt you for the new policy's name. You can then type in and edit the contents of the new policy.

To save your work and apply your new policy, click Save.
Check management
Achieve compliance and quality by centrally controlling which checks to skip and which to always enforce across all your automation workflows; see how.
Note
Skipping or enforcing checks on organization level overrides any rules applied on the scan or task level. See documentation.
To add a new rule, click the Add rule button. Select your event code and define if the check event code is to be skipped or enforced. If applicable, define the event subcode and FQCN.
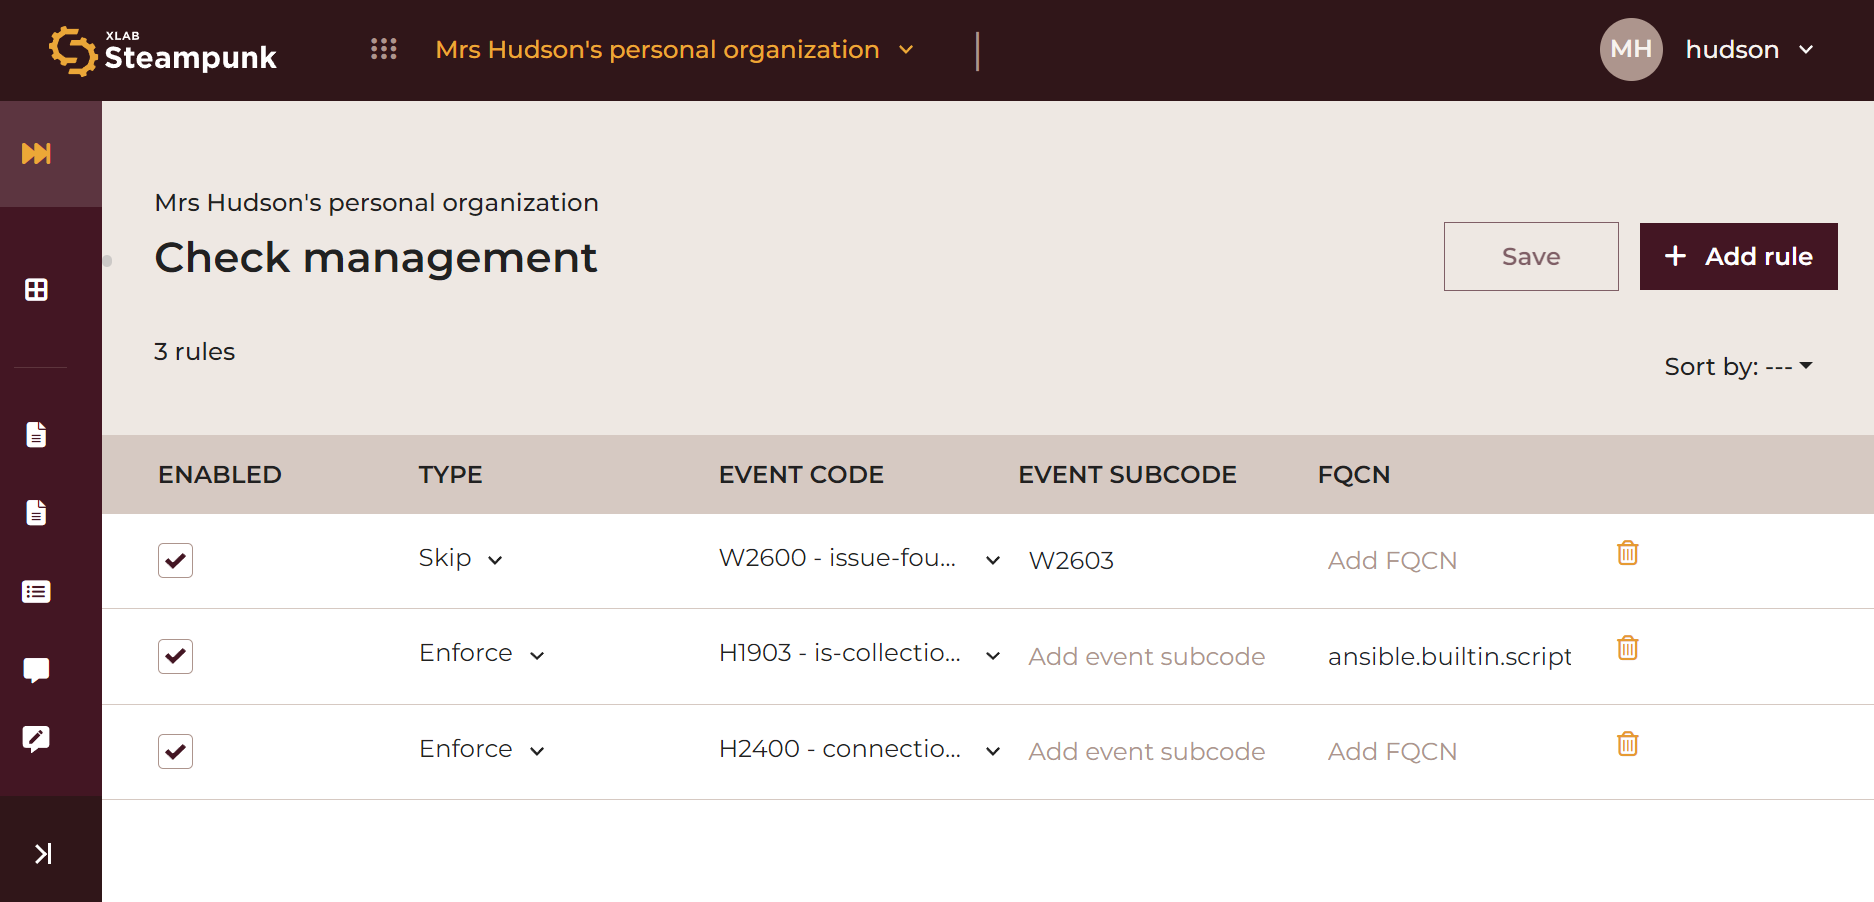
To enable or disable a check to be skipped or enforced, tick or untick the box in the Enabled column. You can delete a rule by clicking Delete rule. Before saving your configuration, you can undelete a rule, by clicking Undelete rule.
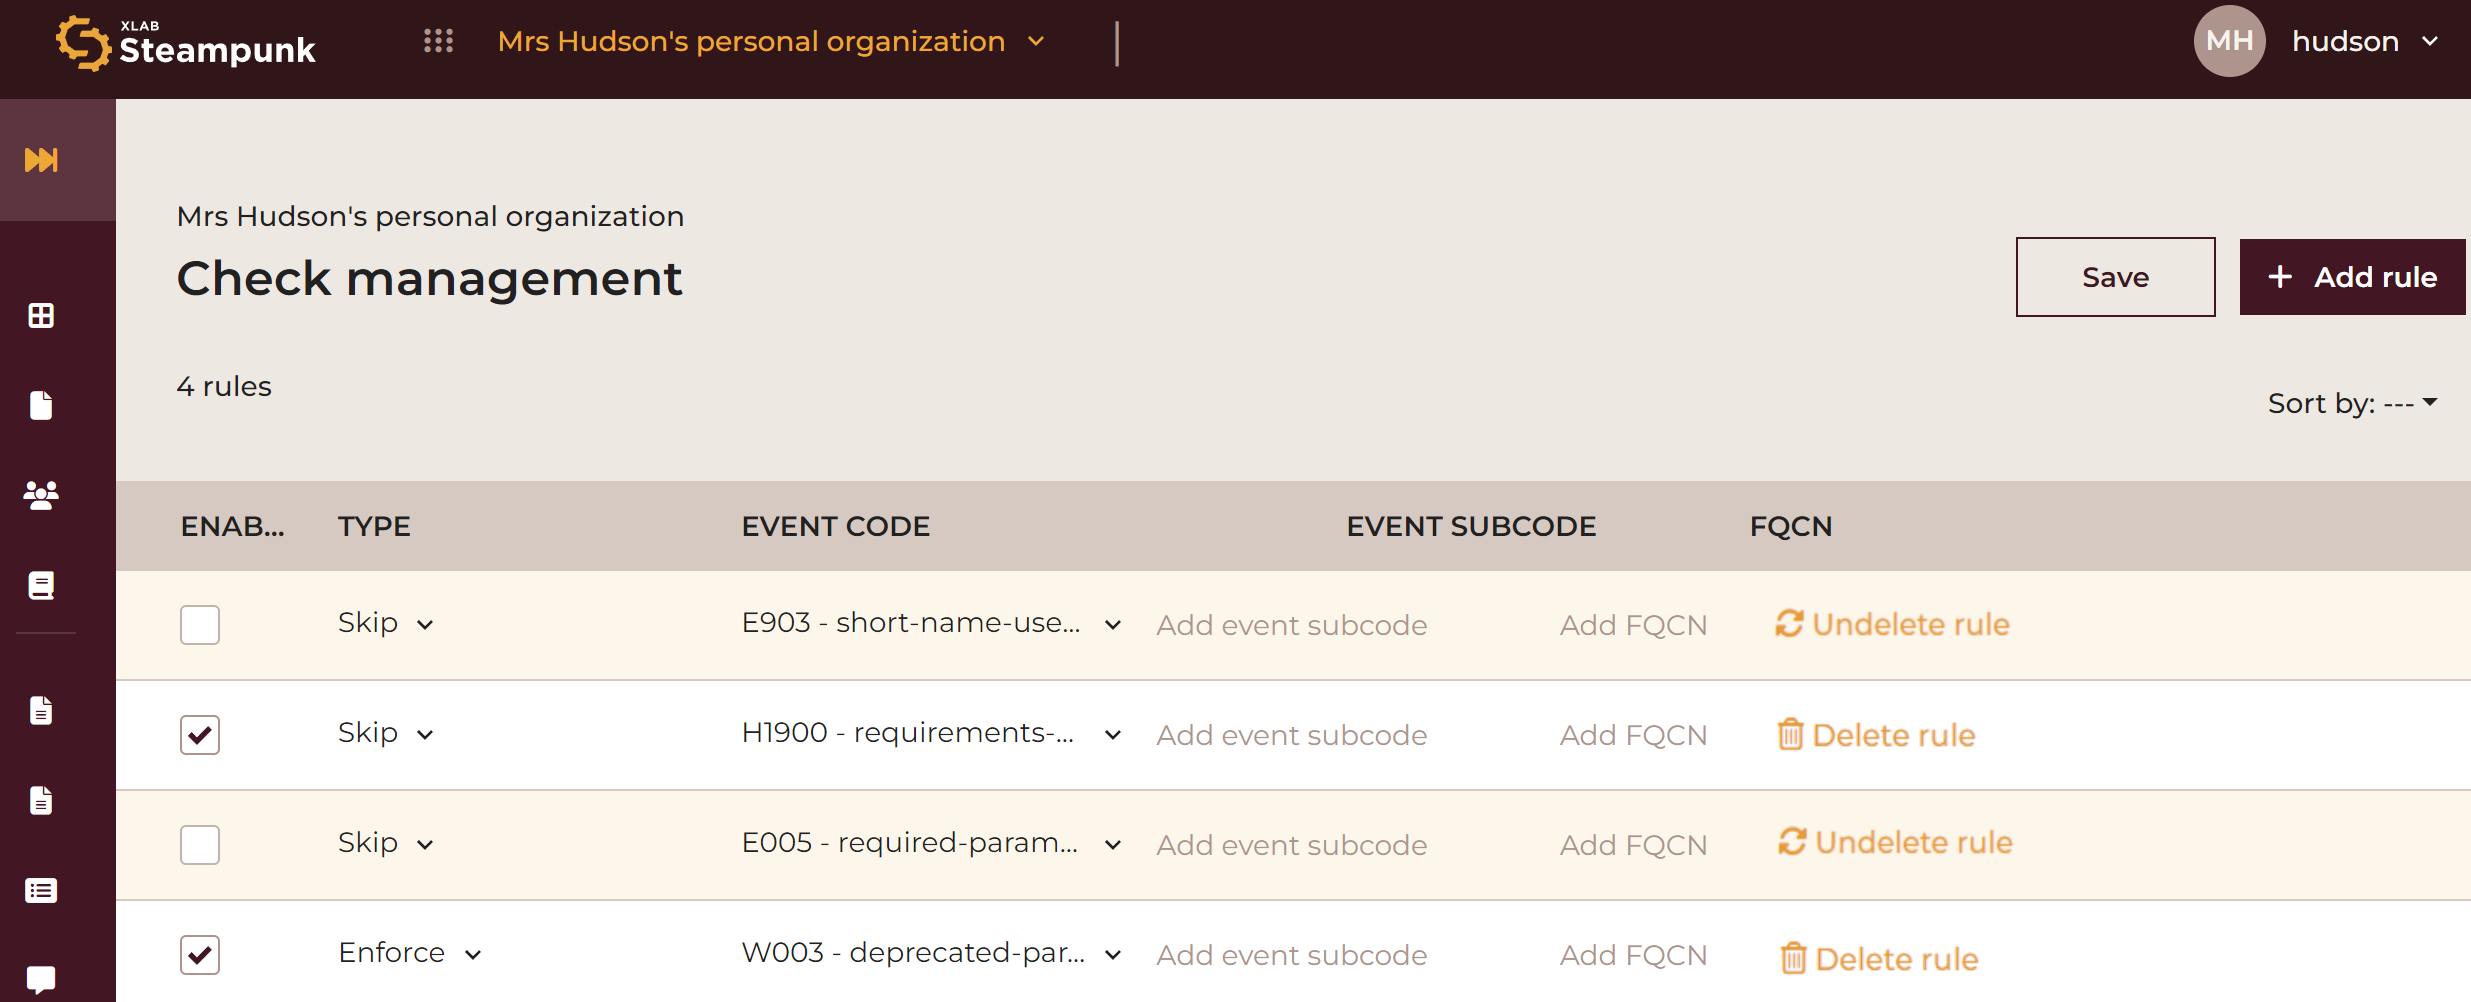
Any unsaved changes will not be applied; click the Save button in the upper right corner to save your configuration.
Custom scan profiles
Customize bundles of checks to run into custom scan profiles. Scan profiles allow you to quickly switch between sets of checks to run when scanning different projects.
Note
Scans are still subject to the rules defined in the Check management regardless of the profile applied.
Visit Scan profiles to see the list of the scan profiles available at the organization.
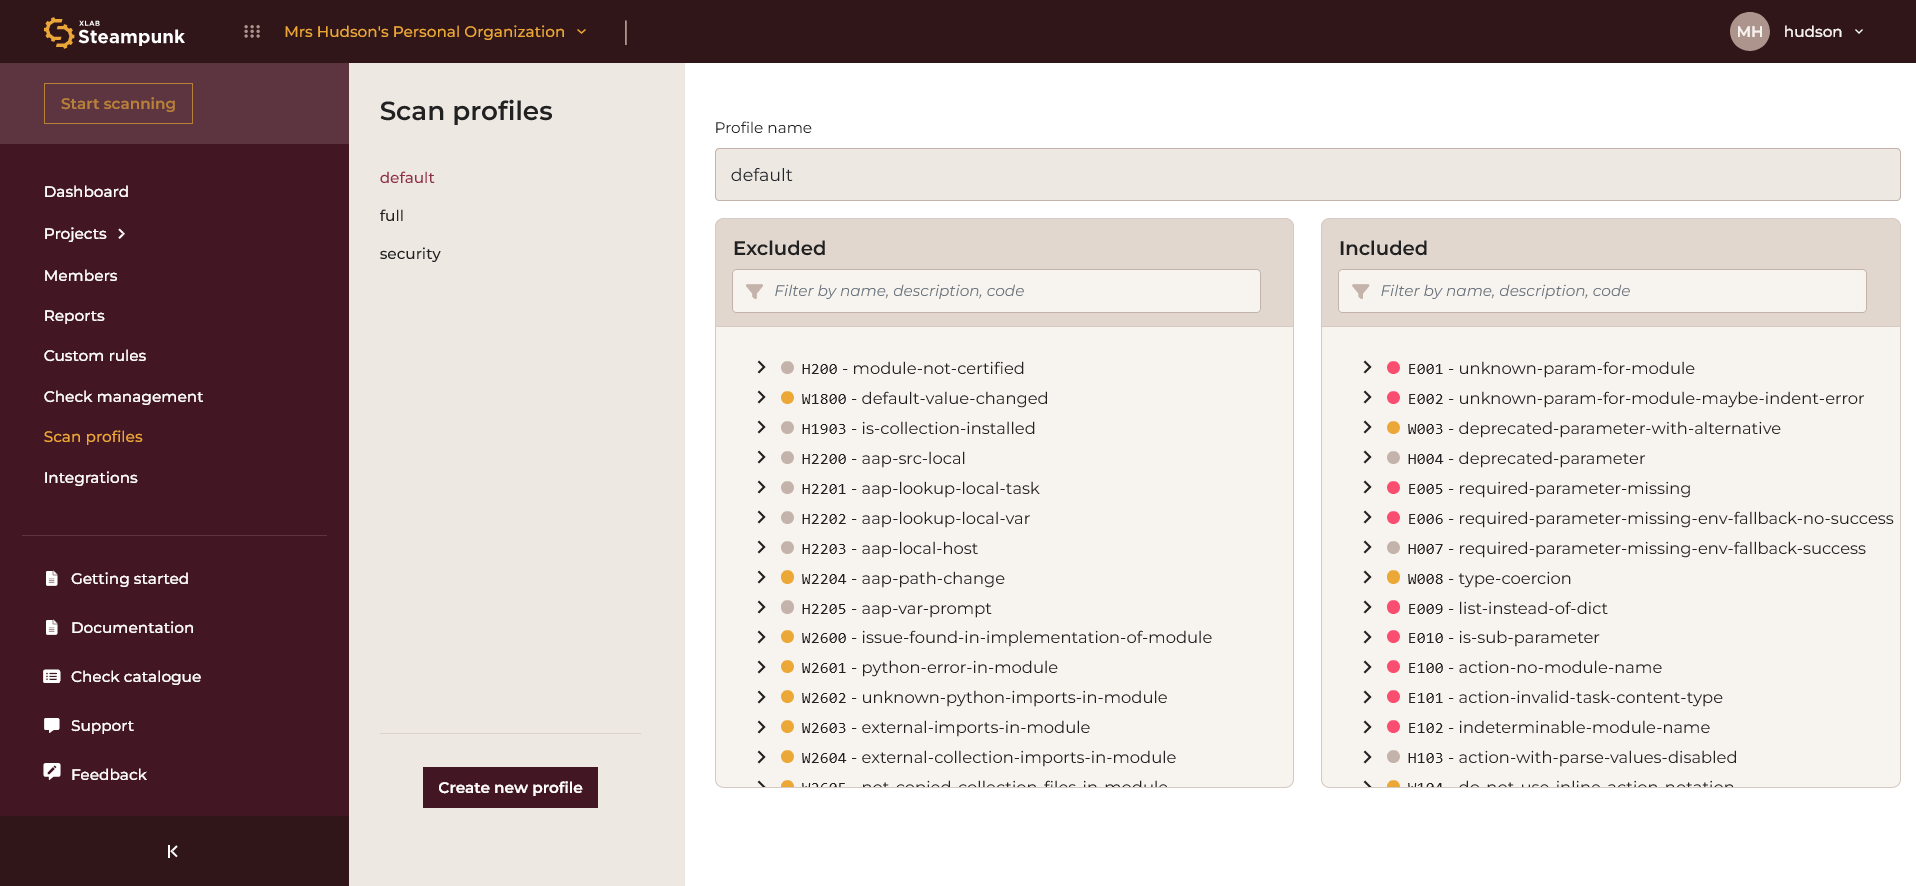
Initially, the built-in profiles are listed. Click on the profile name to view which check profiles are included in that scan profile. Please note that the built-in scan profiles cannot be altered or deleted.
To create a new custom scan profile, click Create new profile. In the main area of the screen, a new blank profile is initiated.
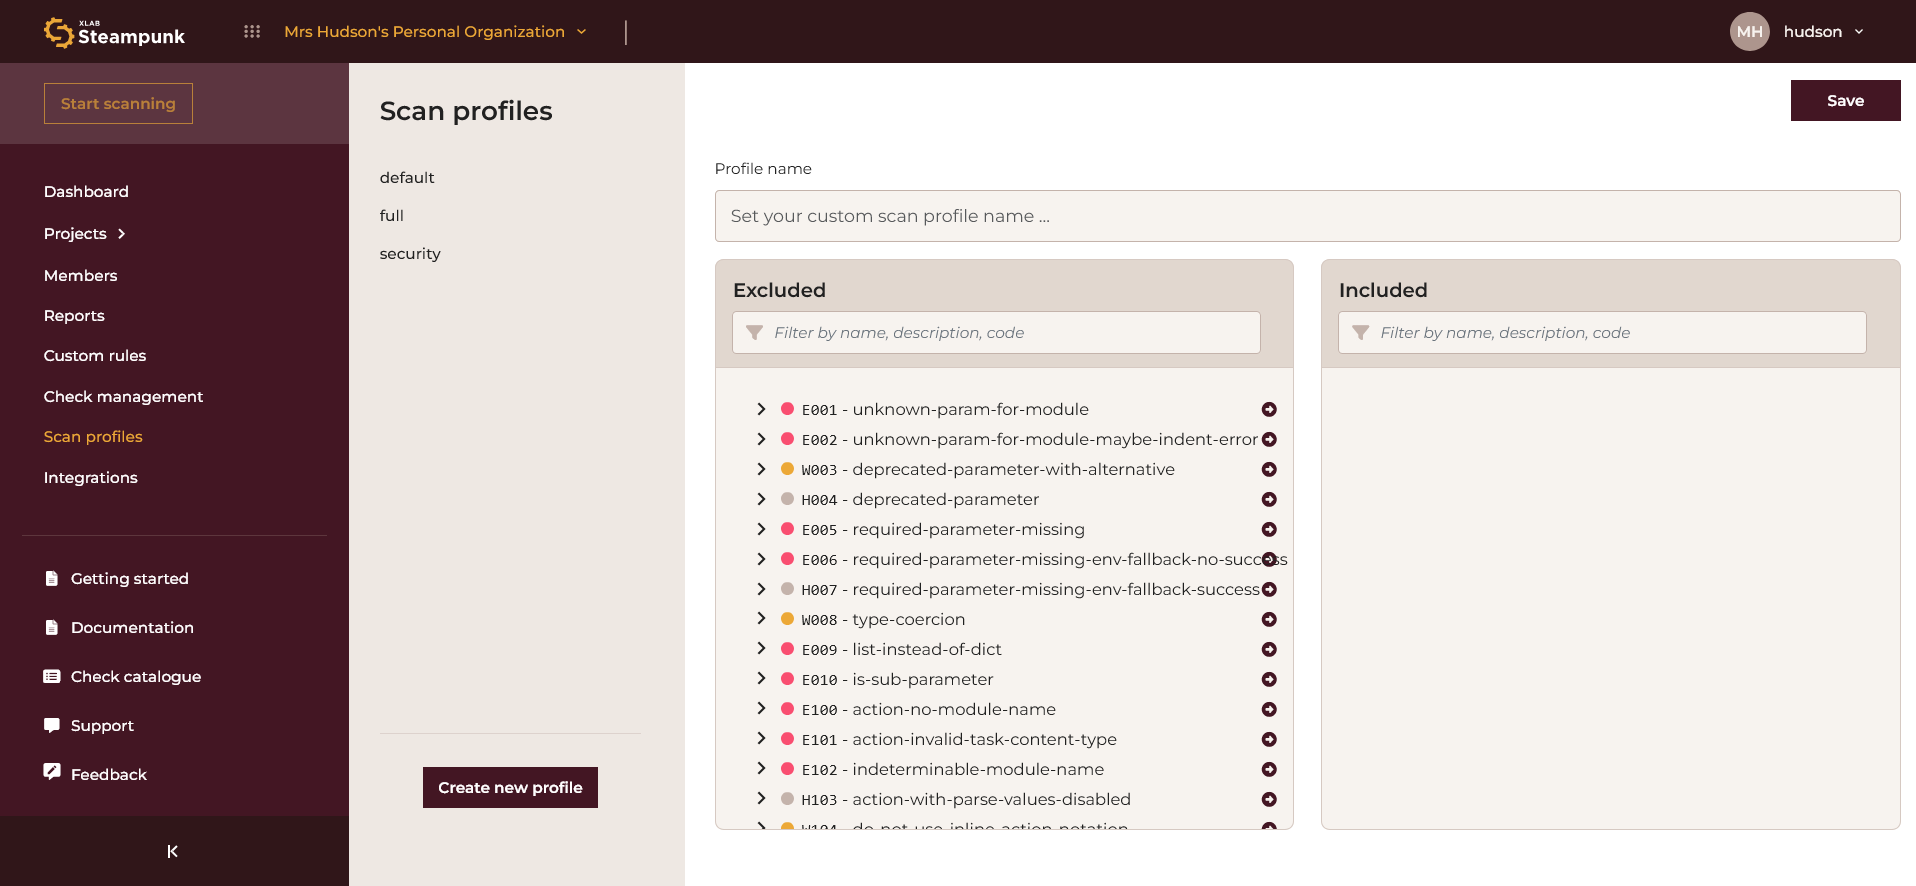
Type the name of the new profile into the Profile name input.
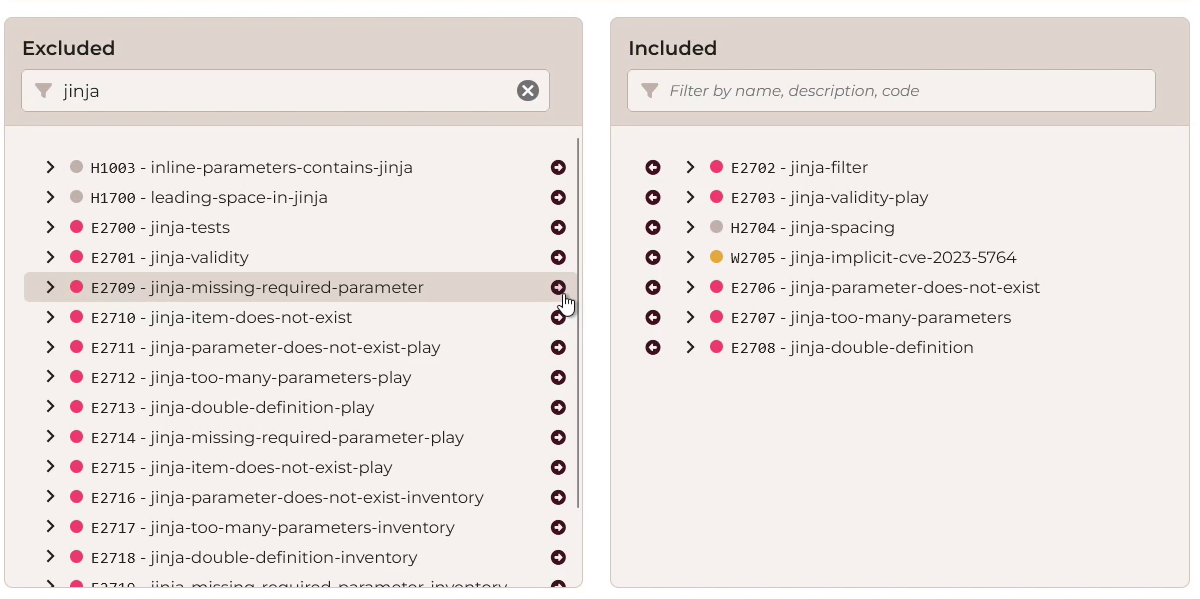
You can examine the check's details by clicking the chevron on the left side of the check's row. You can also narrow down the list by typing a search term to the filter.
To populate the profile with the checks, move the desired checks from the
Excluded list over to the Included list by clicking the arrow glyph
![]() on the right side of the row.
on the right side of the row.
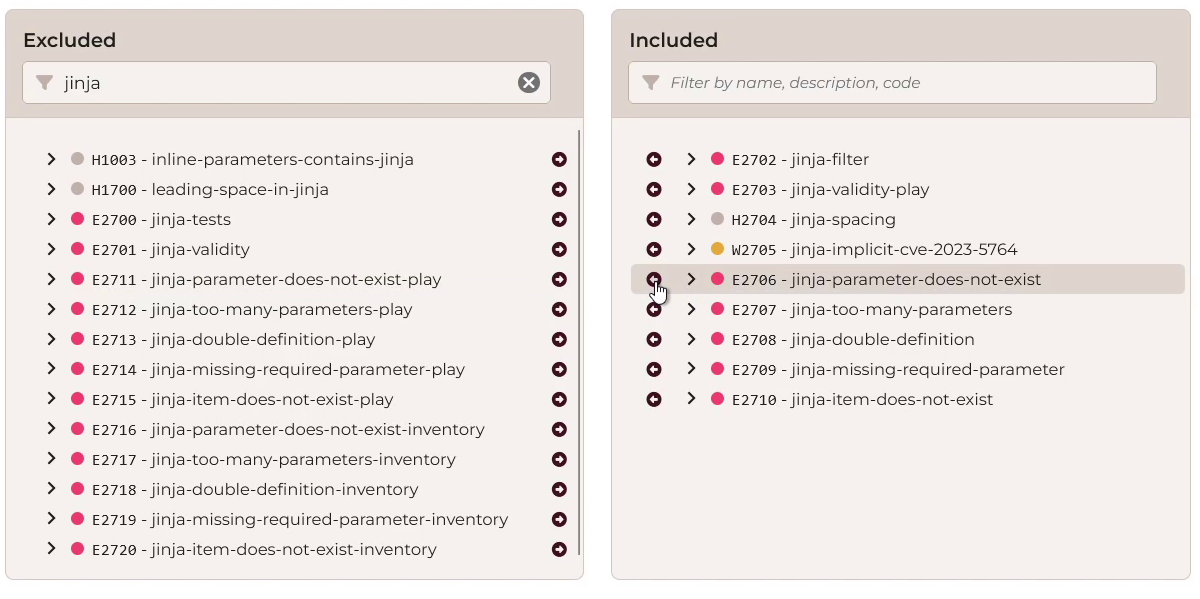
If you decide that you no longer would like particular checks to be included
in the profile, move them from the Included list back to the Excluded
list by clicking the arrow glyph
![]() on the left side of the row.
on the left side of the row.
Click Save to save the custom profile.
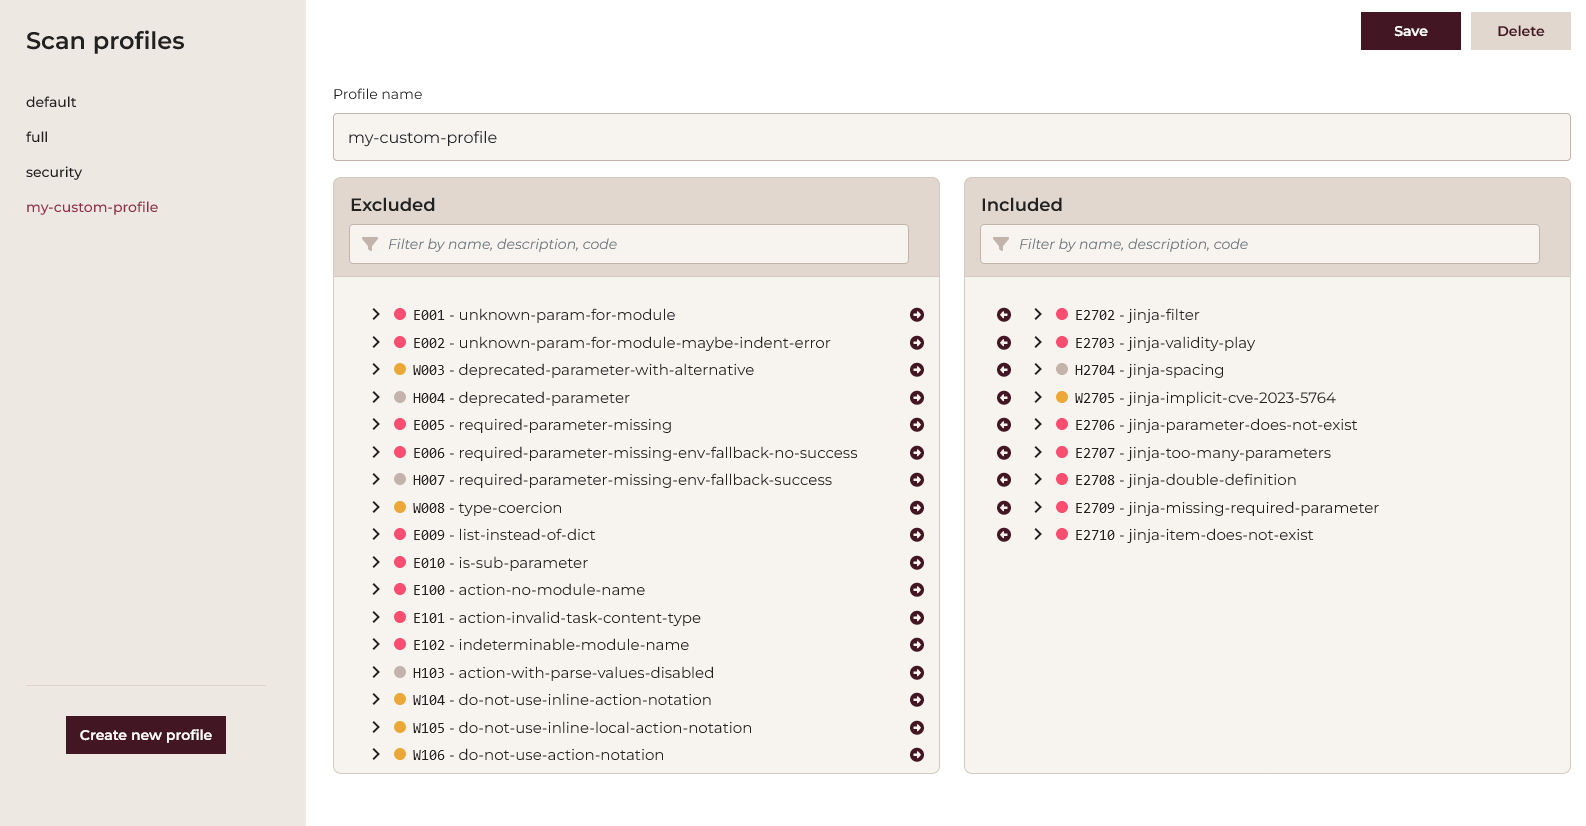
Click Delete to permanently remove the profile.
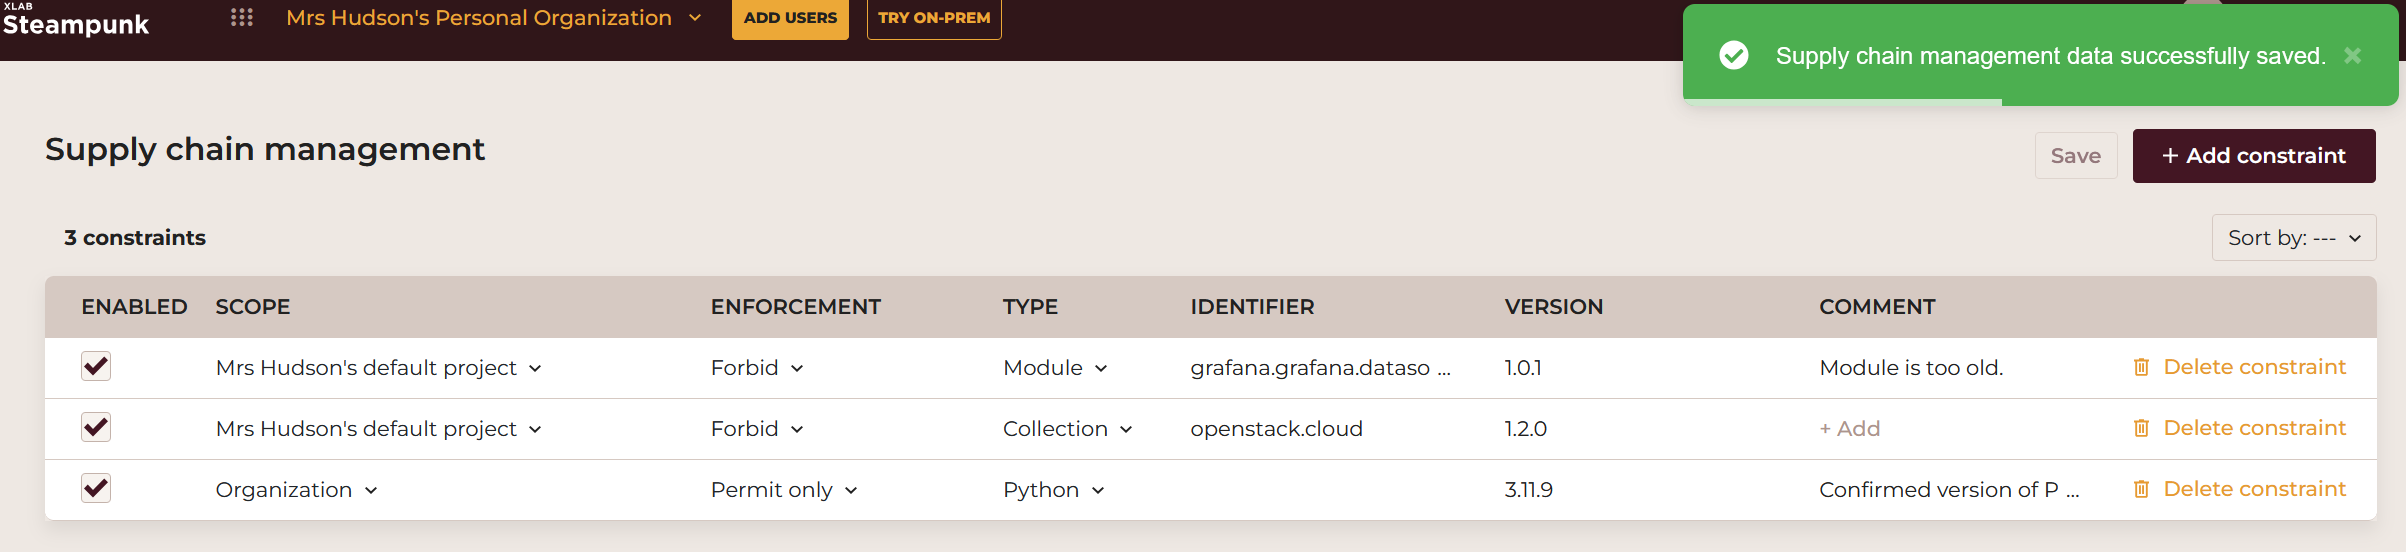
Supply chain management
The Supply chain management feature in Steampunk Spotter allows you to control which third-party dependencies of your Ansible automation are permitted to be installed or used. If a specific Python version, collection, or module is known to be compromised through its supply chain or is otherwise vulnerable, you can block its use.
Note
Supply chain management is an enterprise feature.
![]()
Click Add constraint to insert a new blank entry that appears at the top of the table.

Populate the constraint by filling in the fields:
- Enabled: Tick to require this constraint to be in effect. Untick to have the constraint ignored.
- Scope: Choose whether the constraint should apply to the entire organization (select "Organization" from the top of the list) or to a specific project (select the project name).
- Enforcement: Select "Forbid" to treat a match with this constraint as an error, or select "Permit only" to allow only the specified version of Python, collection, or module. Multiple "Permit only" constraints with similar field values are possible. Any match will contribute to permission granted.
- Type: Select one of: "Collection", "Module", or "Python".
- Identifier: For collections, enter the collection's FQCN (e.g.,
openstack.cloud). For modules, enter the name of the module (e.g.,servicenow.itsm.problem). The field does not apply for Python. - Version: The string representing an exact version.
- Comment: An optional field for your own reference.
Click Add constraint to add additional constraints.
Finish by clicking Save.
To remove constraints, click Delete constraint in the corresponding rows. Confirm and commit deletion by clicking Save.
To change one or more constraints, edit the relevant fields in the table. Confirm and commit changes by clicking Save.
SBOM and CVE
SBOM and CVE is a feature in Steampunk Spotter that allows you to view SBOM and CVE report data of the chosen Ansible collection as analyzed by Steampunk Spotter. It includes the following key components: Software Bill of Materials (SBOM), Dependency Graph, List of known security vulnerabilities detected, Module Analysis, Example Scan Results and Dependent Ansible Collections.
Note
SBOM and CVE is an enterprise feature.
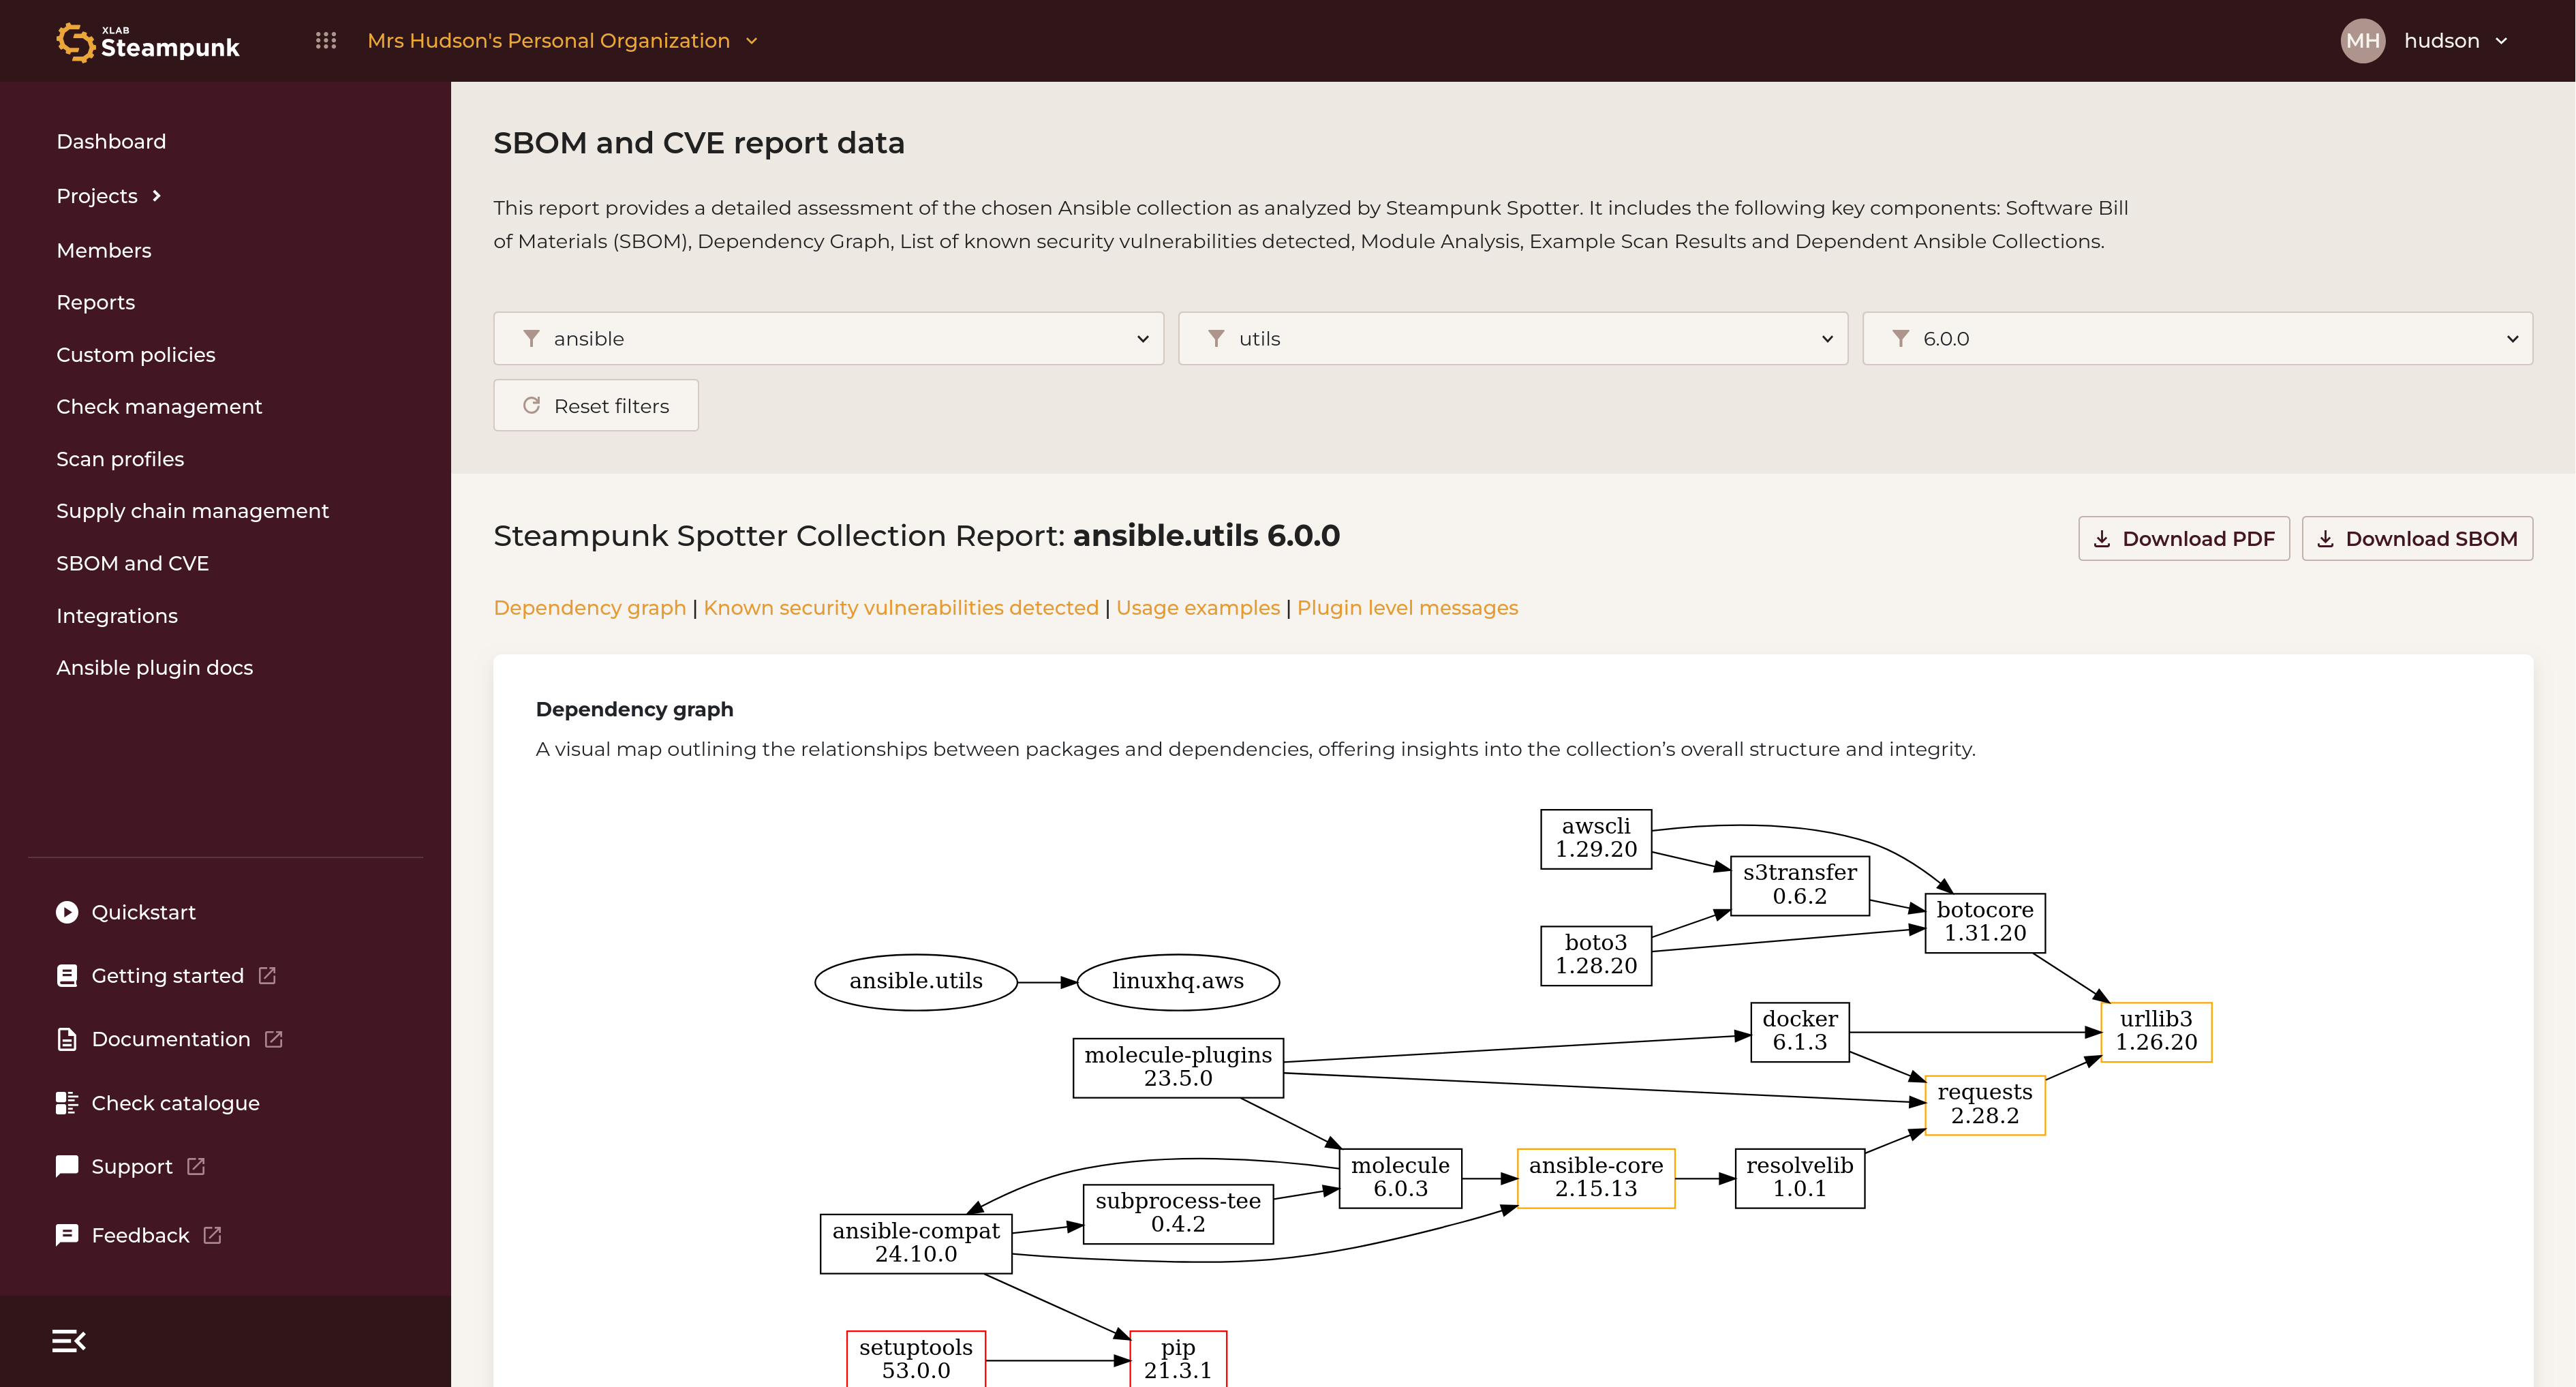
These reports can be filtered by namespace, Ansible collection name and version. You can also download them as a PDF (Download PDF) or JSON (Download SBOM).
Integrations
Getting started
The Getting Started guide showcases practical use cases and examples to help you start with Spotter.
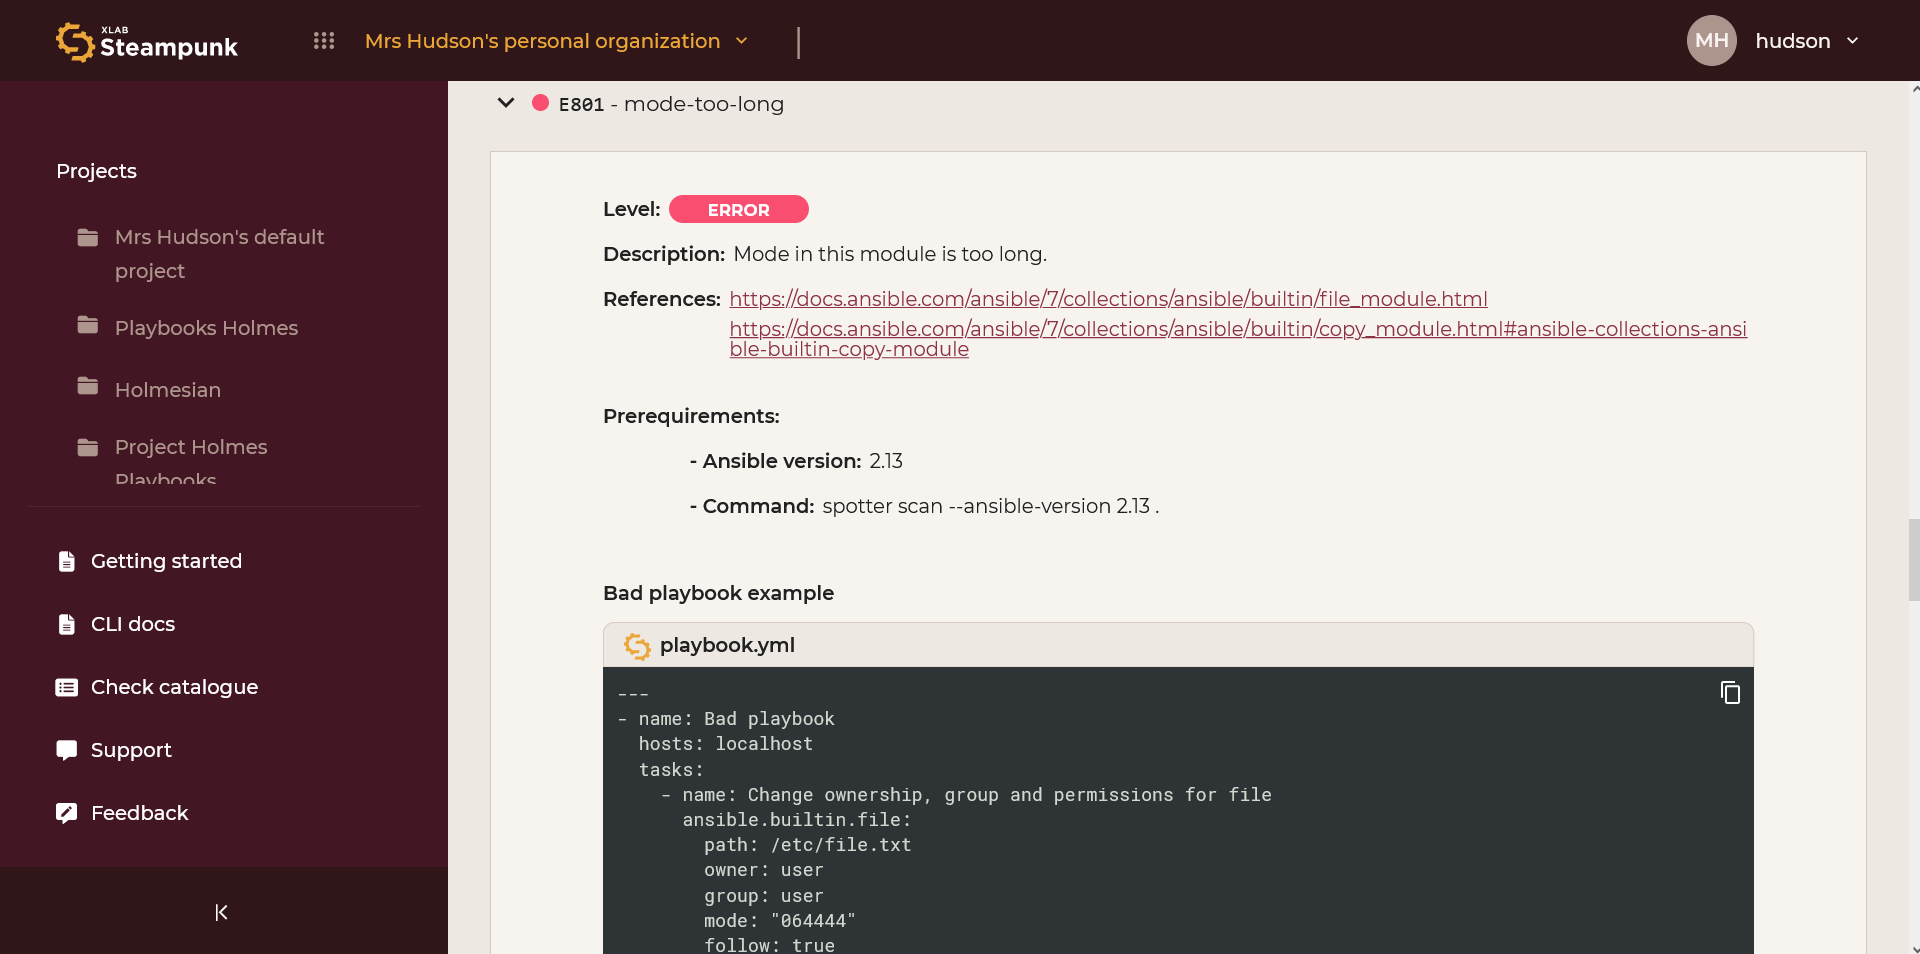
Check catalogue
Offers a comprehensive catalogue of all available checks in Spotter, including families, profiles, related CWEs, examples of "good and bad" Ansible Playbooks showcasing the check. You can filter by name, description, numeric code (e.g., W400), and level of the check.
Ansible plugin documentation
Access a comprehensive library of all the plugins, collections, and modules currently known to Steampunk Spotter, all in one place. Find module descriptions, requirements, usage examples, and input/output details to help you develop and troubleshoot your Ansible automation.
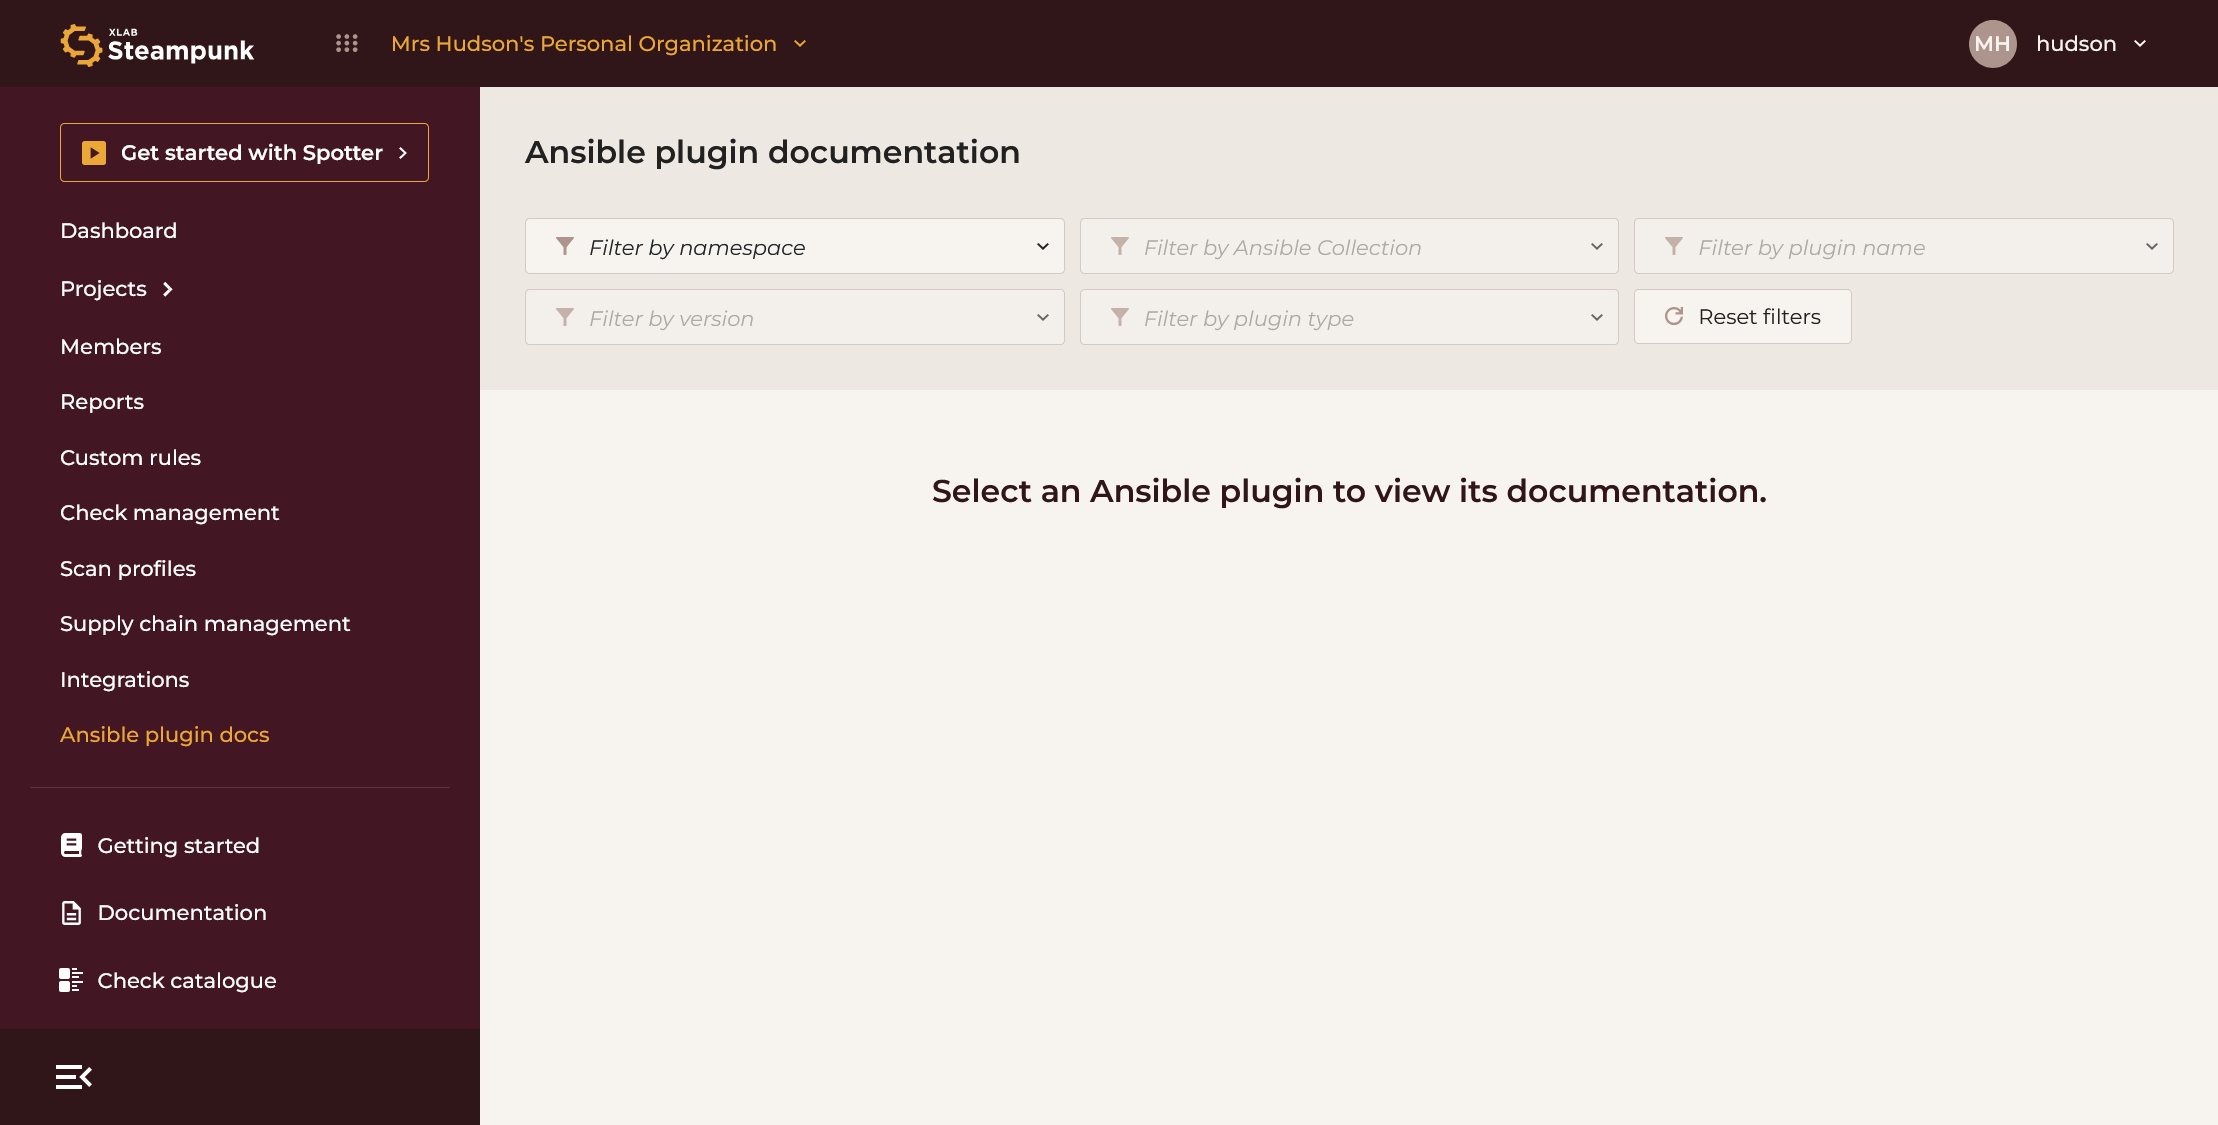
Start by clicking the Filter by namespace drop-down to see the list of all known namespaces. Type a few characters of the namespace to narrow down the list, then click on the one you're looking for.
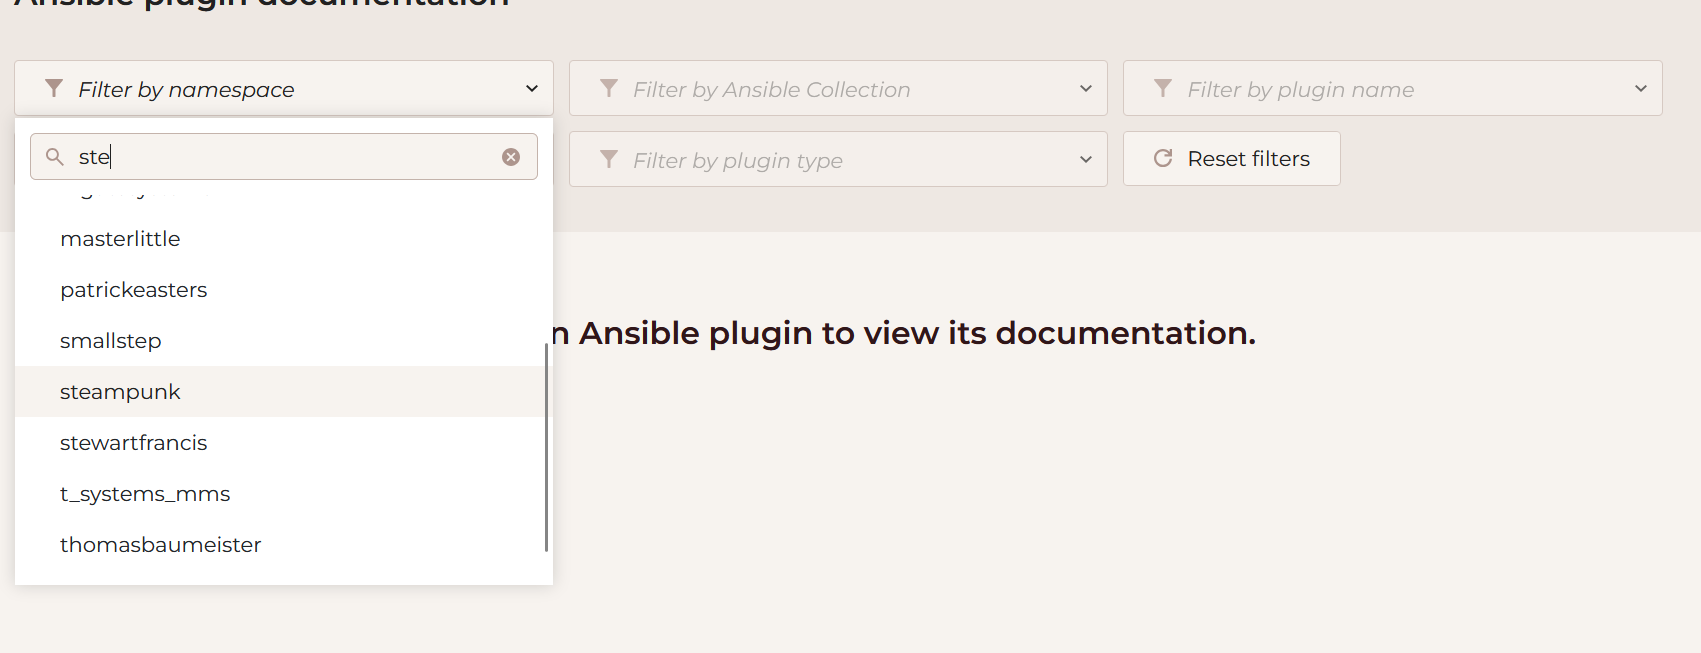
Next, select an Ansible Collection belonging to the selected namespace, by optionally typing a substring of the collection name, then by clicking the name of the collection.
Do the same for the plugin name, version, and plugin type.
The filter automatically selects the fields where a single item is available.
Once all fields are set, the plugin's documentation will appear.
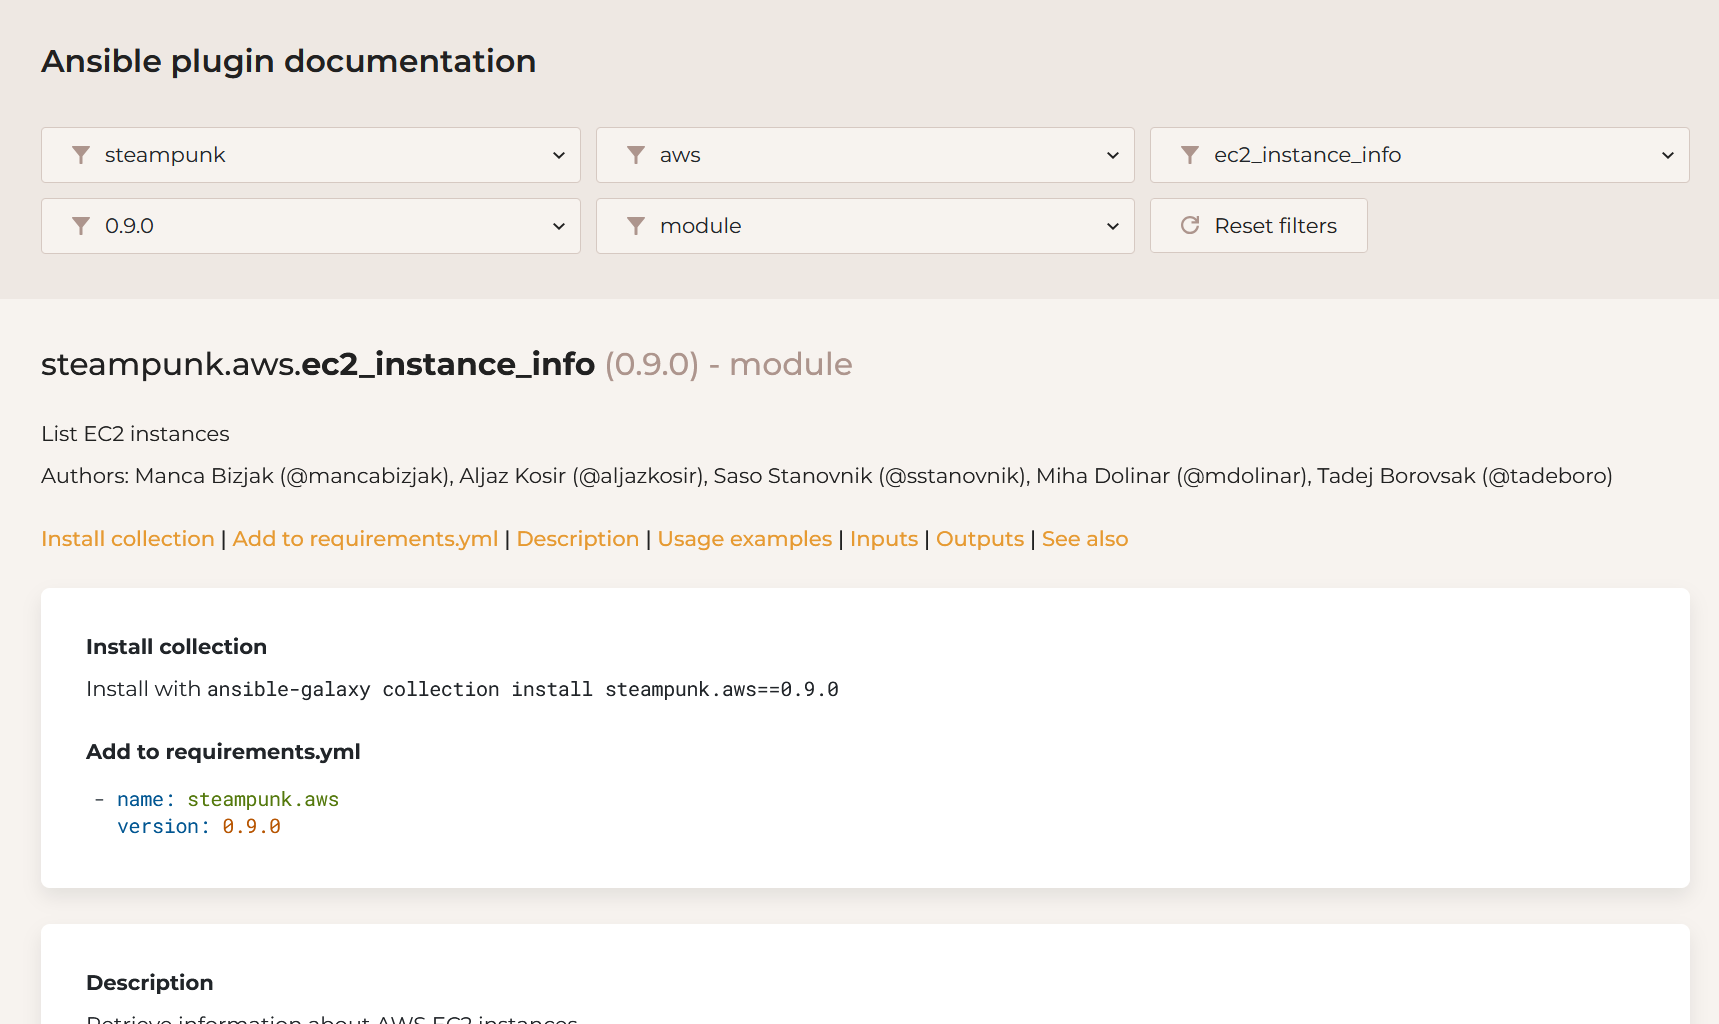
To start over, click the Reset filter button.
Support
Contact us regarding any issues, questions, or business inquiries you might have.
Feedback
Share your feedback with us; we strive to improve Spotter. Your input is highly appreciated.