VSC Extension
The Visual Studio Code (VSC) extension of Steampunk Spotter is a powerful tool that enhances your playbook writing experience. With its unique capabilities, Spotter helps you identify and fix errors in your Ansible content, making automation more reliable, secure, and effective.
Installation
Requirements
- Steampunk Spotter app user account.
- steampunk-spotter installed in the default console used with Visual Studio Code.
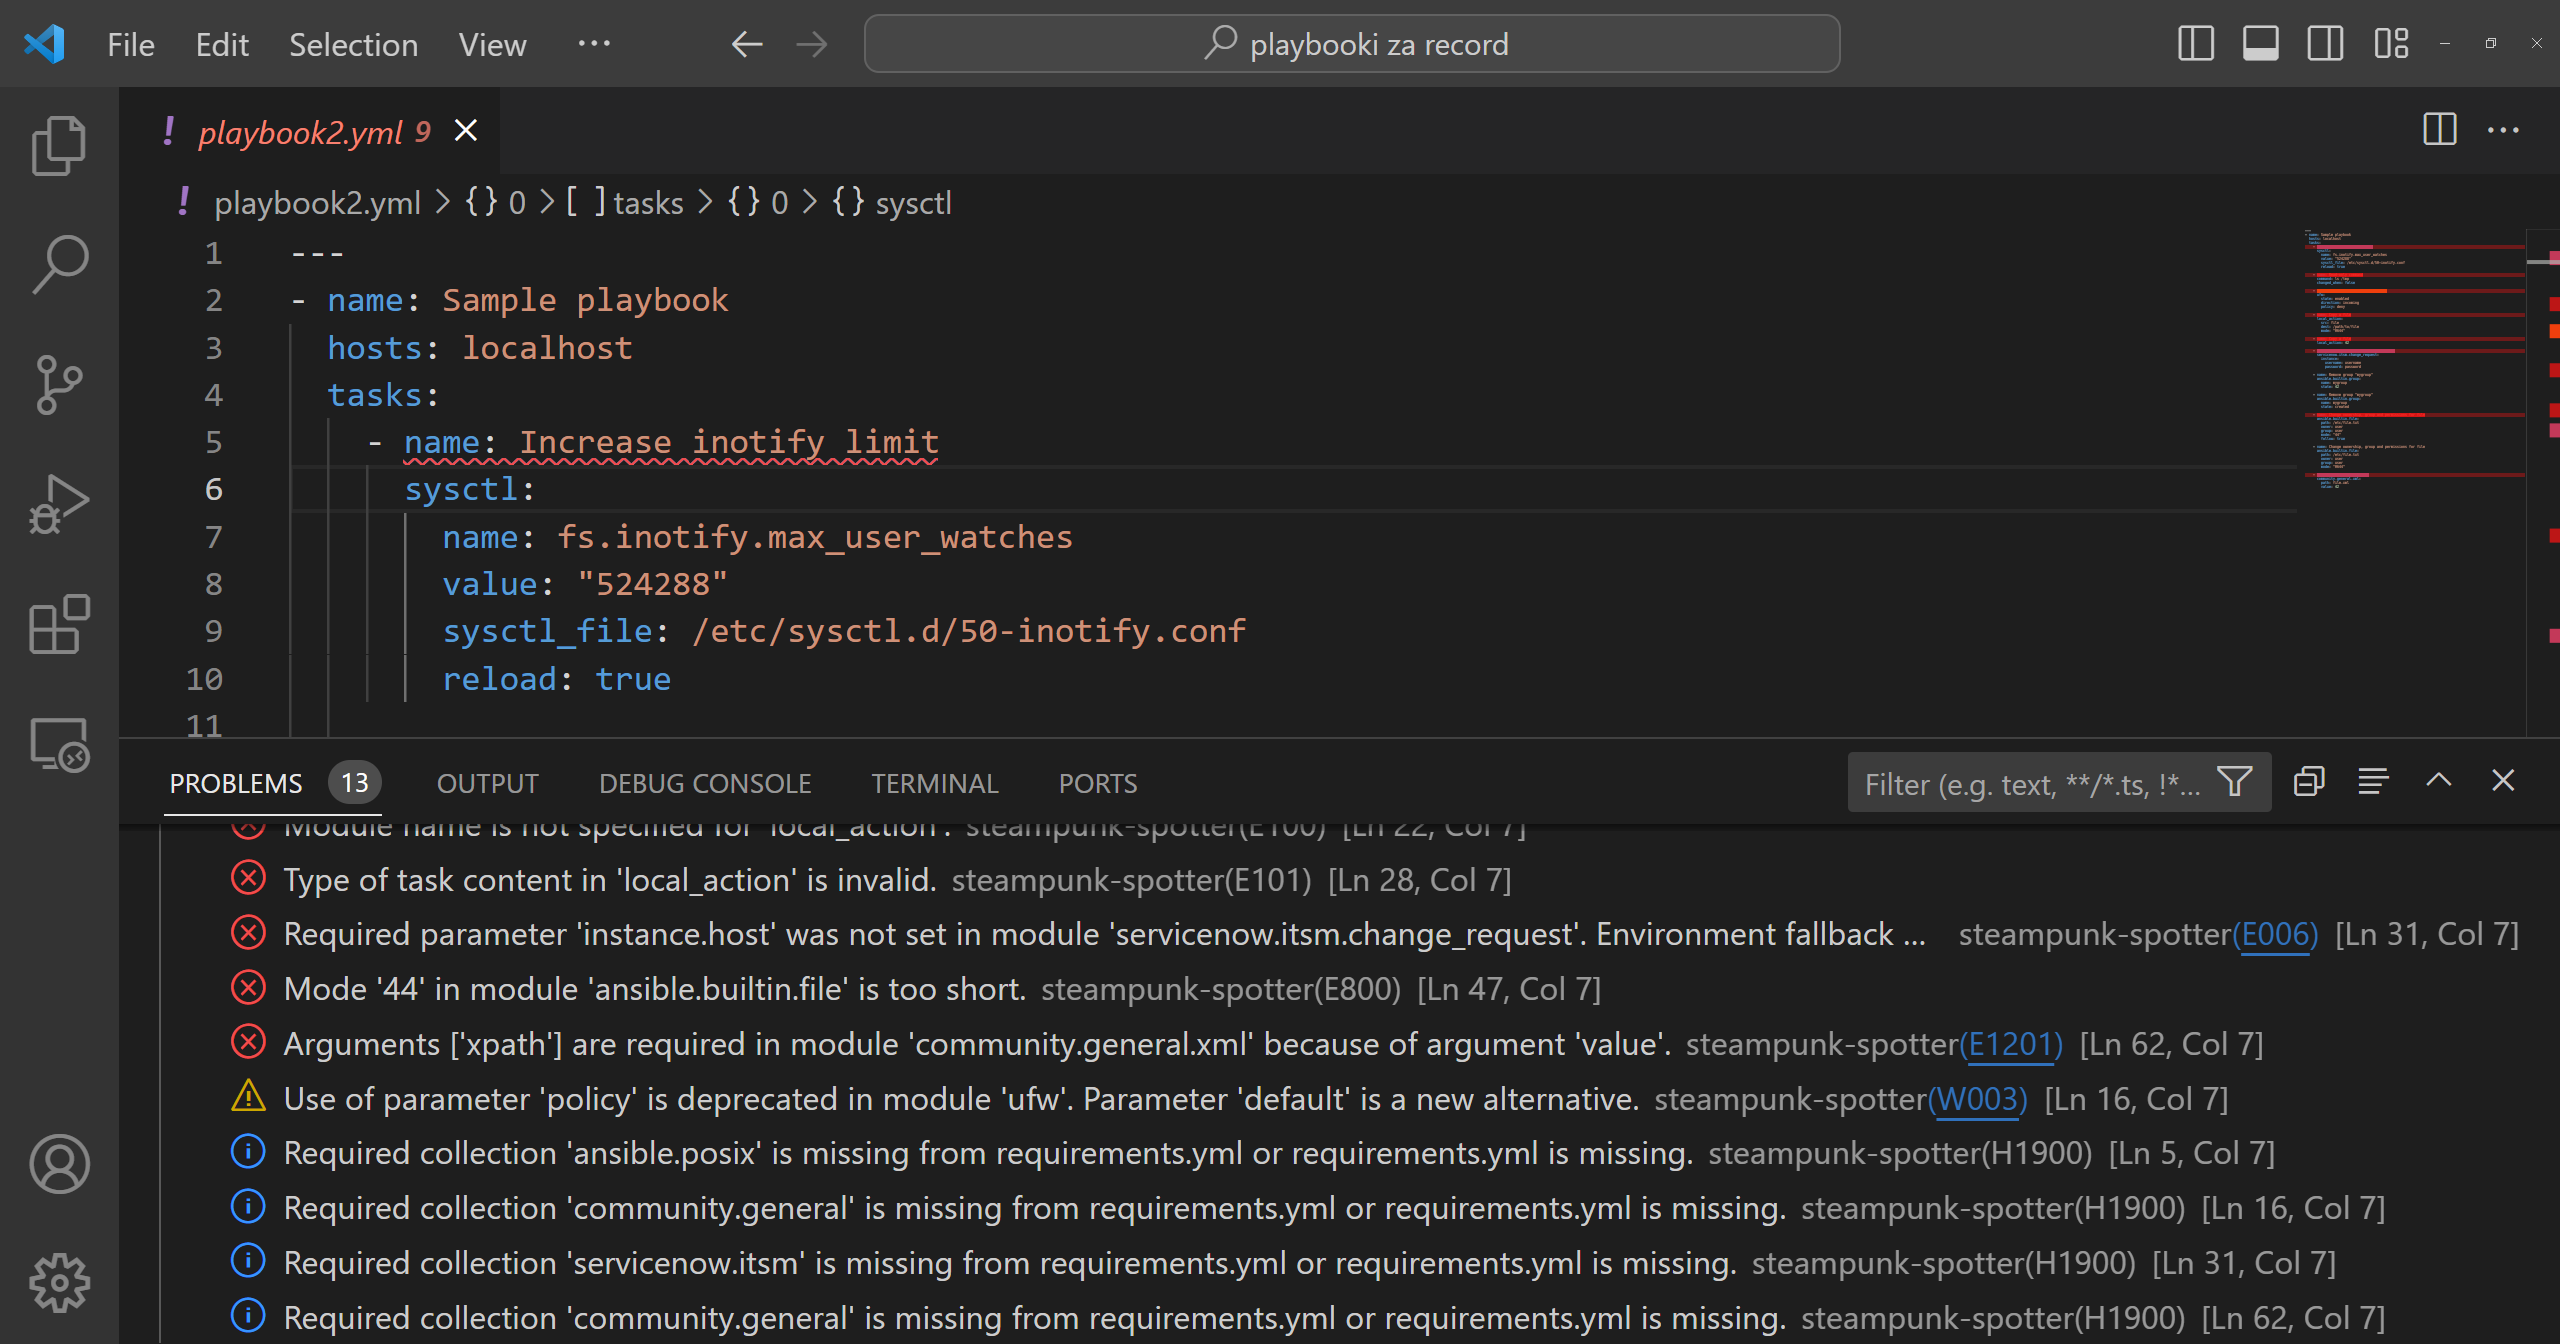
Scanning
Read blog tutorial or see demo for more information.
Right-click and choose "Initiate a new scan."
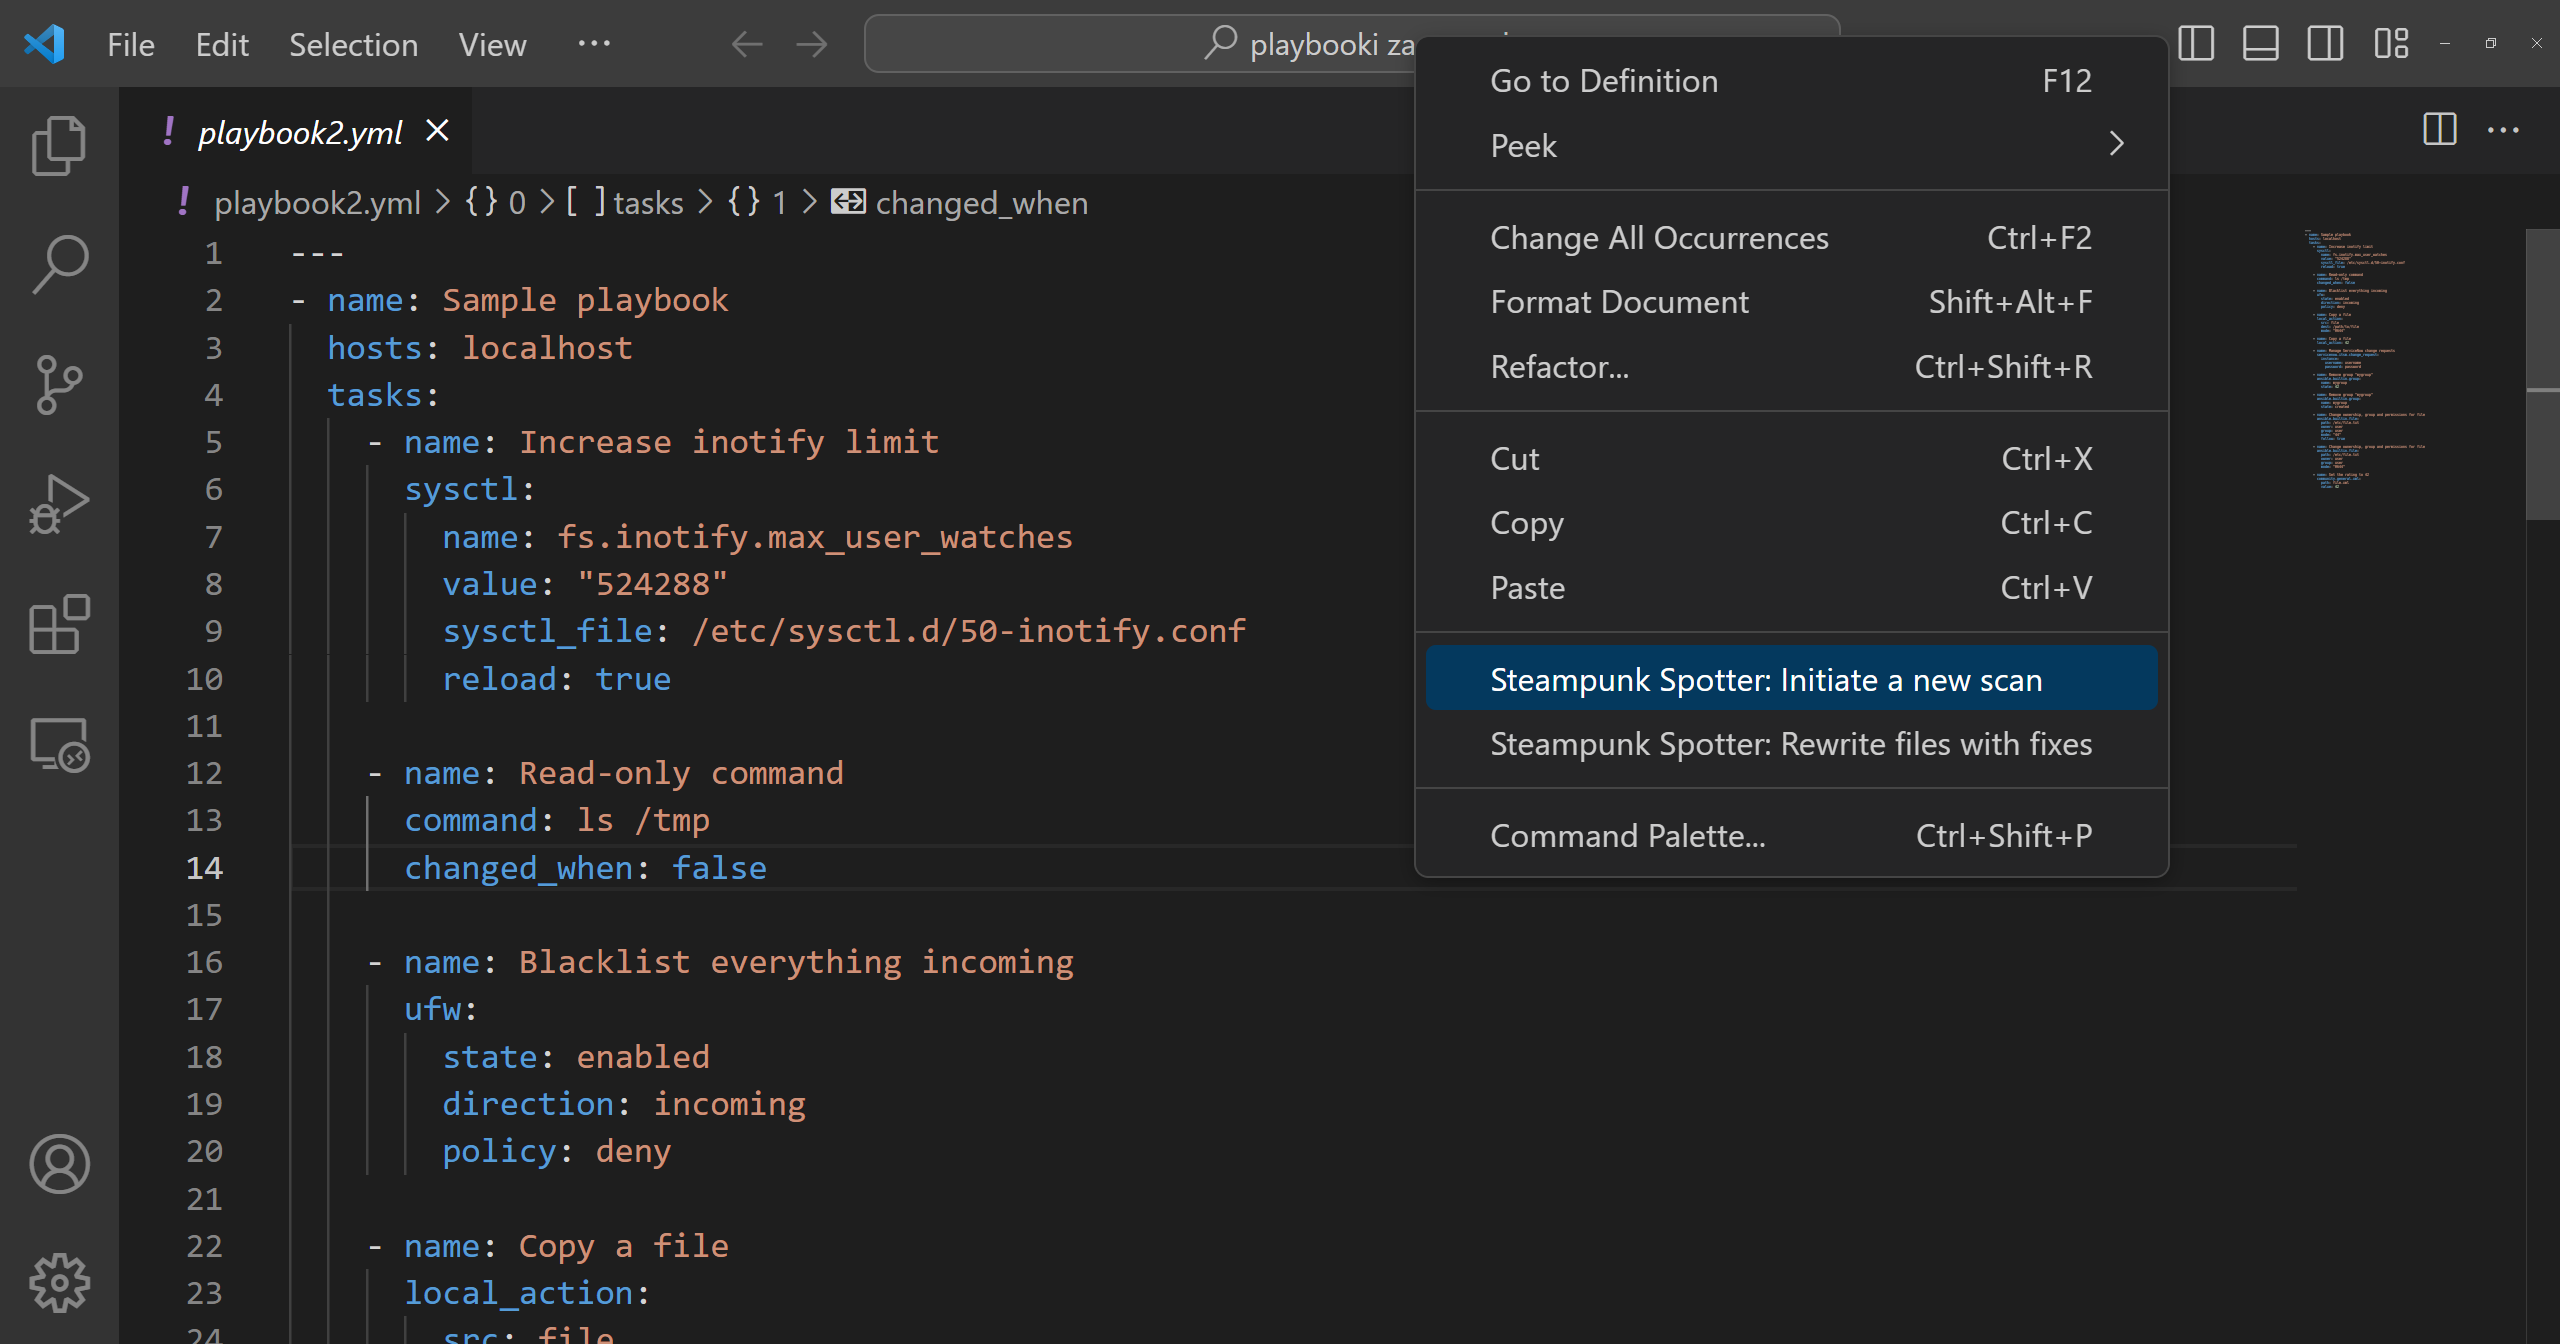
A list of identified errors, warnings, and hints is provided with links to the module documentation.
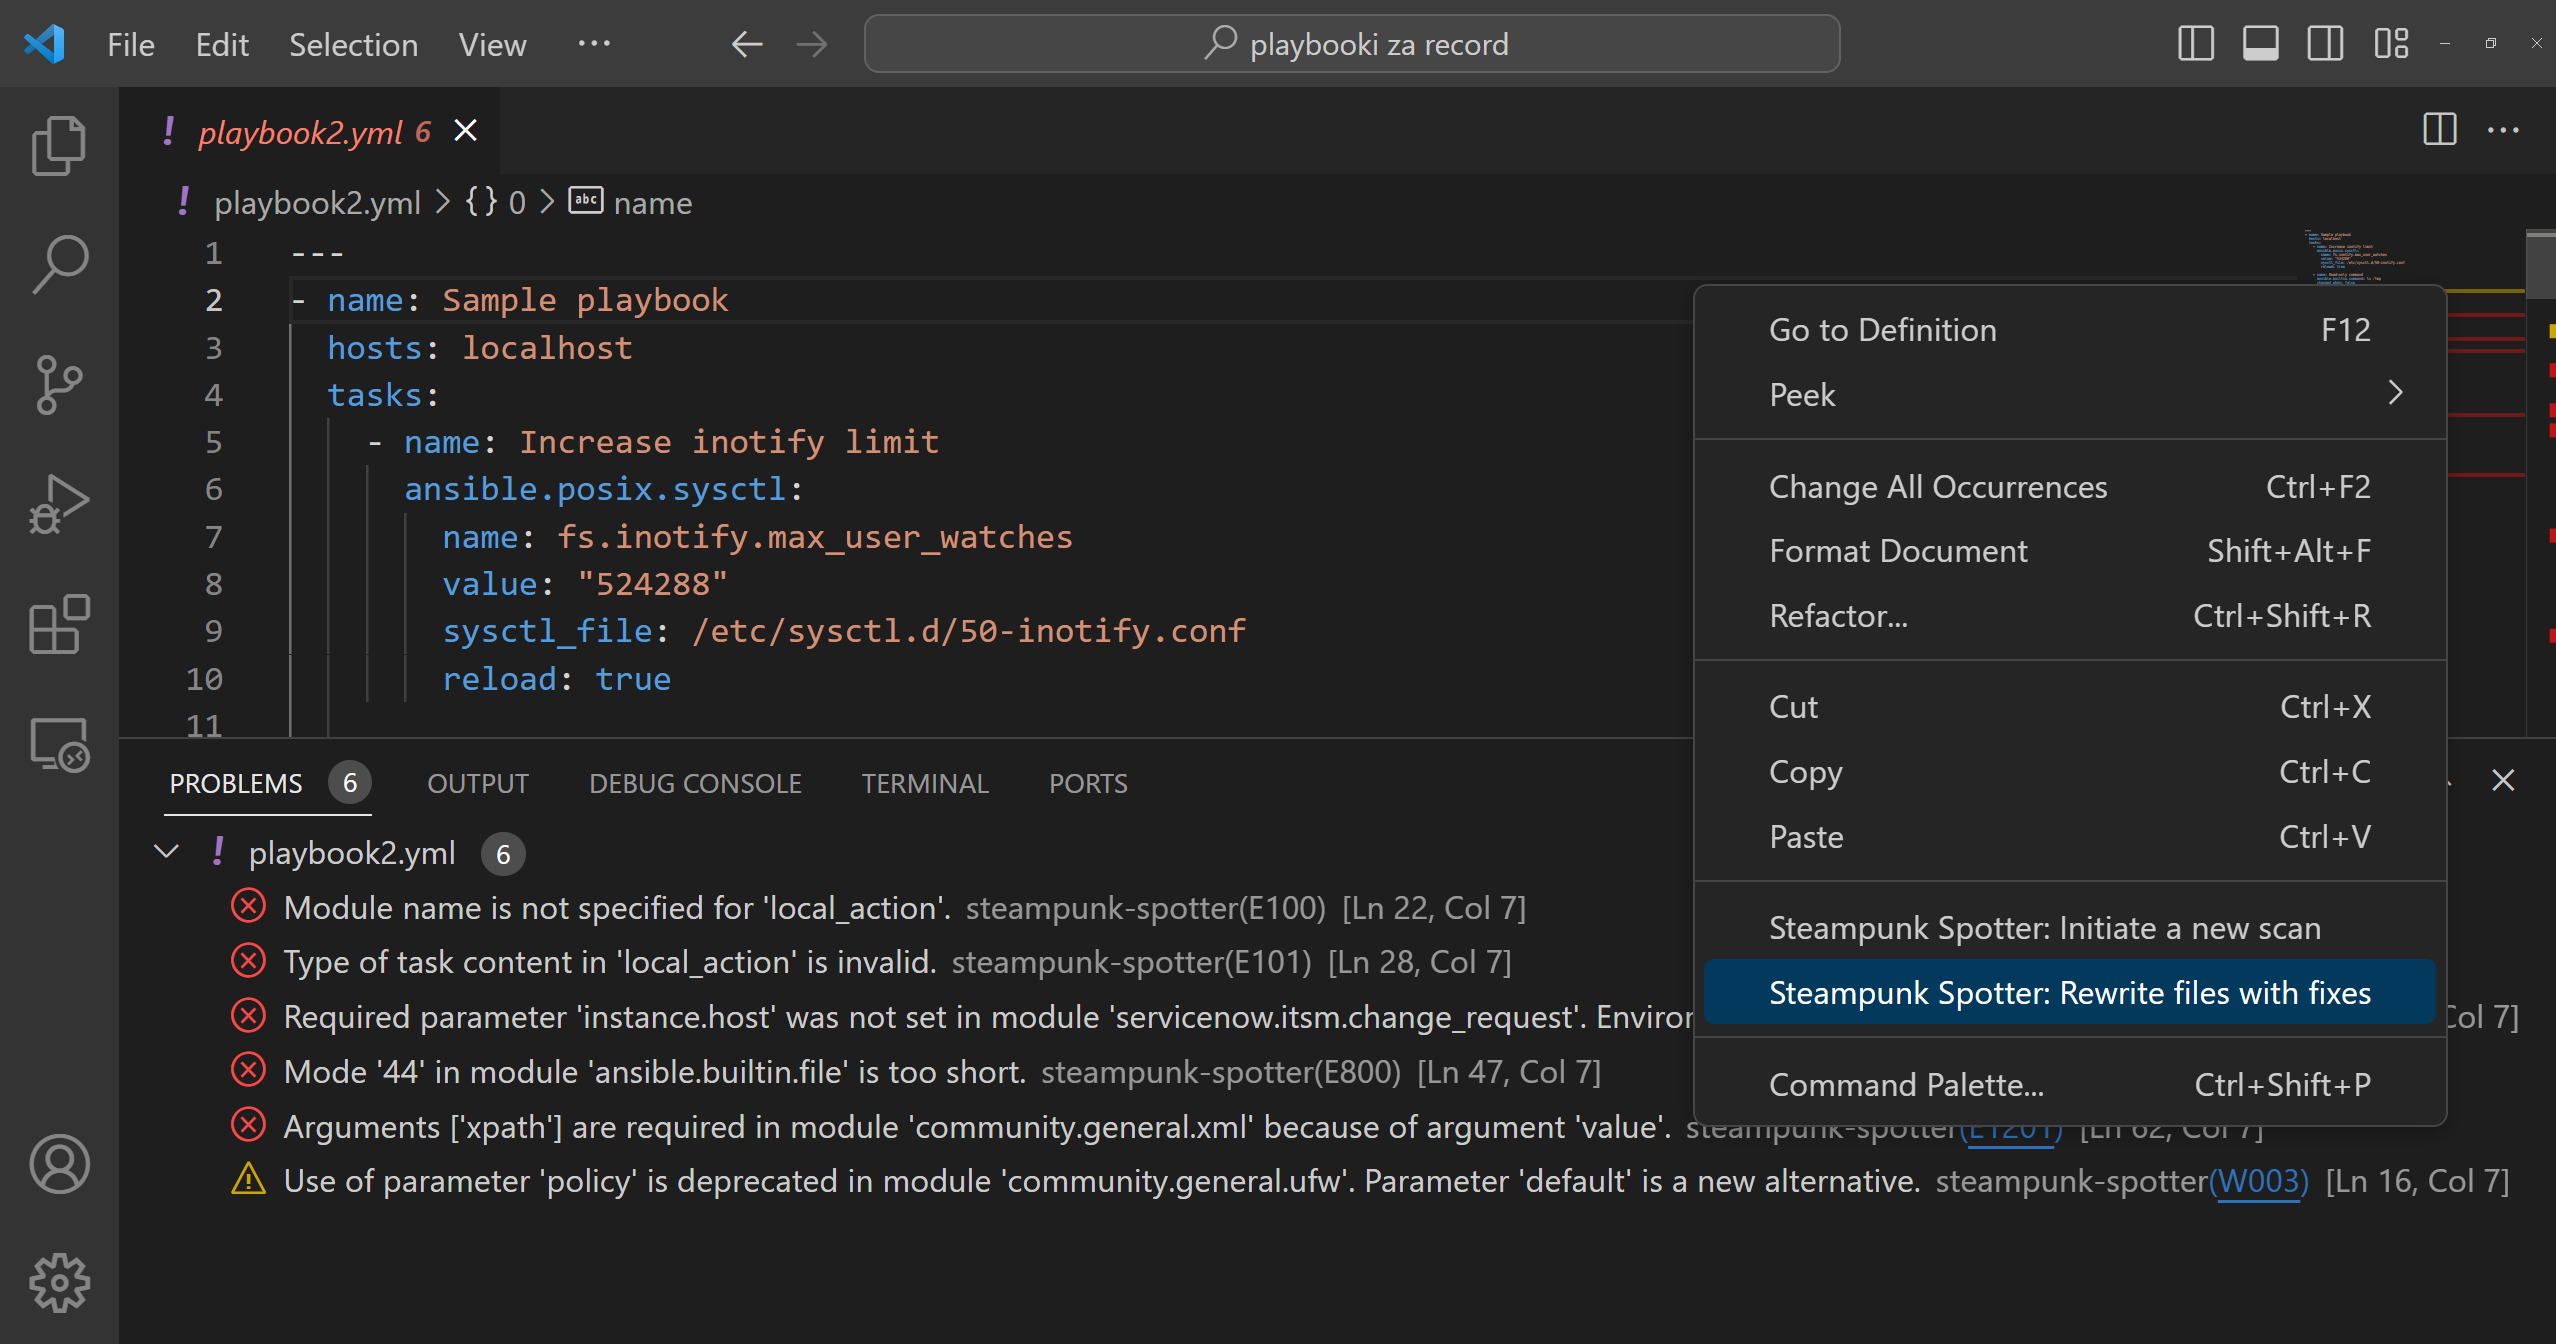
Automatic fixing
The Rewrite function can automatically fix many errors. Once applied, the errors are resolved; the playbook updates automatically.
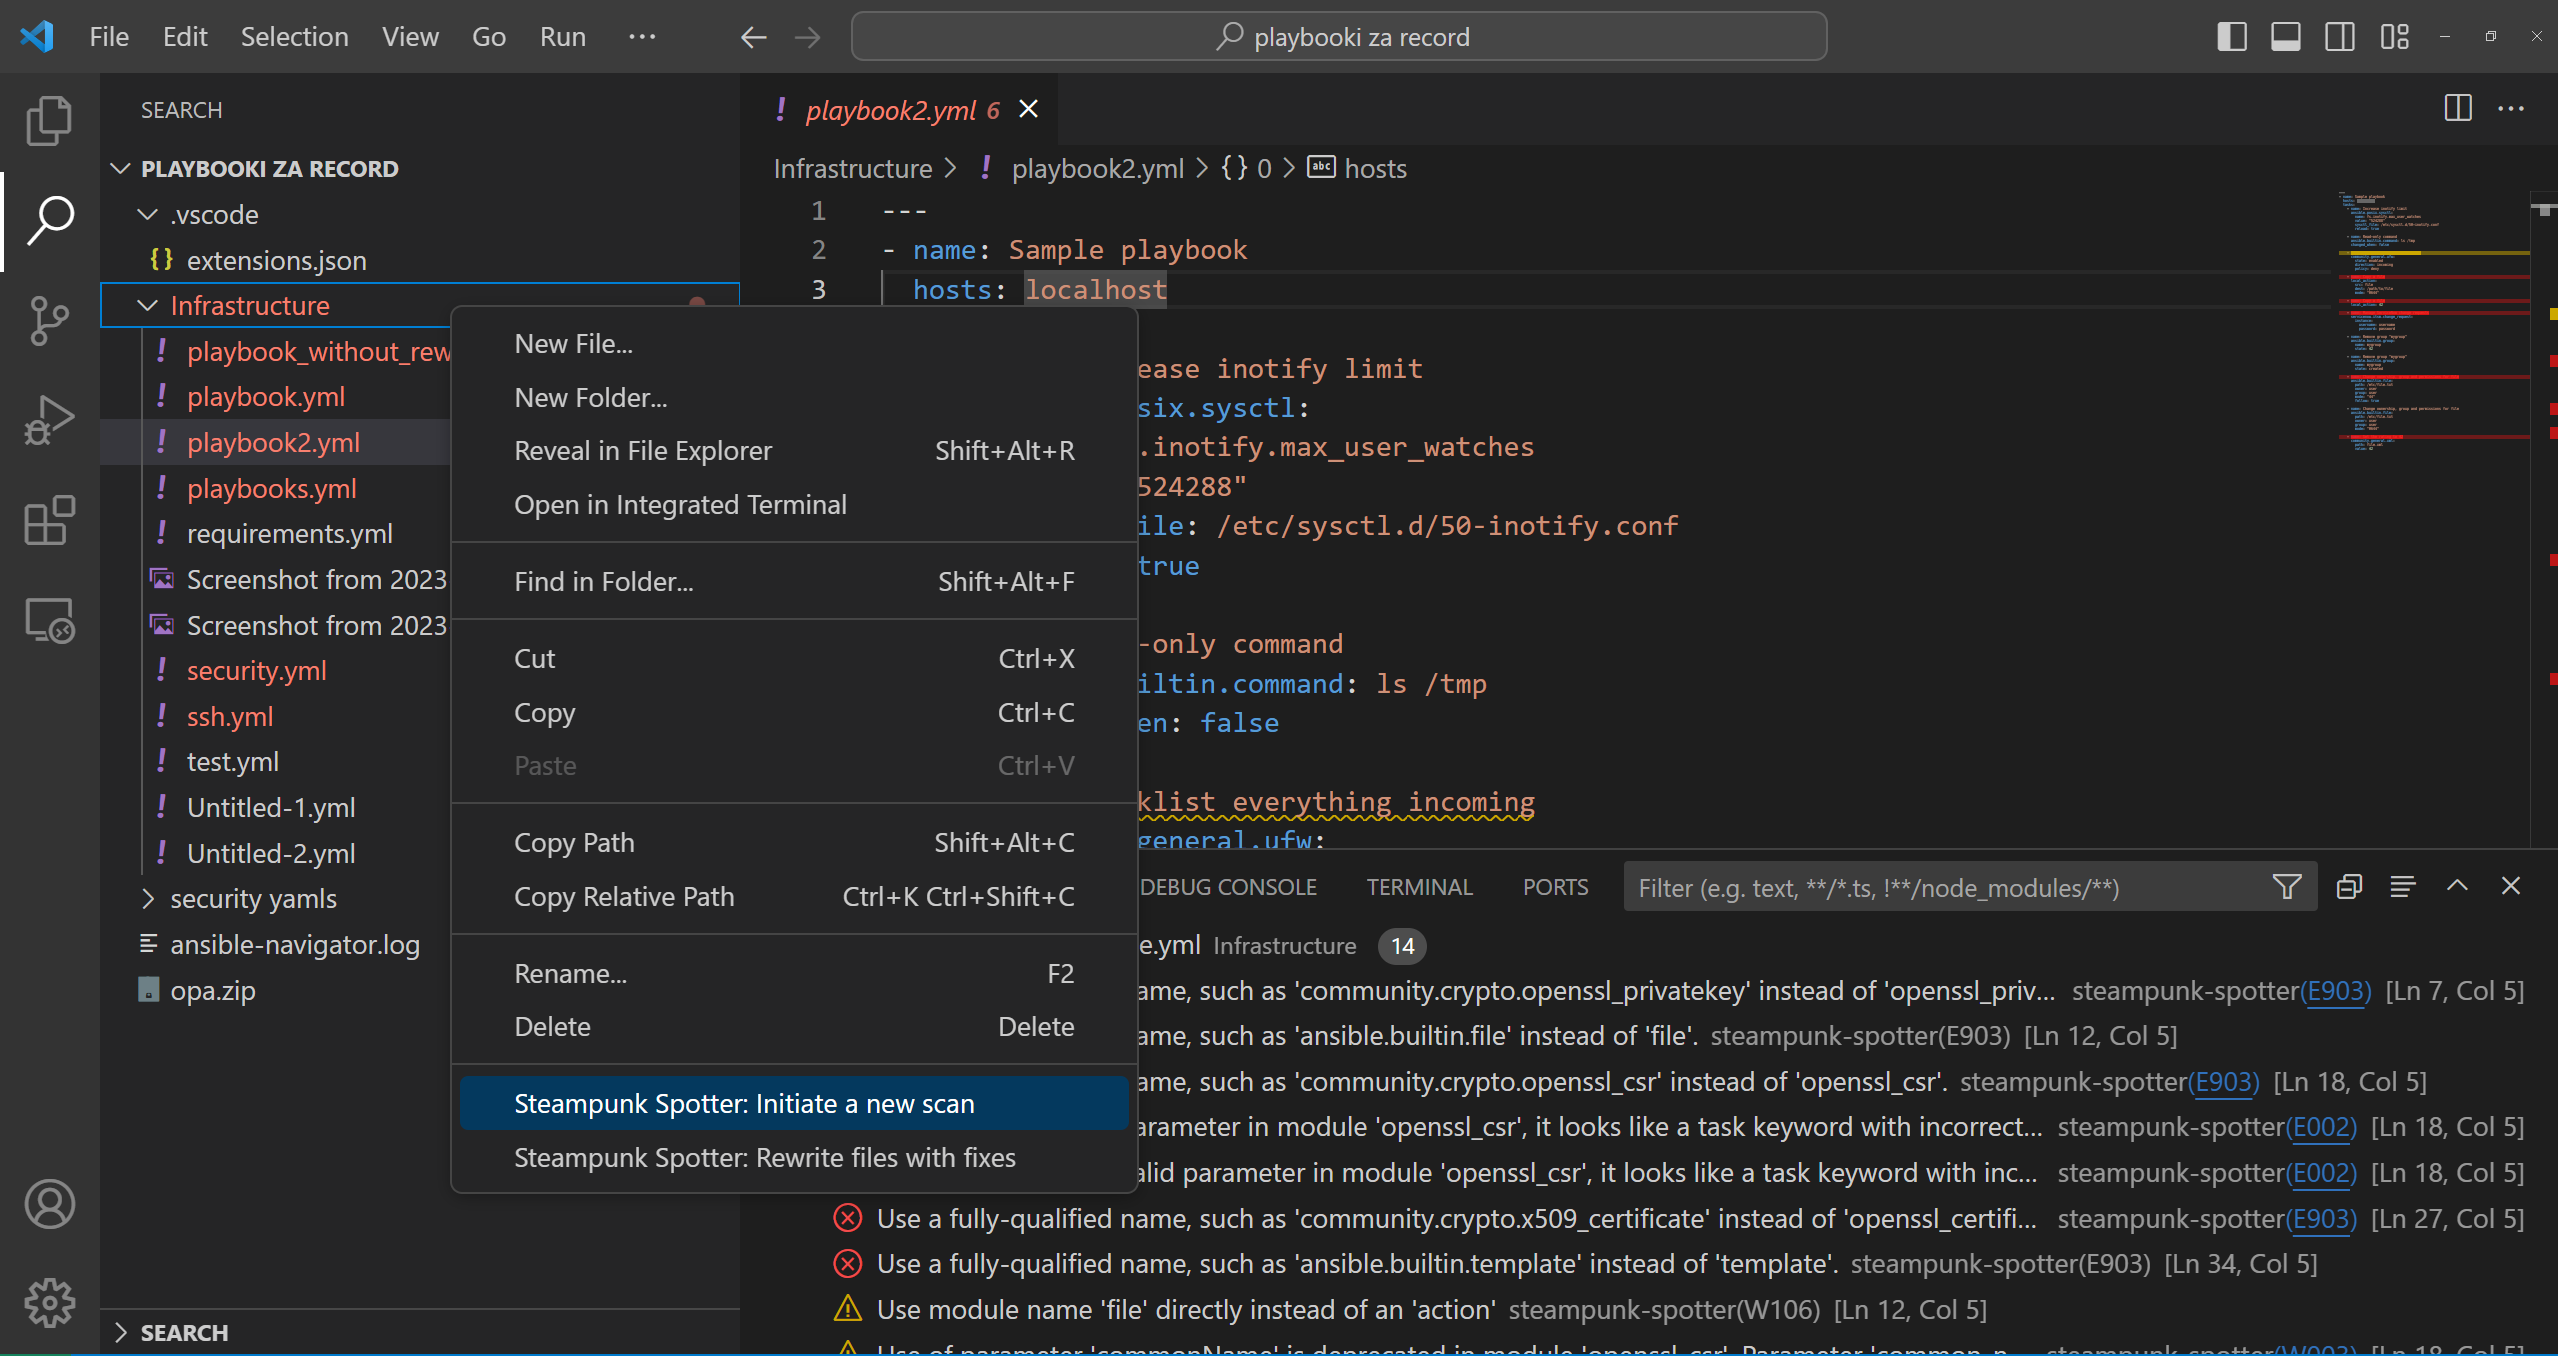
Scanning a directory structure
Extend the scanning process to the entire directory structure. Scan and identify errors within the specified directory.
Automatic scanning on file save
Automatically scan files after saving.

Steampunk Spotter Visual Studio Code Extension Assisted Writing Feature
Read blog tutorial or see demo for more information.
Inline suggestions
By enabling, access to suggestions is given. The number of suggestions displayed can be configured.
The predefined regular expression # spotter: can be replaced with # your query.
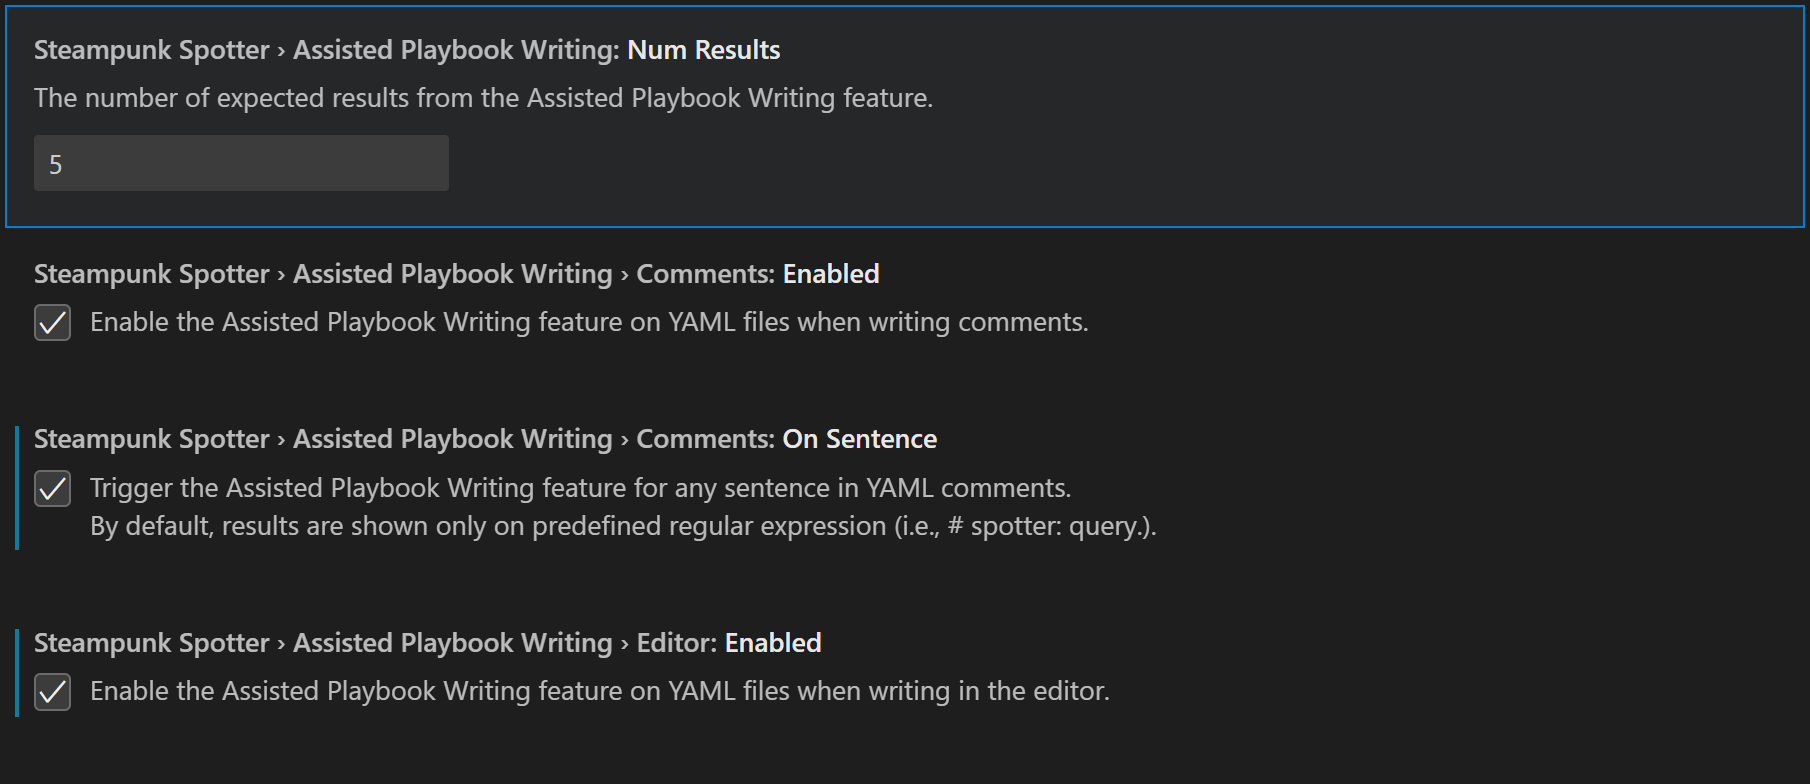
Type in # spotter: <your query>. Suggestions appear when typing; choose a suitable option by pressing TAB.
Task addition
Suggestions for writing tasks are given. Trigger the suggestion box by typing the sentence describing the
task: – name: <your task>.
Press ENTER and choose the relevant suggestion.
Settings
Retrieving the CLI path
Retrieve the path to the Spotter CLI using the terminal command which spotter.

Customizing the URL
If using an on-prem Spotter instance, use the provided field to customize the URL.

Setting the API token
Fetch the token (see demo) from the Steampunk Spotter app under "My Settings" in the "Profile settings" section; Copy the API token into the field.

Configuring scan level
Set the path to the configuration file (JSON/YAML).

Assigning Project IDs
Send data into designated projects using project IDs; Attain the ID (see demo) in the Steampunk Spotter app, and copy the project ID into the field.

Ansible Version
Select the Ansible version to scan against; if the Ansible version installed is not found, all Ansible versions are considered for scanning.

Exclude Values
Omit parsing and uploading values from Ansible Playbooks.

Exclude Metadata
Omit collecting and uploading metadata, i.e., file names, line, and column numbers.

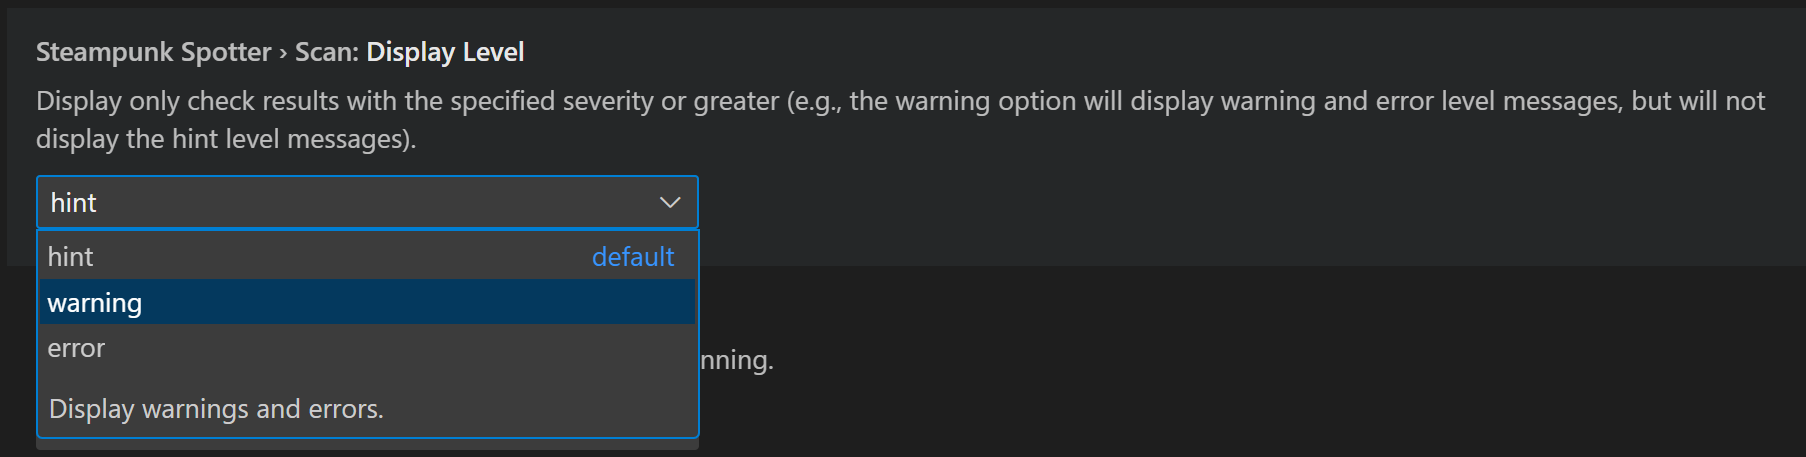
Display Level
The display level determines what level of output to be shown:
- Hint: Displays hints, warnings, and errors.
- Warning: Displays warnings and errors.
- Error: Displays errors.
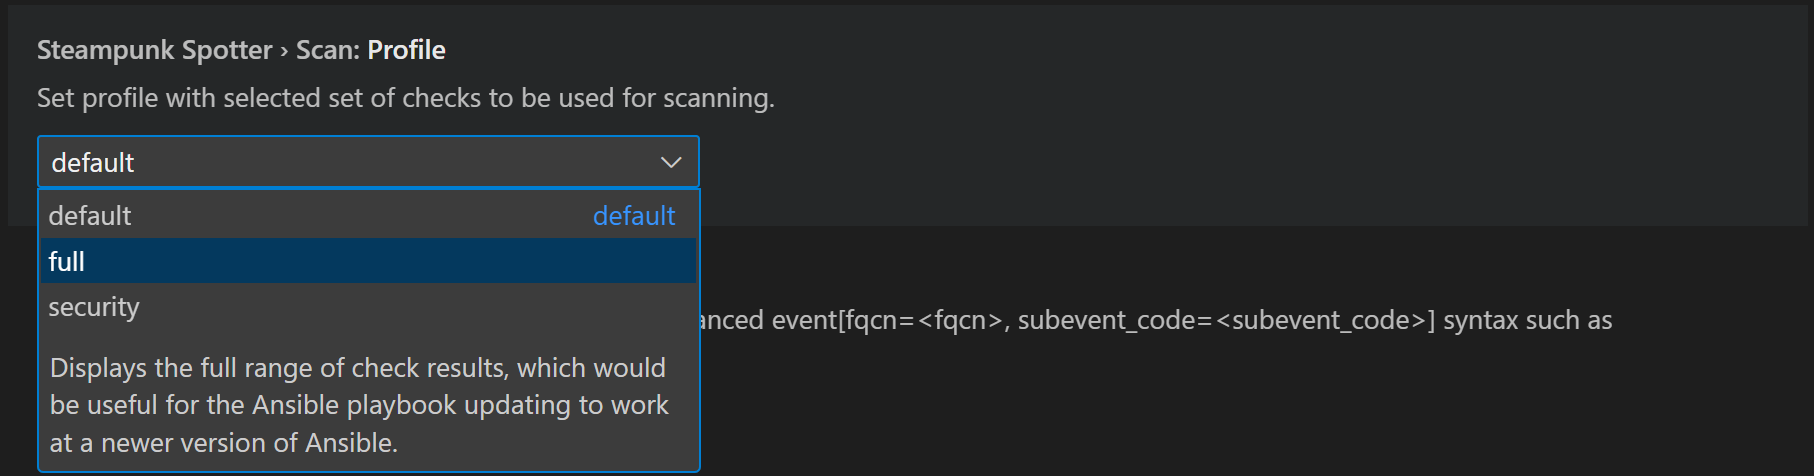
Scanning Profile
Read blog tutorial or see demo for more information.
- Default Profile: Includes best practices, validations, and essential security checks.
- Full Profile: Includes all checks, including Ansible upgrade-related and complete security-related checks.
- Security Profile: Includes checks for potential security vulnerabilities.
Skipping Checks
Add the check ID to skip it during the scanning process. The check ID can be found in the check catalogue in the Spotter app.

Read Skipping and Enforcing checks blog tutorial or see demo for more information.
Enforcing Checks
Add the check ID to enforce it during the scanning process. The check ID can be found in the check catalogue in the Spotter app.

Read Skipping and Enforcing checks blog tutorial or see demo for more information.
Tracking Whole Workspace
Always scan the whole workspace when scan events are activated.

Change Active Text Editor
Scan and show diagnostics when switching the active YAML file from the text editor.

Change Text Document
Scan and show diagnostics when typing, i.e., when the content of the YAML file changes.

Close Text Document
Delete diagnostics for the YAML file that was closed in the editor.

Focus Problems View
Open and focus on problems view automatically after a successful scan.

Show Output View on CLI Error
Open the output view with extension logs on Steampunk Spotter CLI failure.

Using Spotter in Windows Subsystem for Linux (WSL)
You can use Visual Studio Code in your Windows environment and run Steampunk Spotter against your playbooks in a WSL distribution.
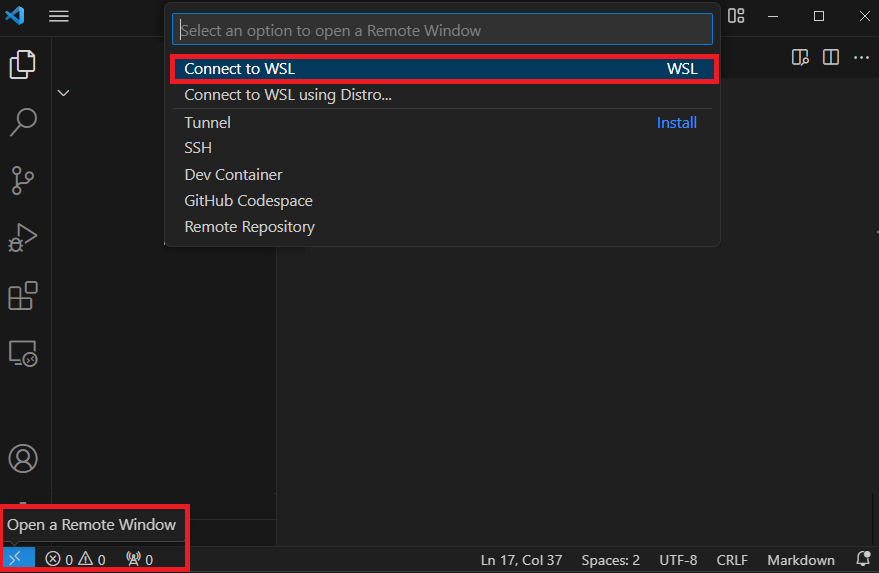
Your Visual Studio Code has to be running in WSL. To use WSL within VS Code, follow these steps:
- Start Visual Studio Code on your Windows machine.
- Click on the Open a Remote Window icon in the bottom left corner of the VS Code window.
- From the dropdown menu that opens in the search bar on top, select Connect to WSL. This action will link the VS Code workspace to your WSL environment, allowing you to work directly with Linux-based tools and files.
- Install the Steampunk Spotter extension in your WSL. Local installations do not work. Read more on managing VS Code extensions using WSL, here.
The Spotter CLI needs to be installed in your target WSL distribution.